Tutorial # 11
Love the look of this card. It looks complicated, but it's not. Stay and give it a try. Think you'll love it. So grab your favorite papers and let's get started.
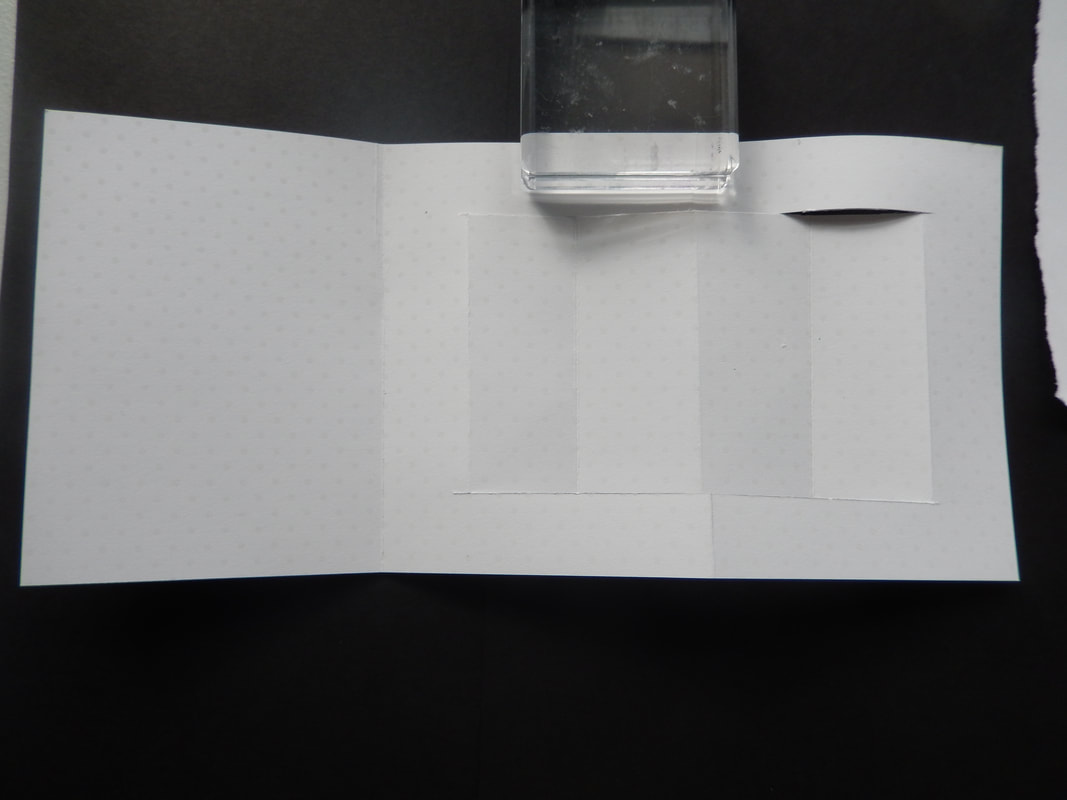
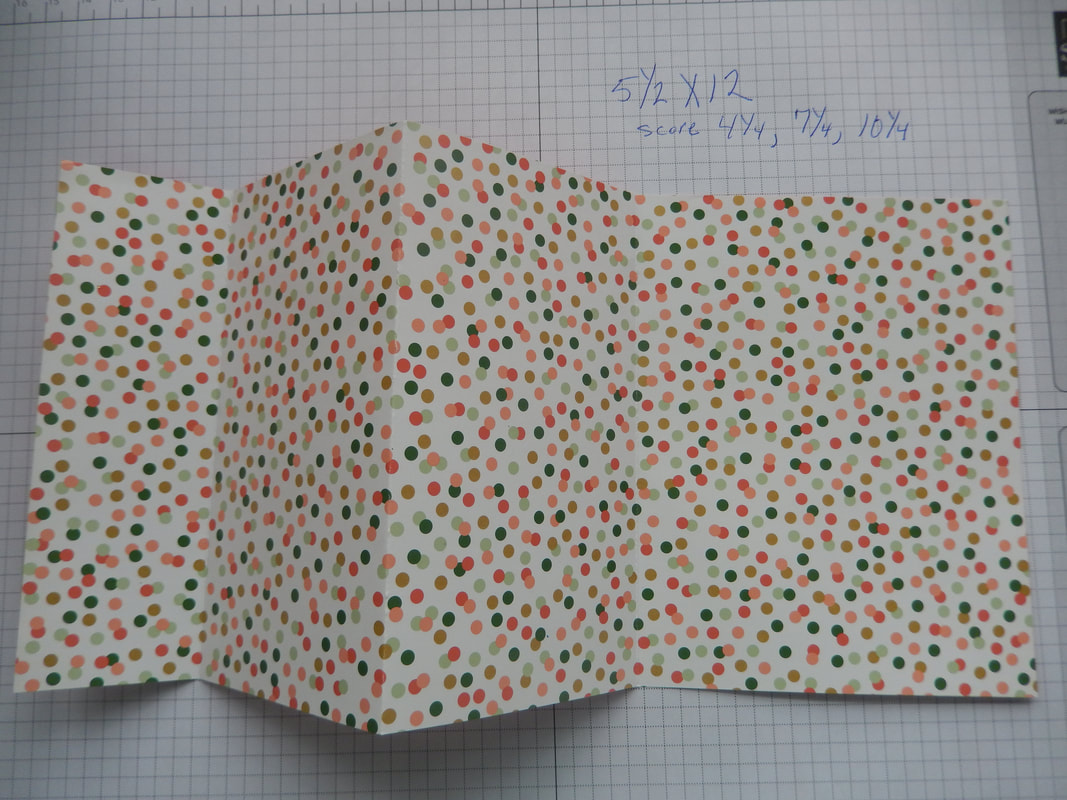
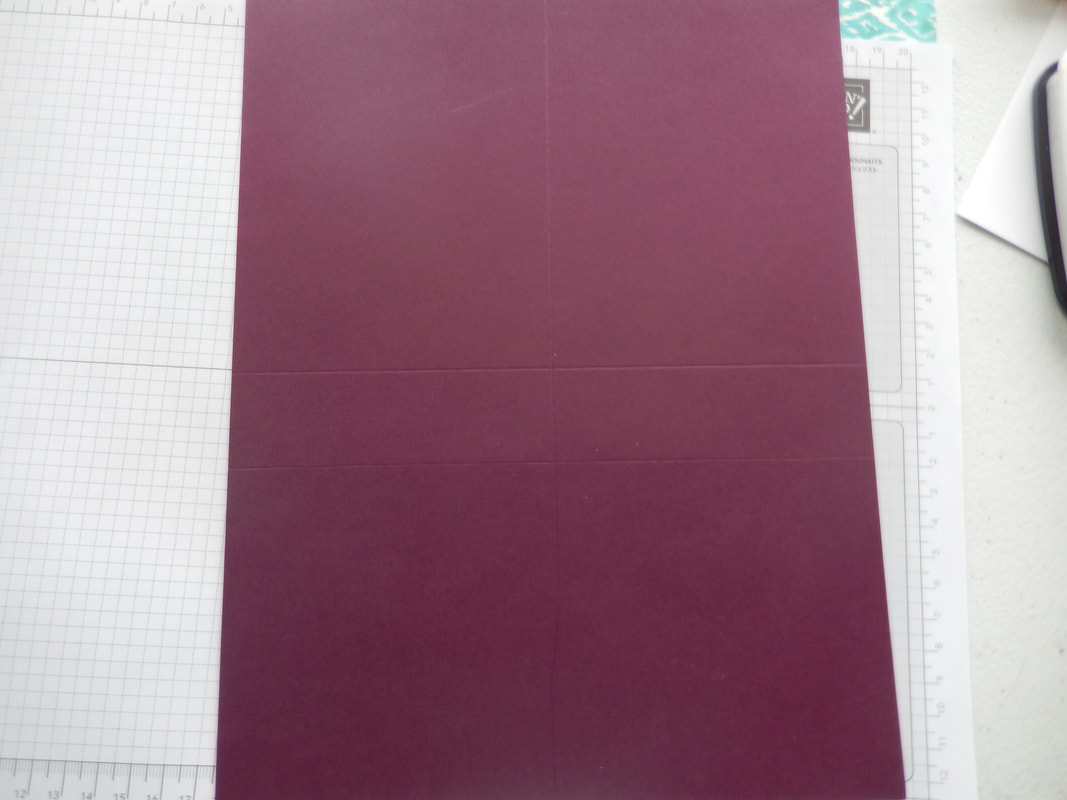
Start with a 5 1/2" X 12" paper, whatever you want for your base card. Score at 4" and 8" along the long side. Then turn so the 4" section is on top and go in 1" and cut from 5" down to 11". Flip the paper over, the 4" section will still be on top and do the cut again on the side....go over 1", start at 5" and cut down to 11". Now, between the cuts, score at 5", 6 1/2", 9 1/2"and 11". That's it.
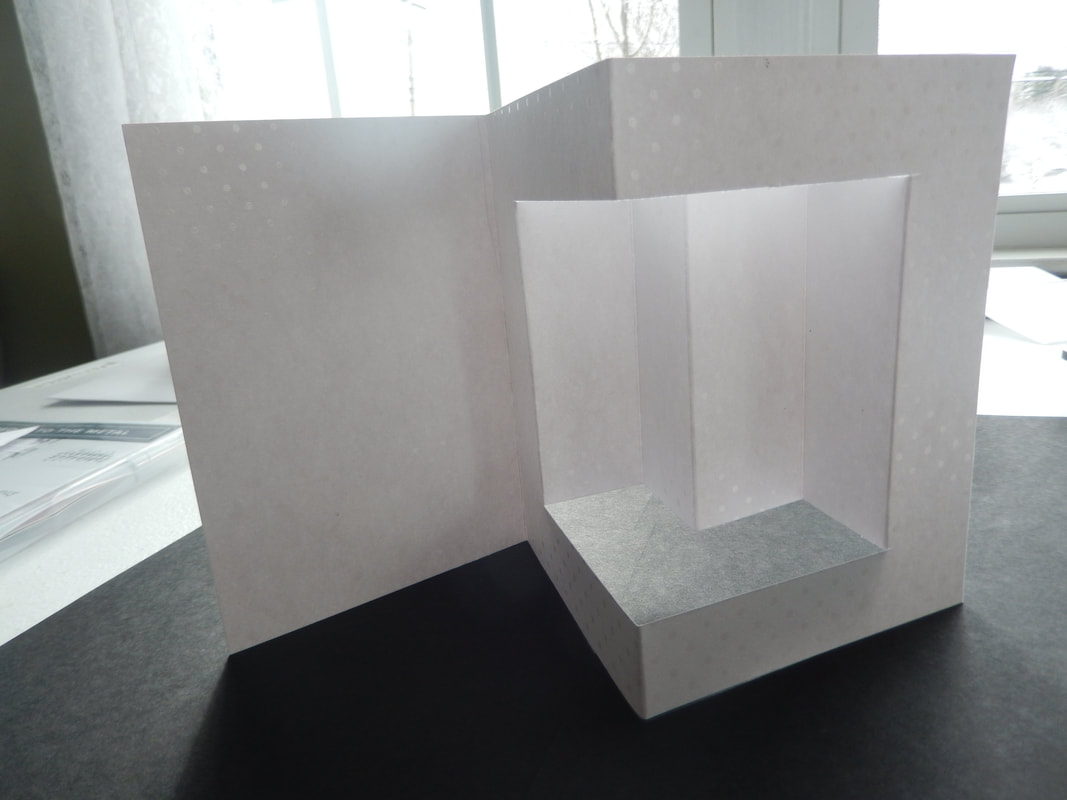
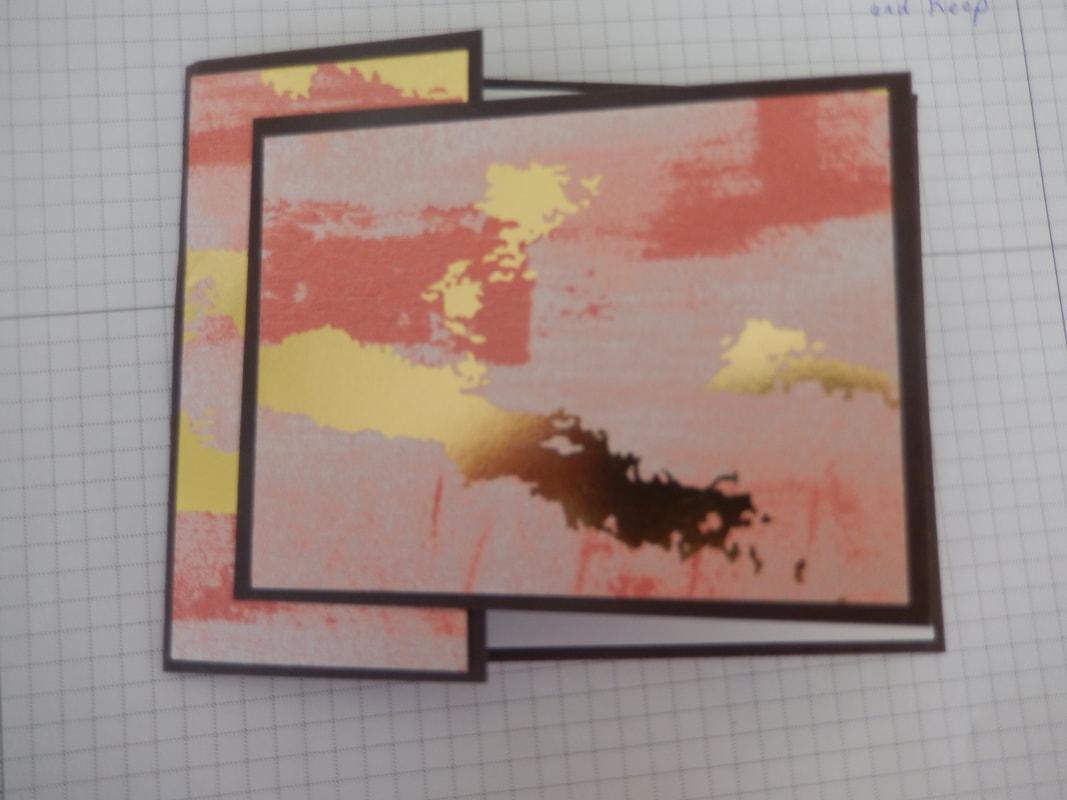
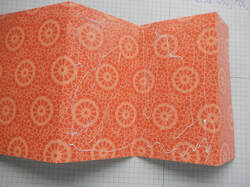
Your 4" score is a valley fold and from there fold mountain, valley pattern till it's all folded. It will look like the above.
When you fold your card now, it looks like this, but to mail, you push in all the middle folds and it fits in the enveolpe.
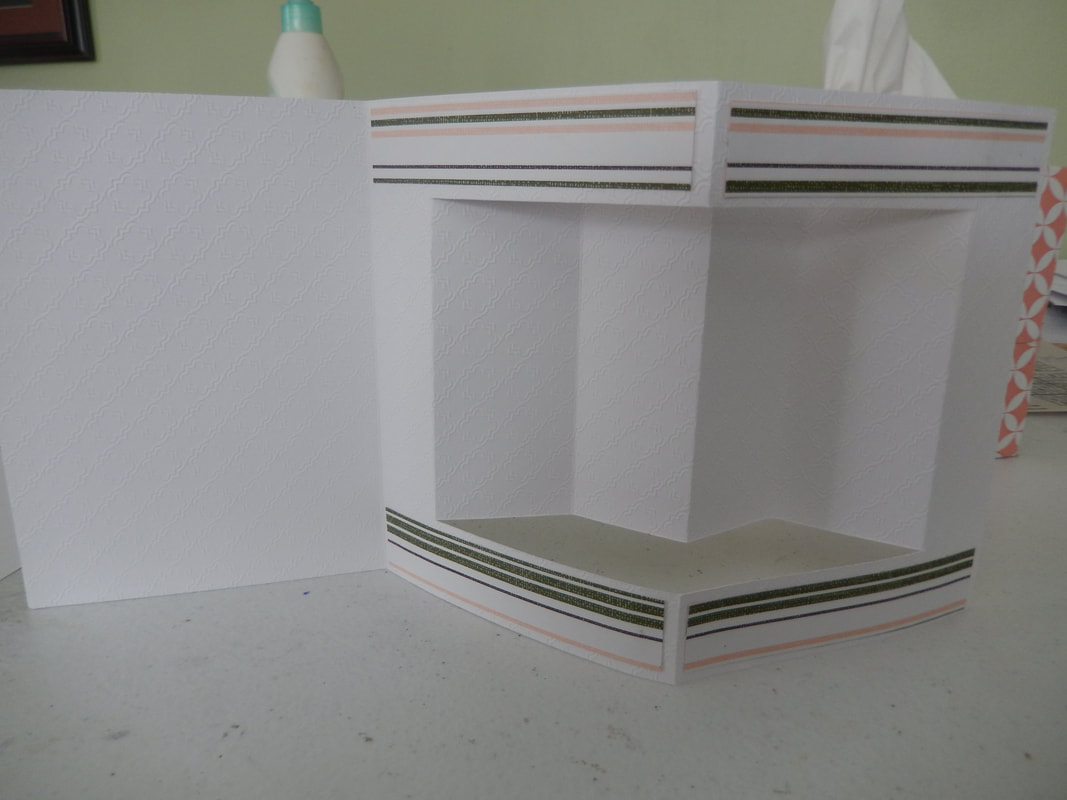
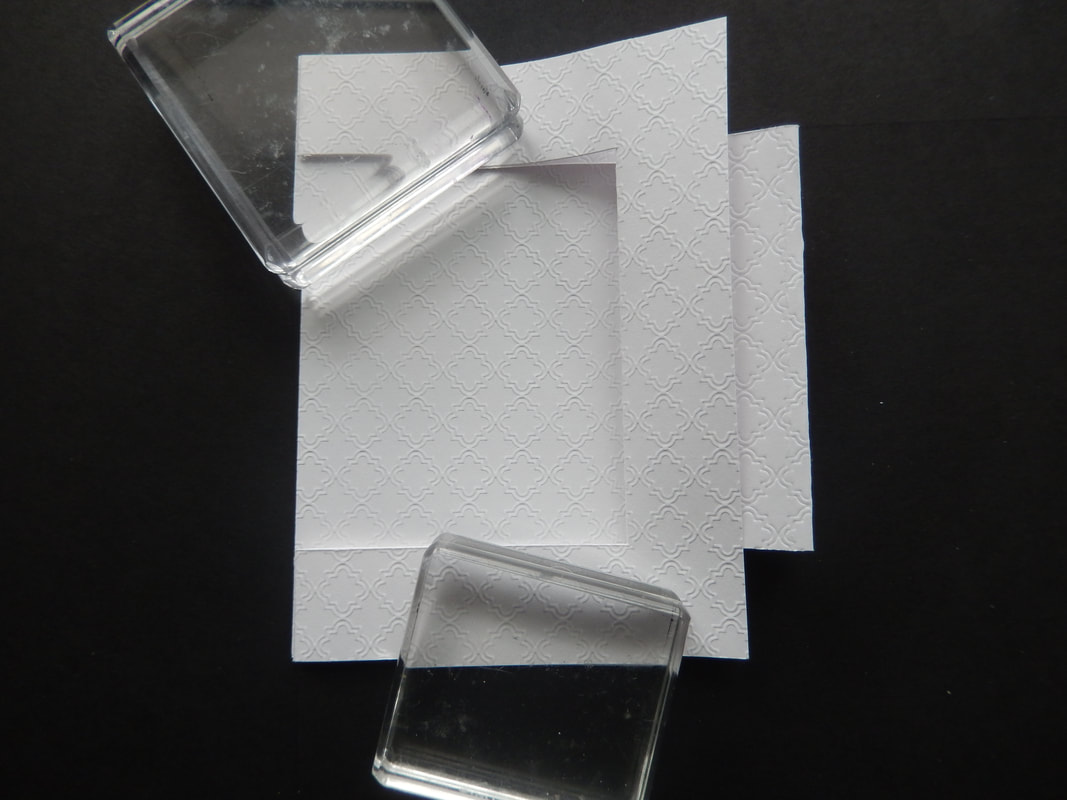
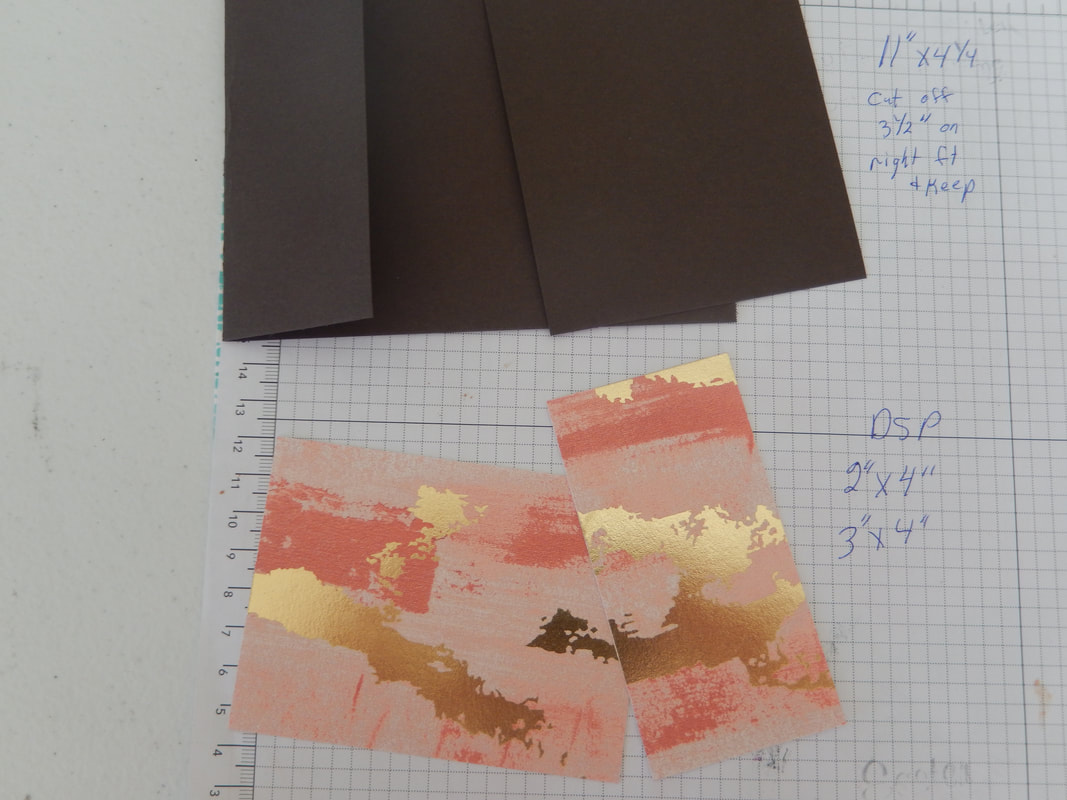
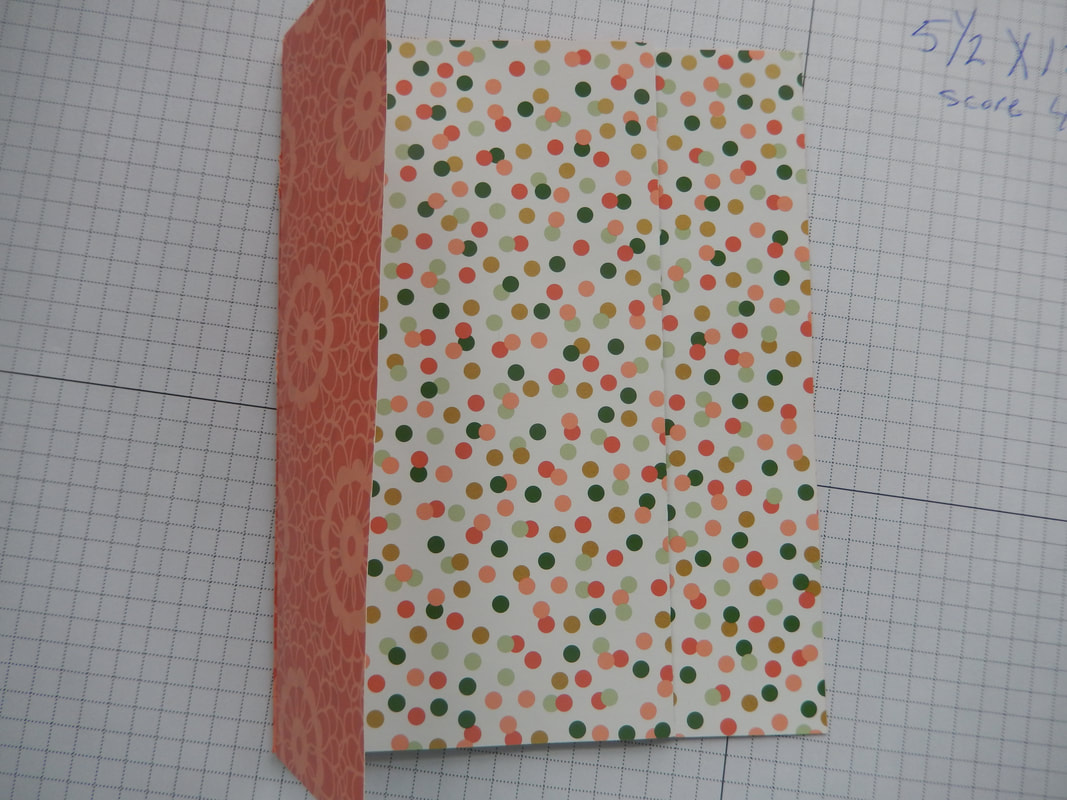
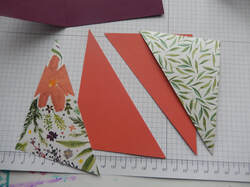
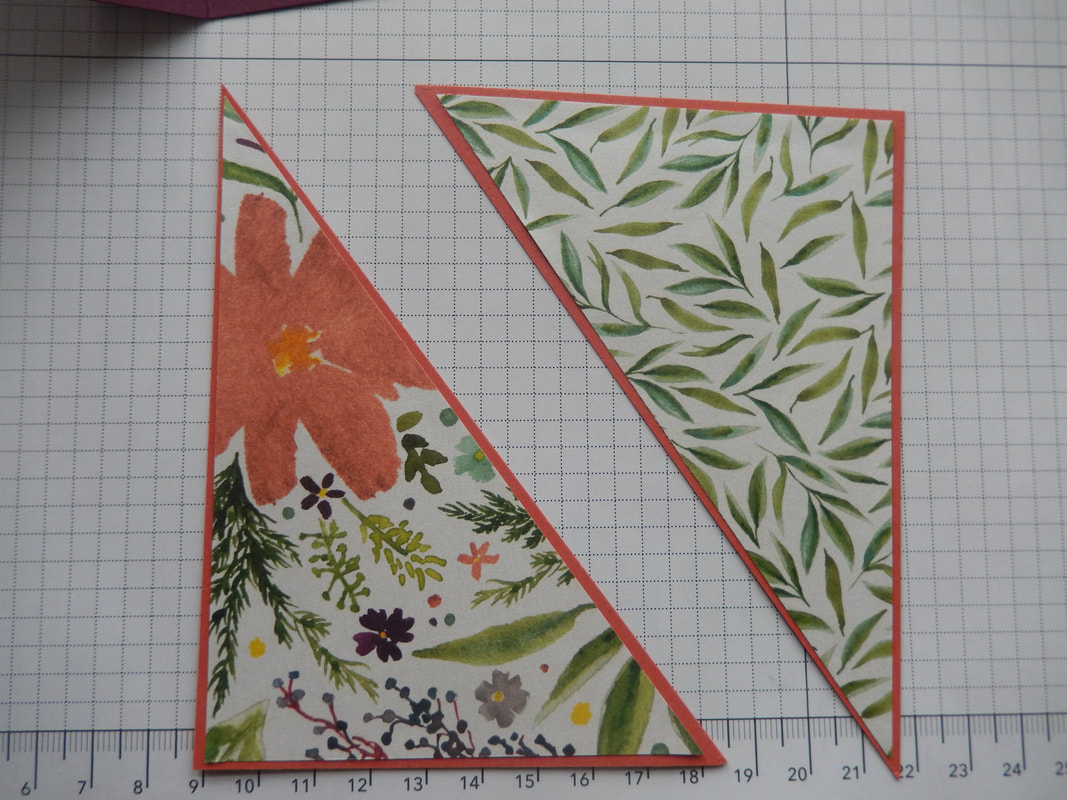
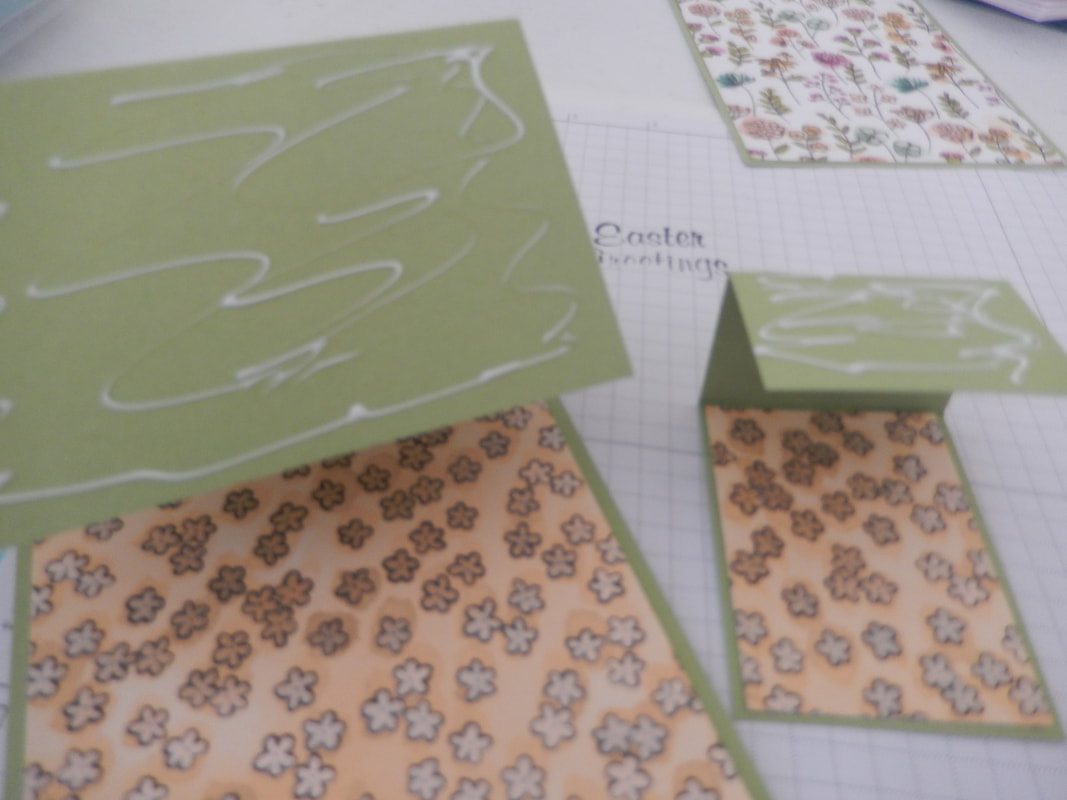
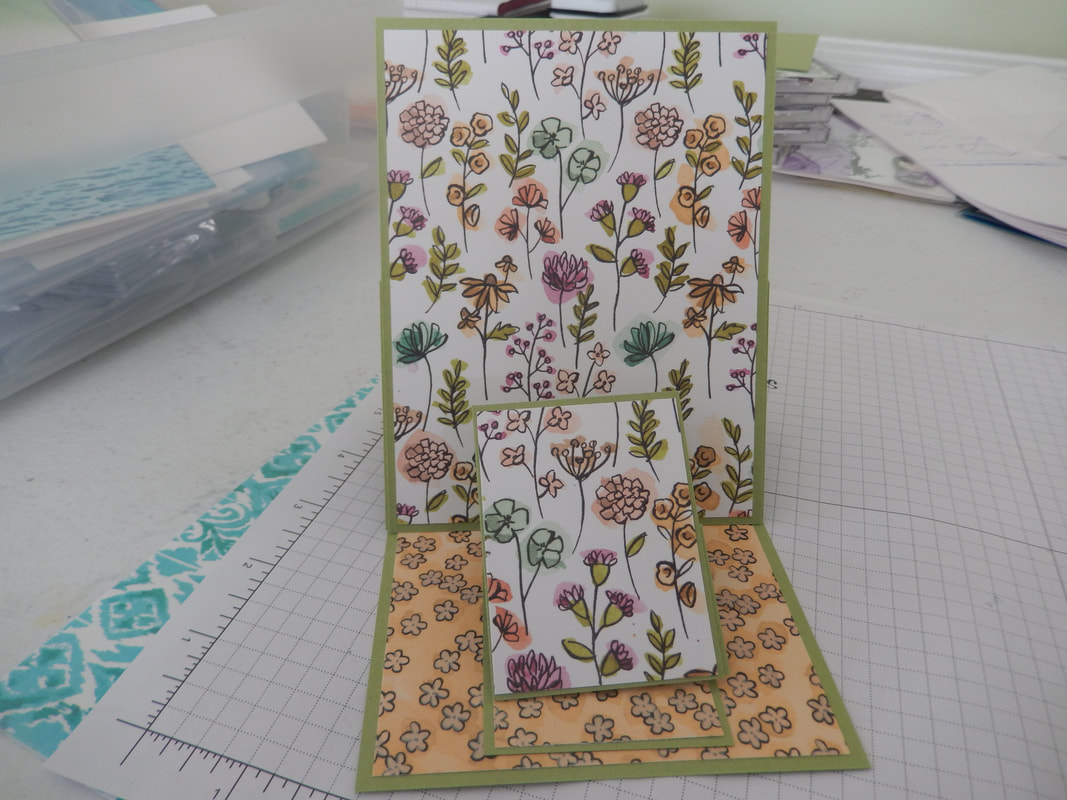
Now for the fun of decorating your card, you will need: 4 pieces at 2 3/4" X 5 3/4". 2 pieces at 3 1/4" X 1 1/4", 2 pieces at 3 1/4" X 1 1/4". I picked all my paper from one DSP group. You can do that or just pick papers you like the looks of together. In the picture above, my DSP was too long, but yours will be find and NOT go all the way to the 4" score or the end on the right and that's the way it should be.
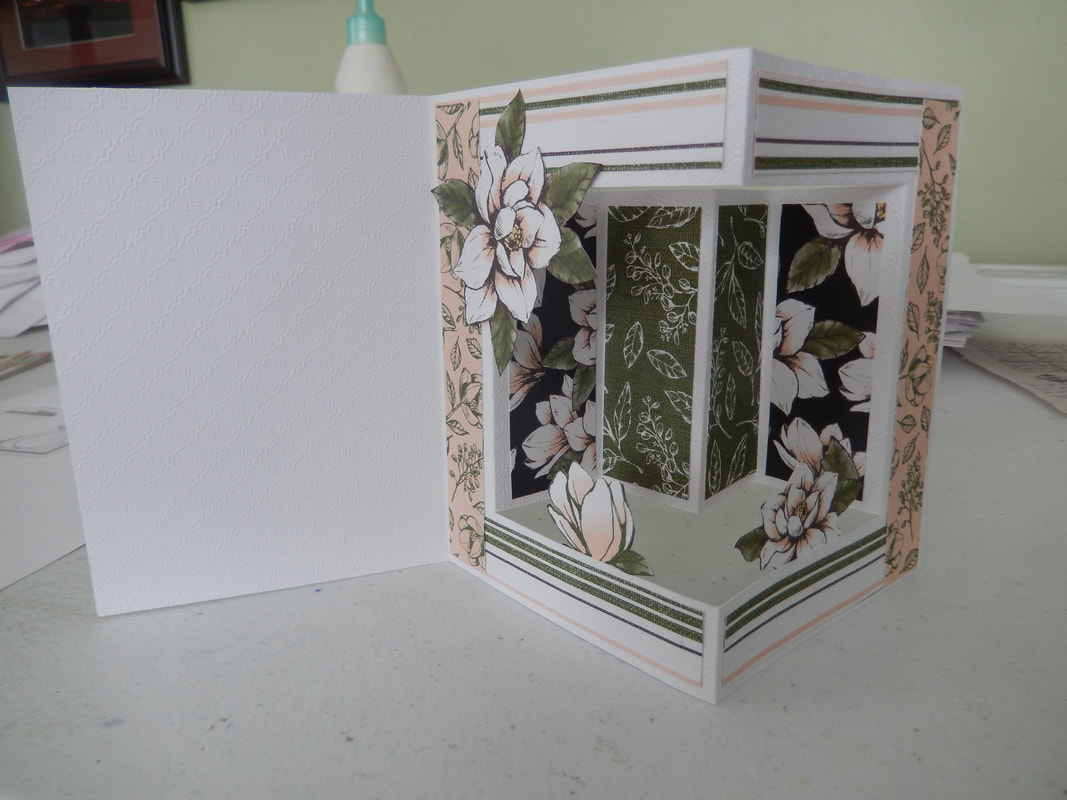
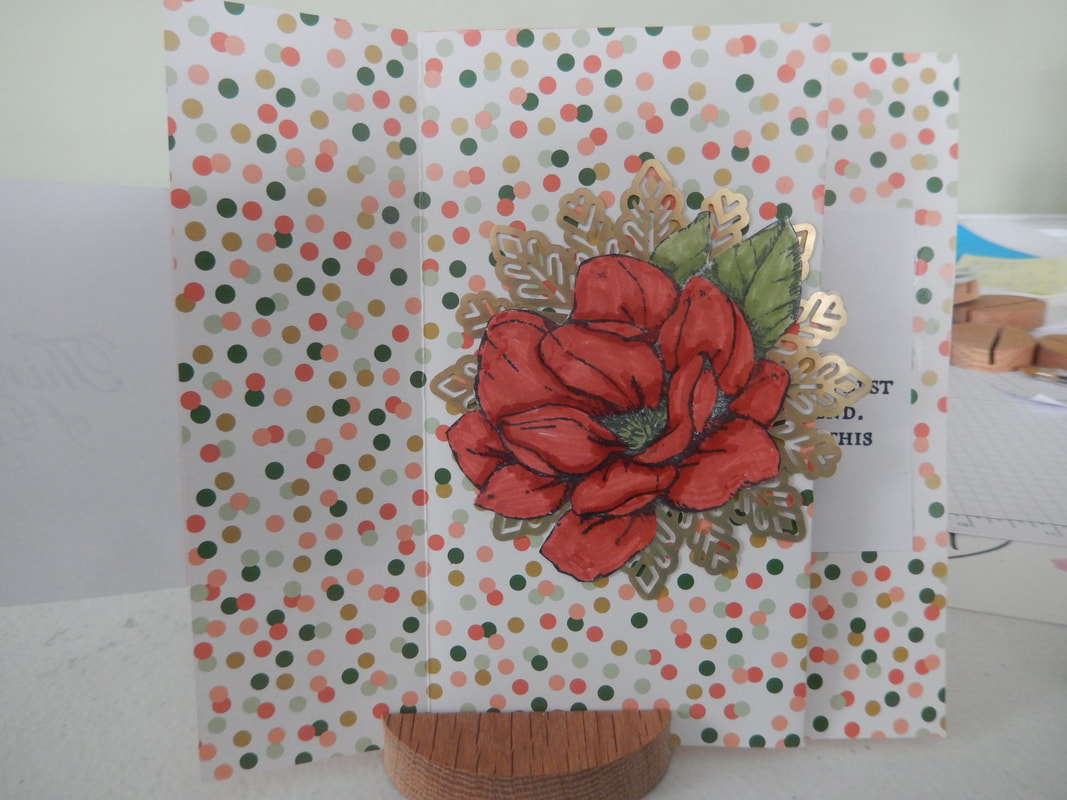
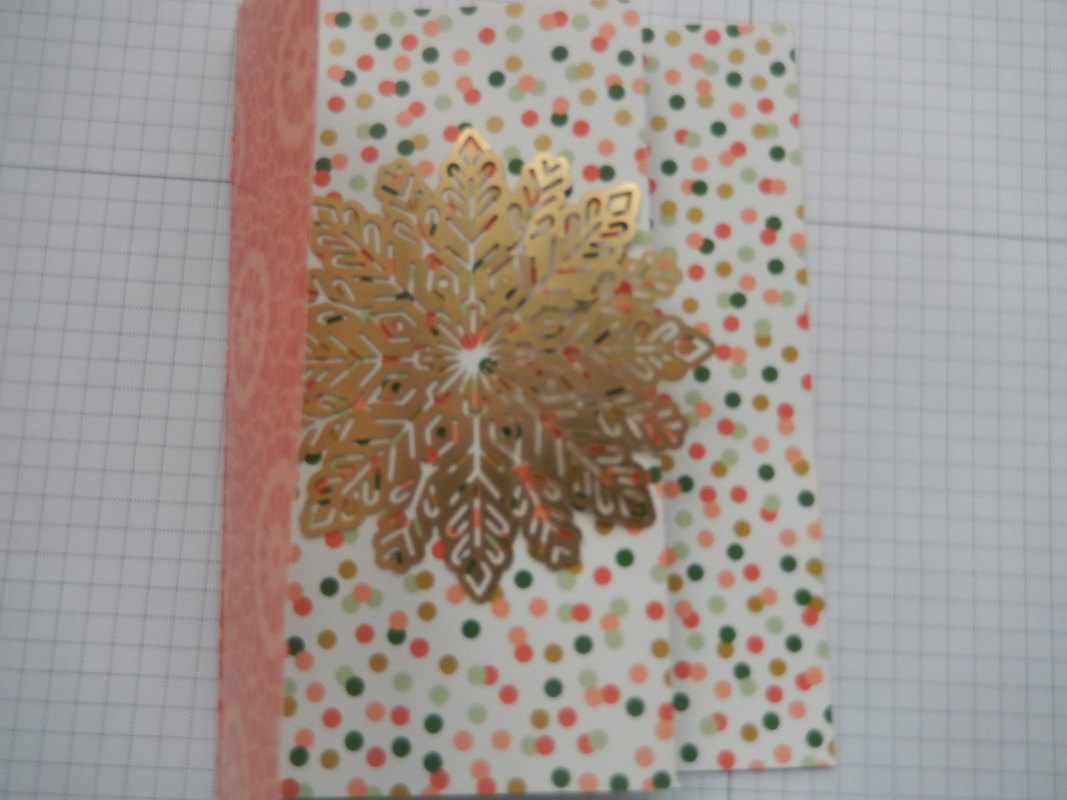
I have put on all my strips and then started to decorate. I actually cut out flowers from the DSP and added them, but you could also stamp images to go with your paper/theme and add those. Remember, there's always Google images you can choose, print and cut out as well.
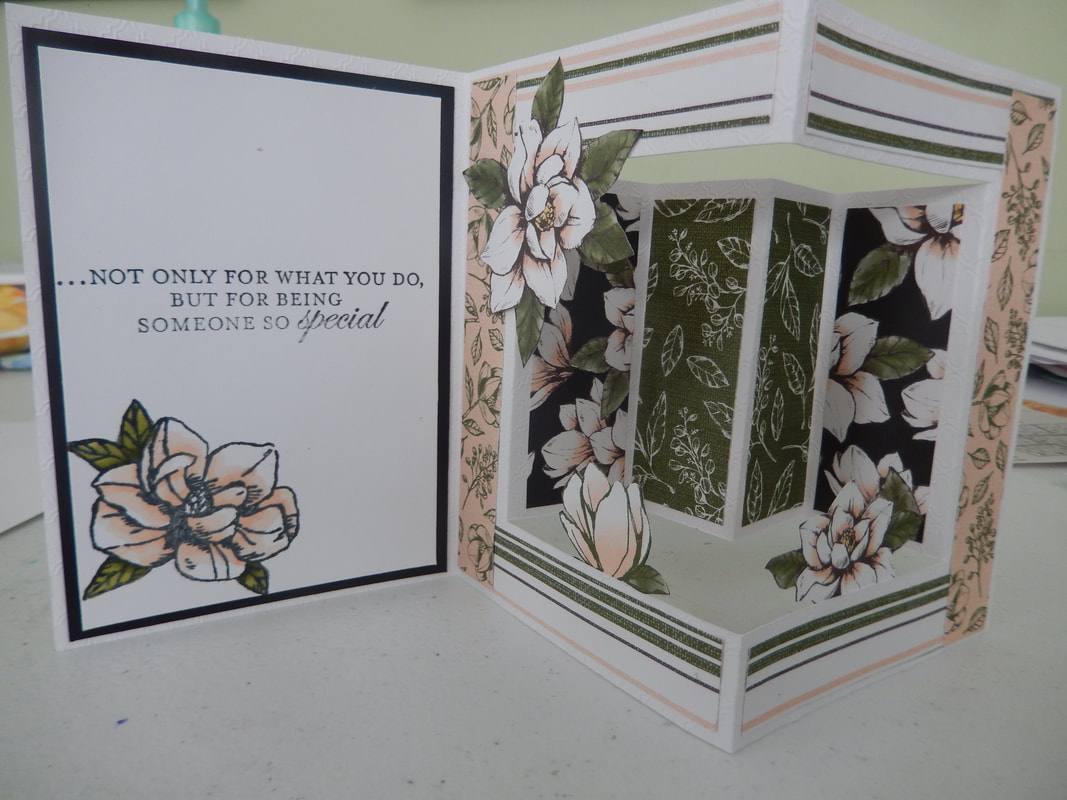
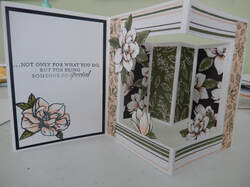
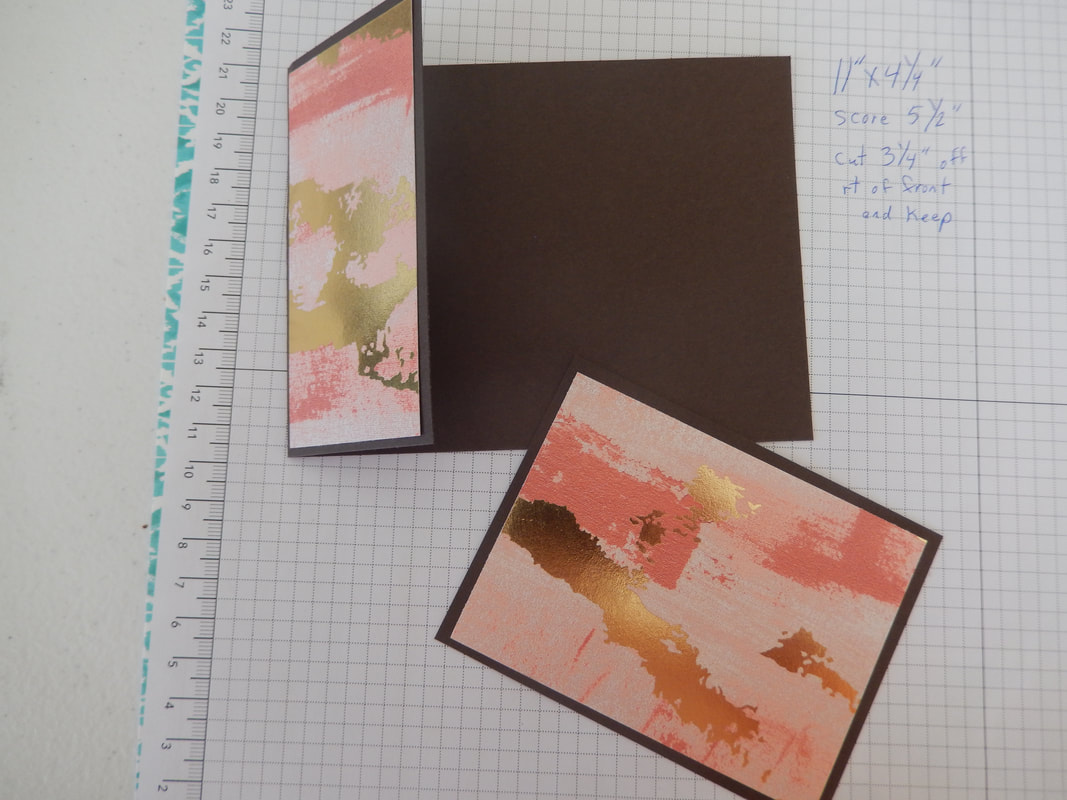
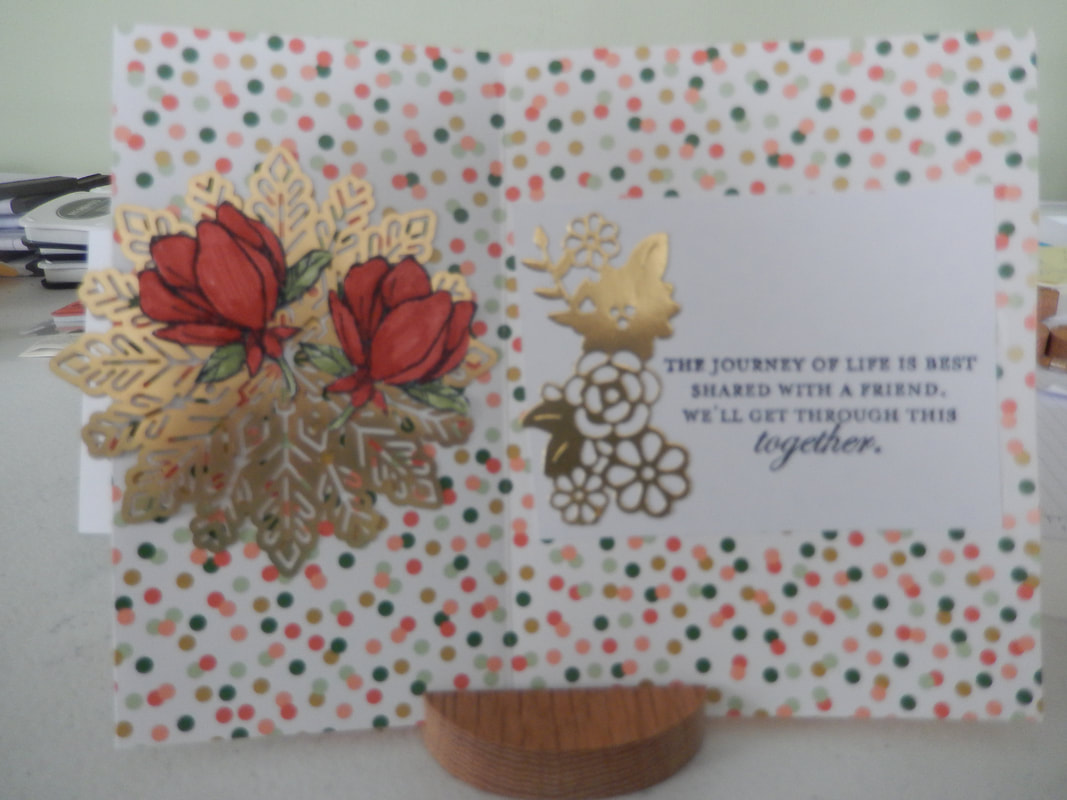
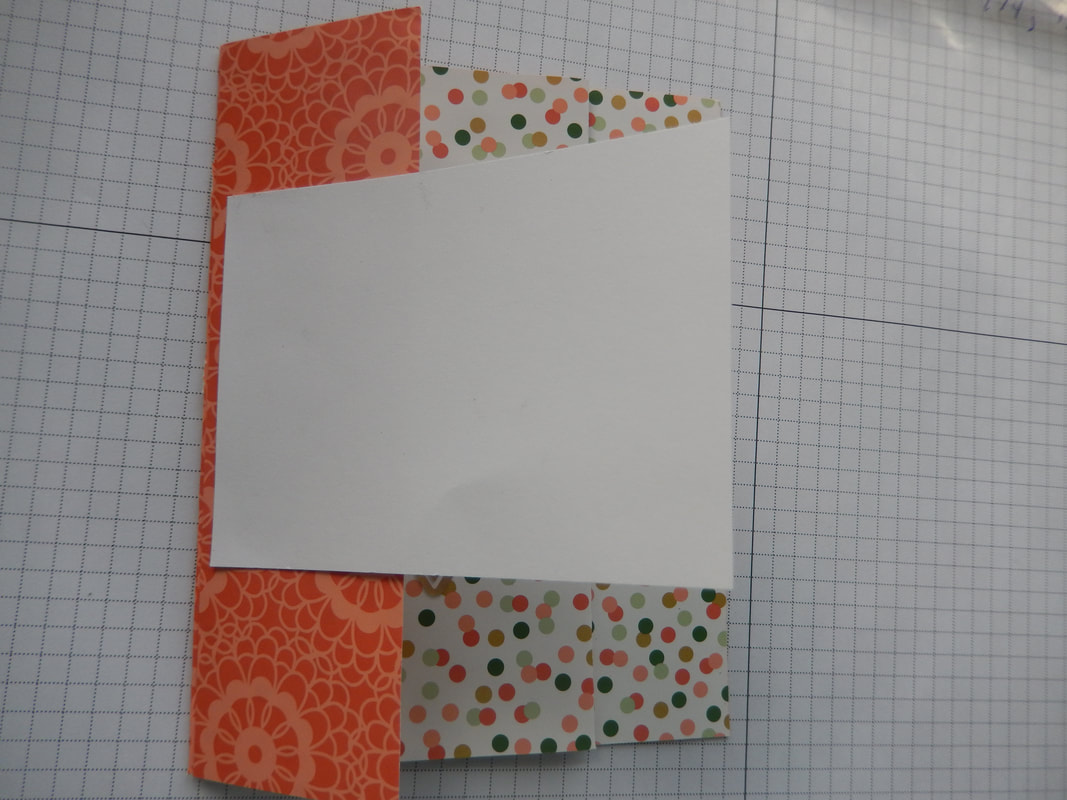
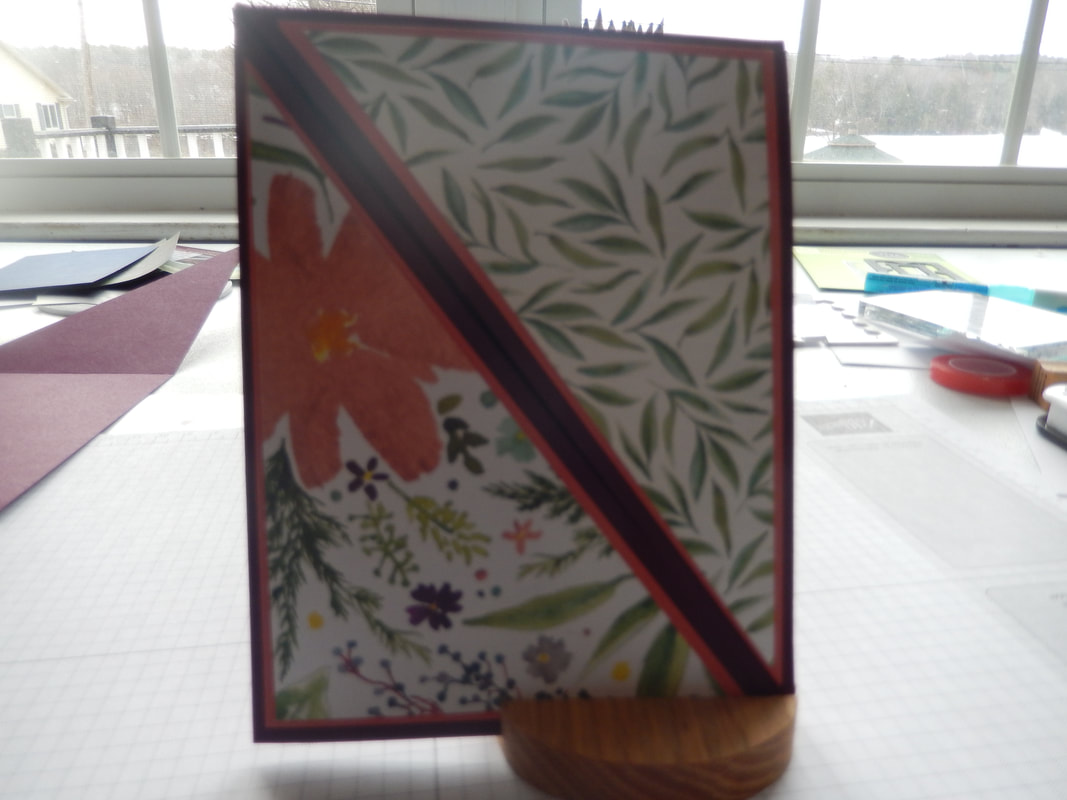
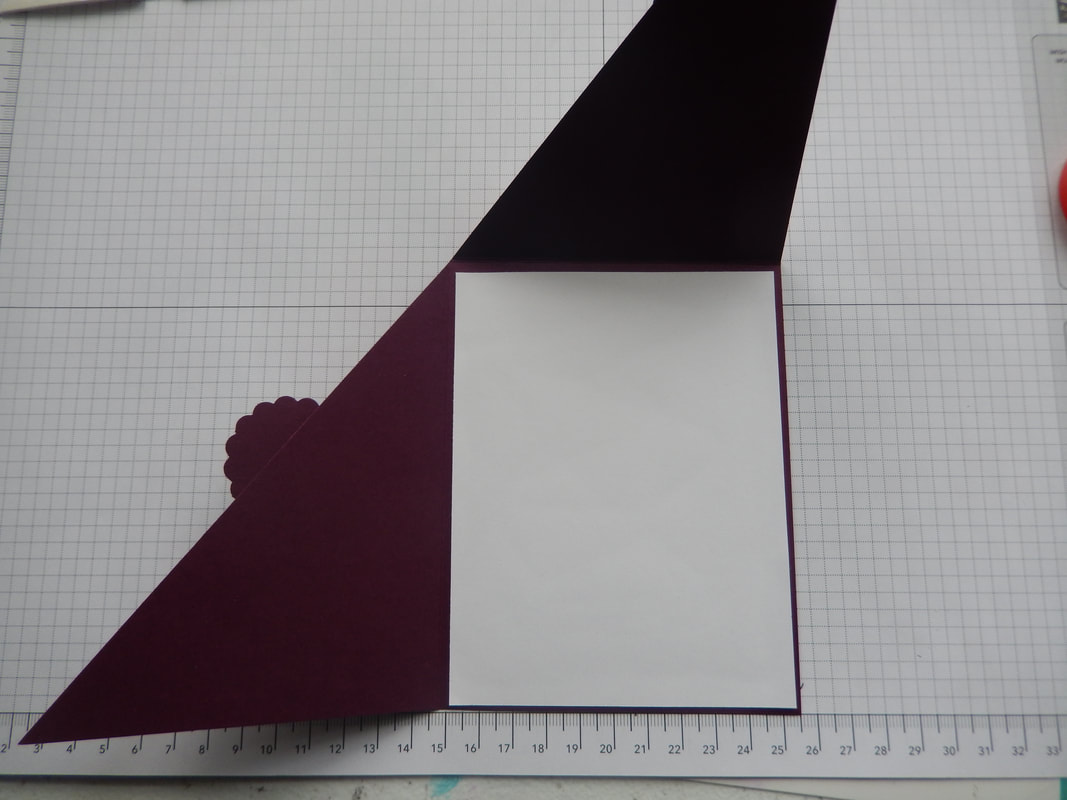
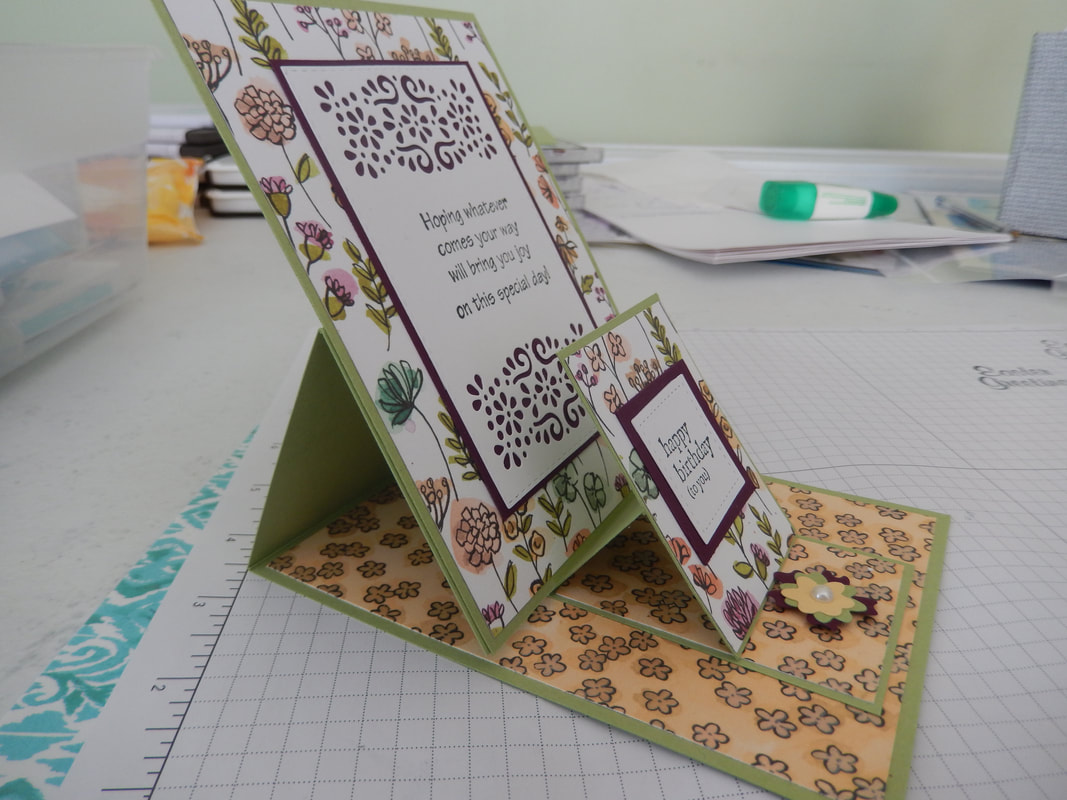
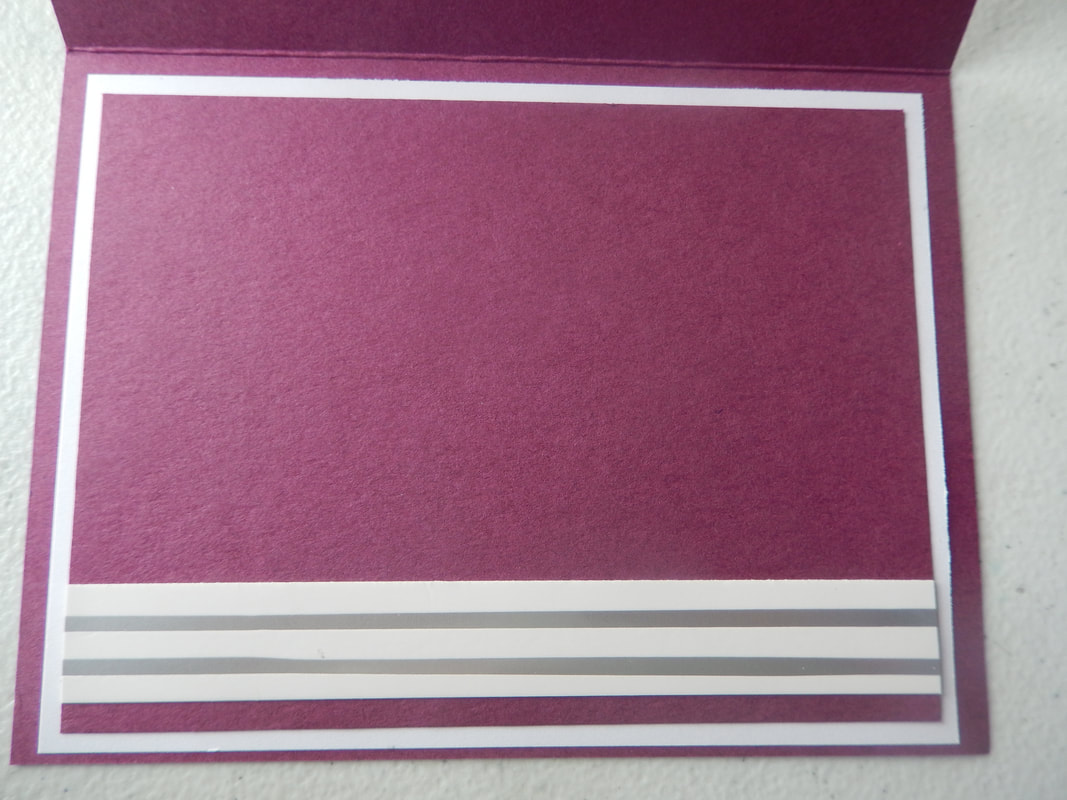
I added a black mat - 5 1/4" X 4" and then stamped a white 5" X 3 3/4" mat, adding both these to the inside 4" section.
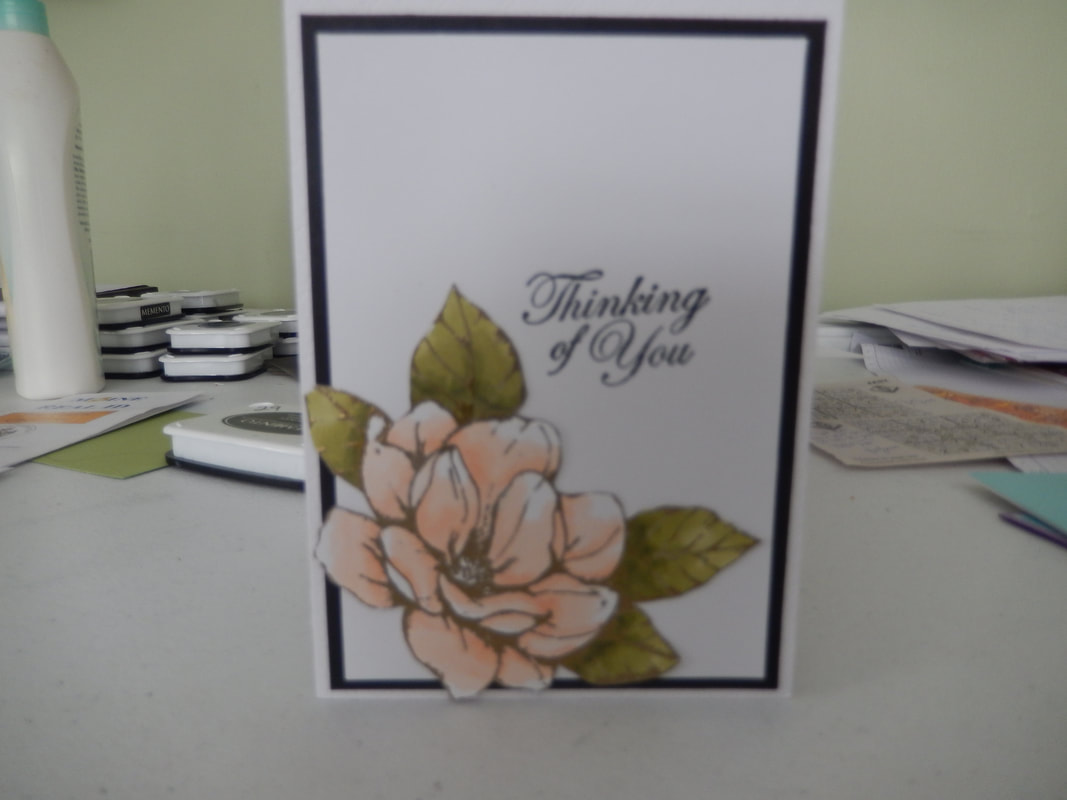
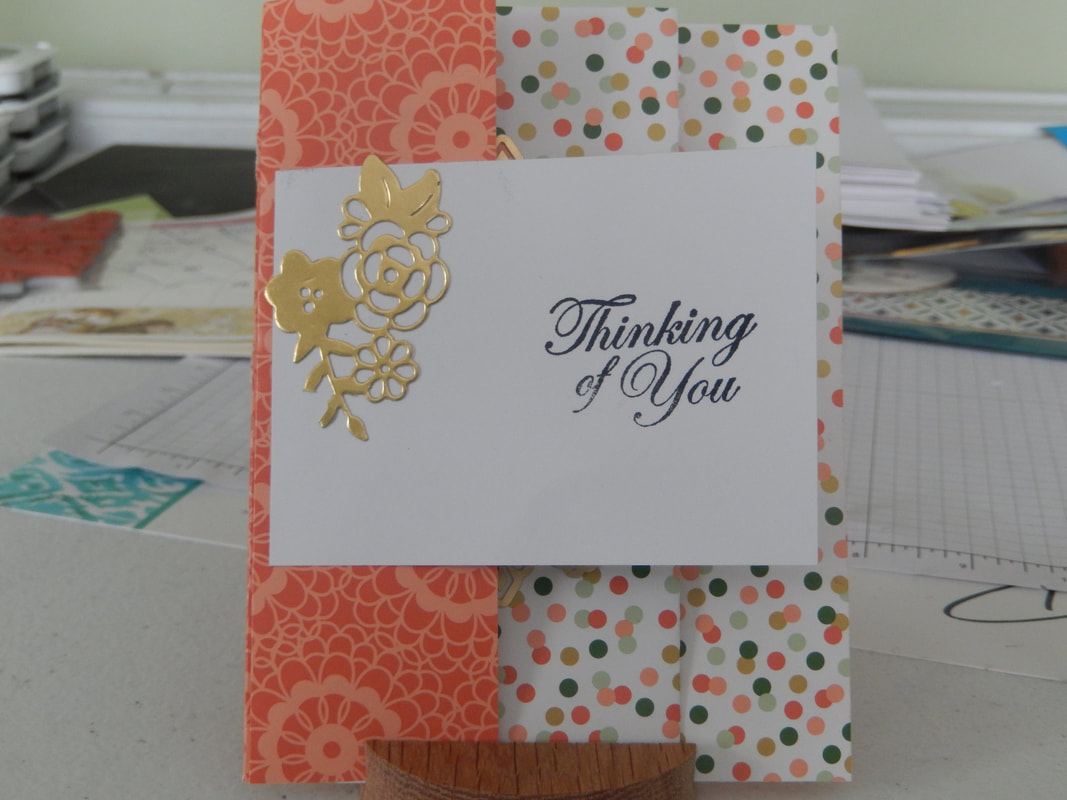
My final step was to add another 5 1/4" X 4" black mat to the front. Then I stamped a greeting and added a cut flower to the white 5" X 3 3/4" mat. Hope you try this. I'd love to see what you use . Have fun and stay safe.
Tutorial # 10
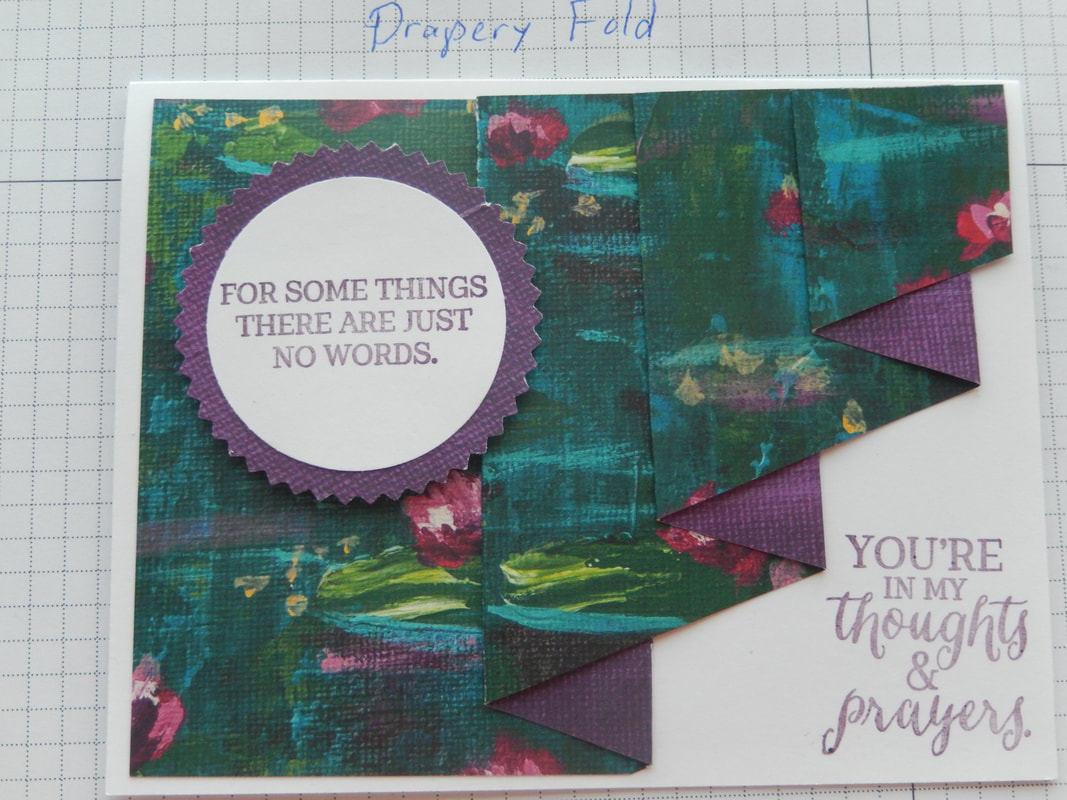
Drapery Fold card: Find paper you love both sides of make this card. Finish it off with sayings, as I did, or with stamped image, choice is yours.
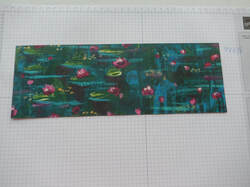
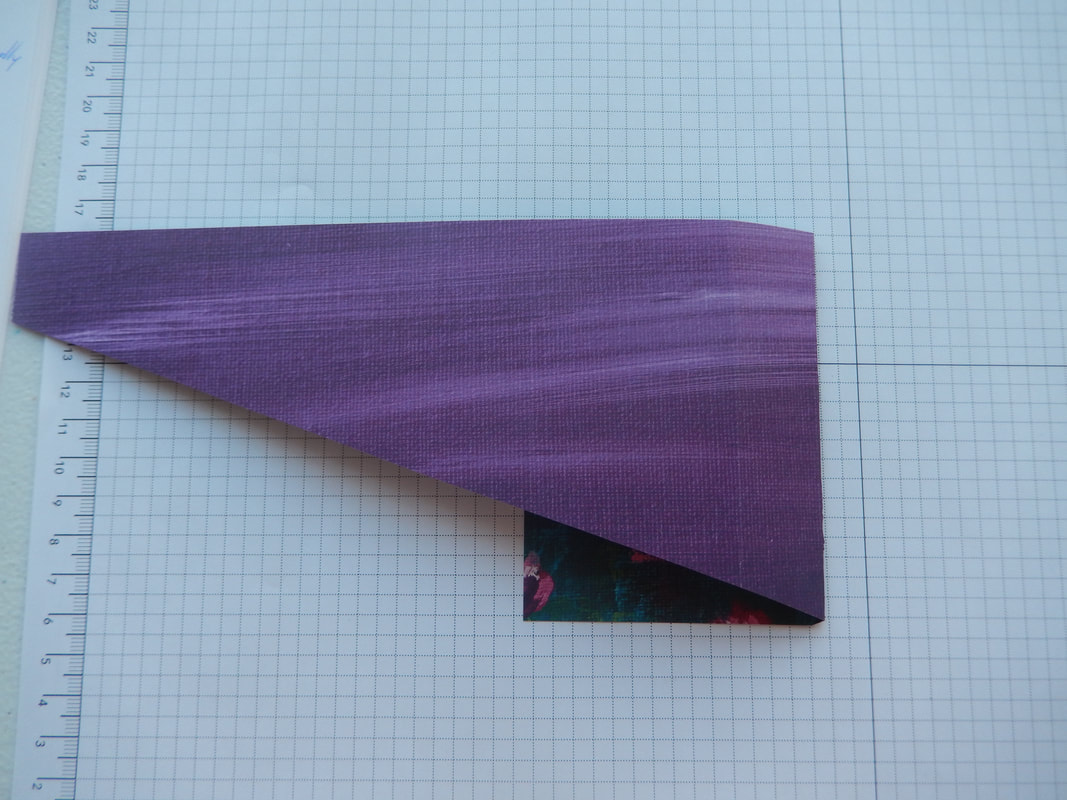
Start with a piece of DSP 4" X 11 1/2". Score this at: 3". 4", 6", 7", 9", and 10".
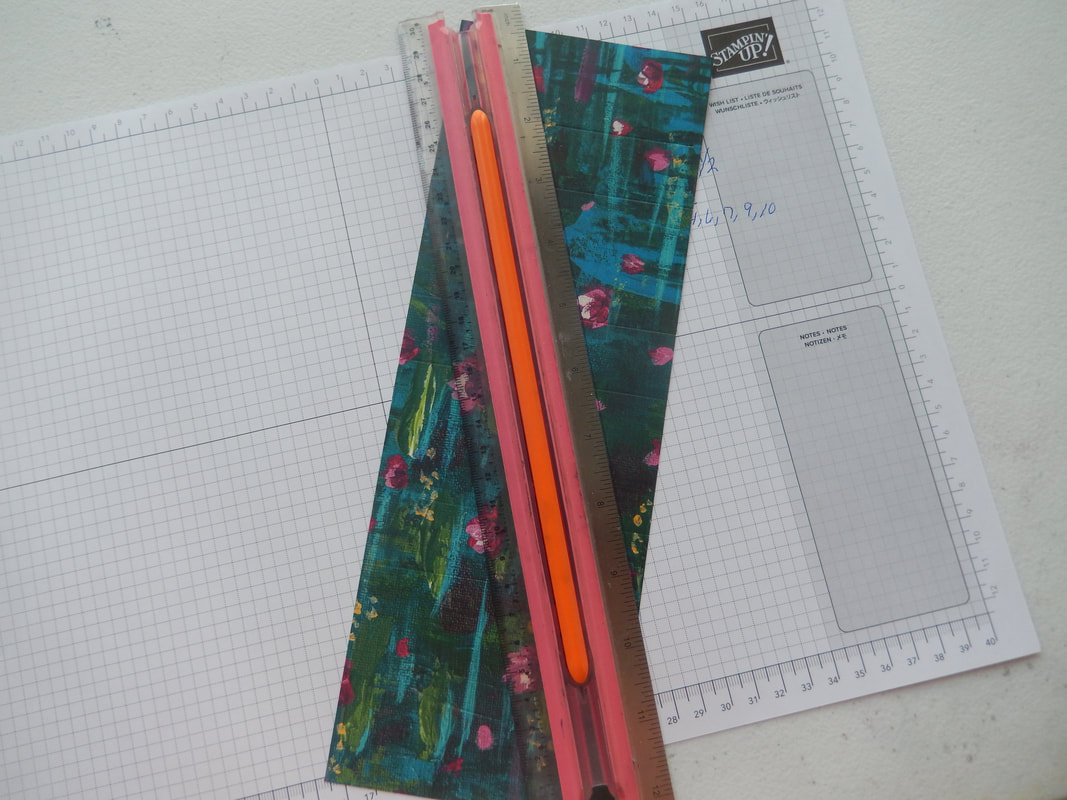
Using a ruler, put one end at the 3" score mark on the outside right edge and the other end of the ruler at about 1" in on the upper left, and draw a line. It doesn't have to be exact at the top. Now cut that piece off. You can keep the cut of piece for a touch of your card on the inside.
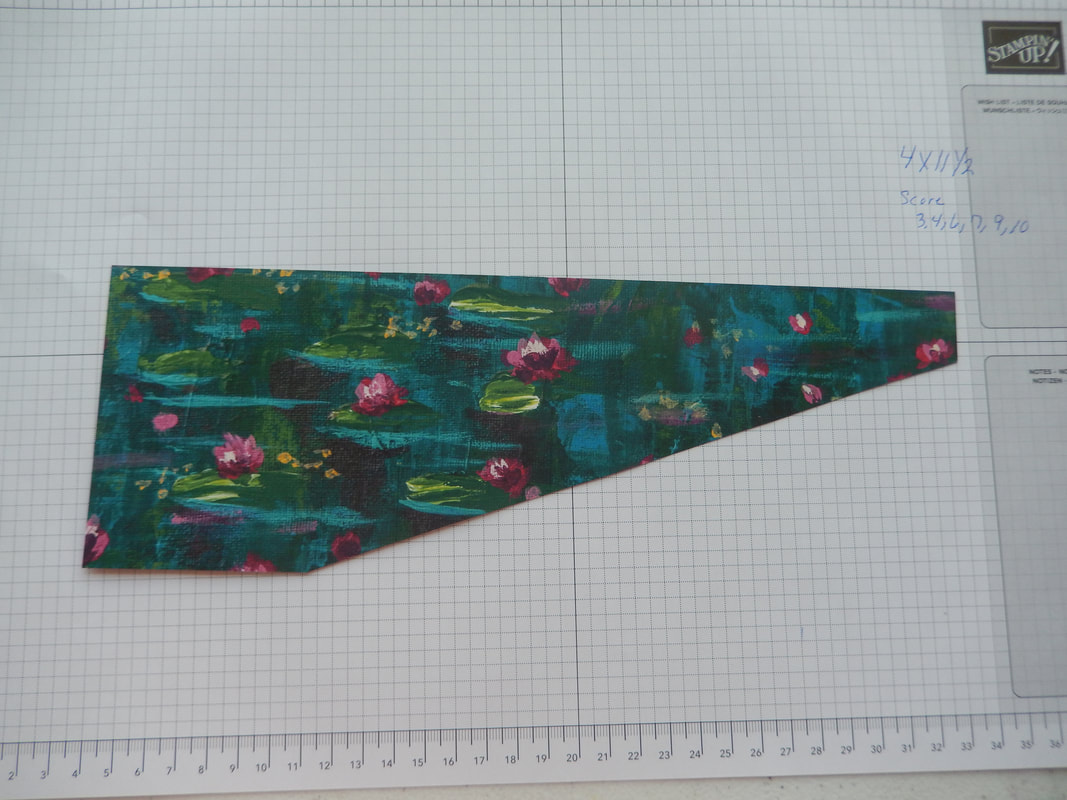
This is what your piece will look like.
Now start to fold your score lines. The first one will be bringing the far right over the left, folding at the 3" score mark.
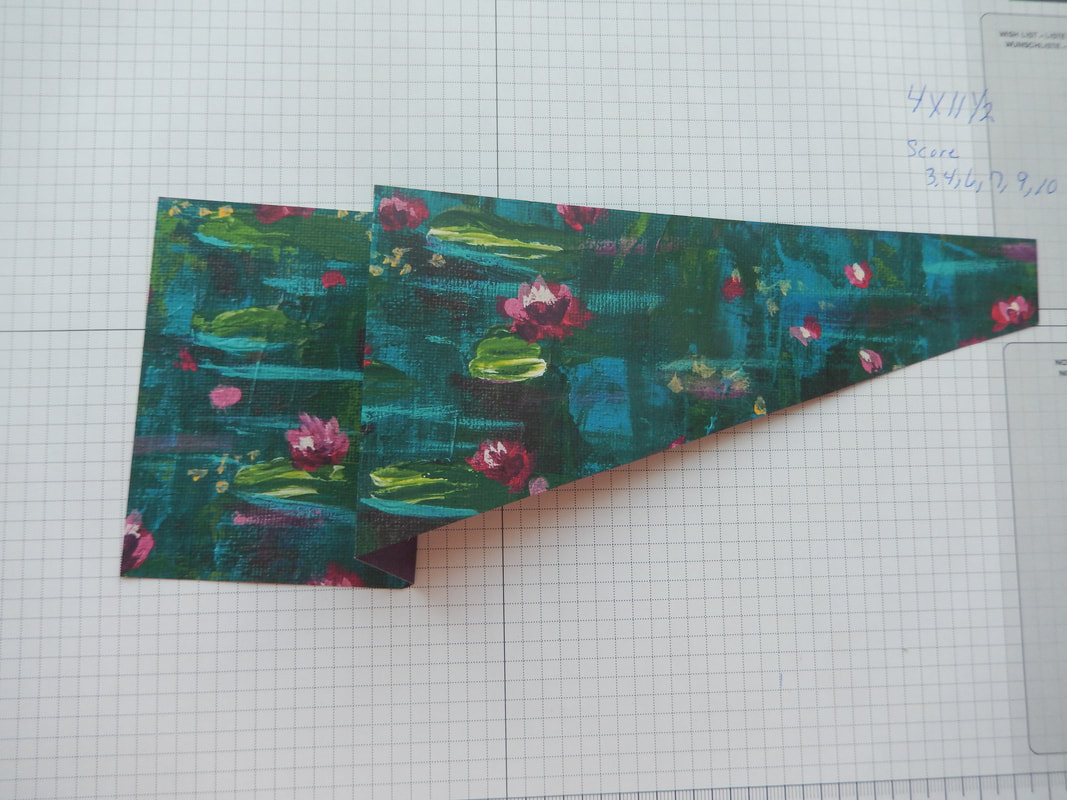
Keep going back and forward on your all your score lines.
It will look like this.
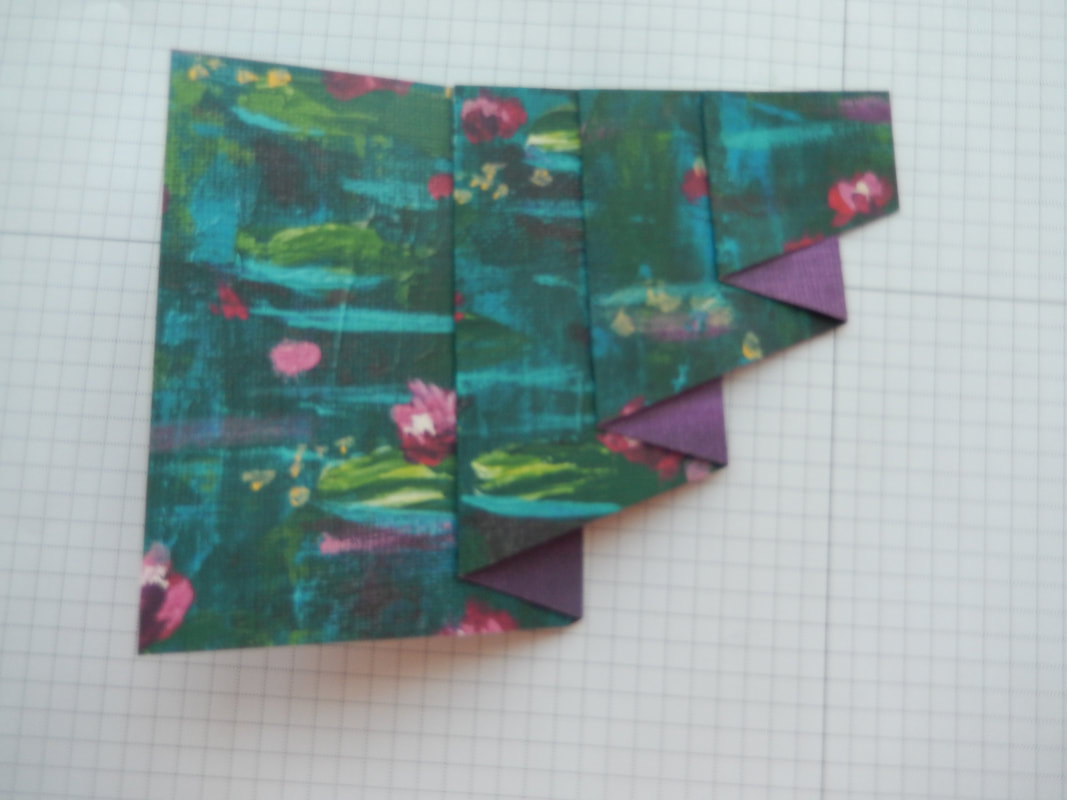
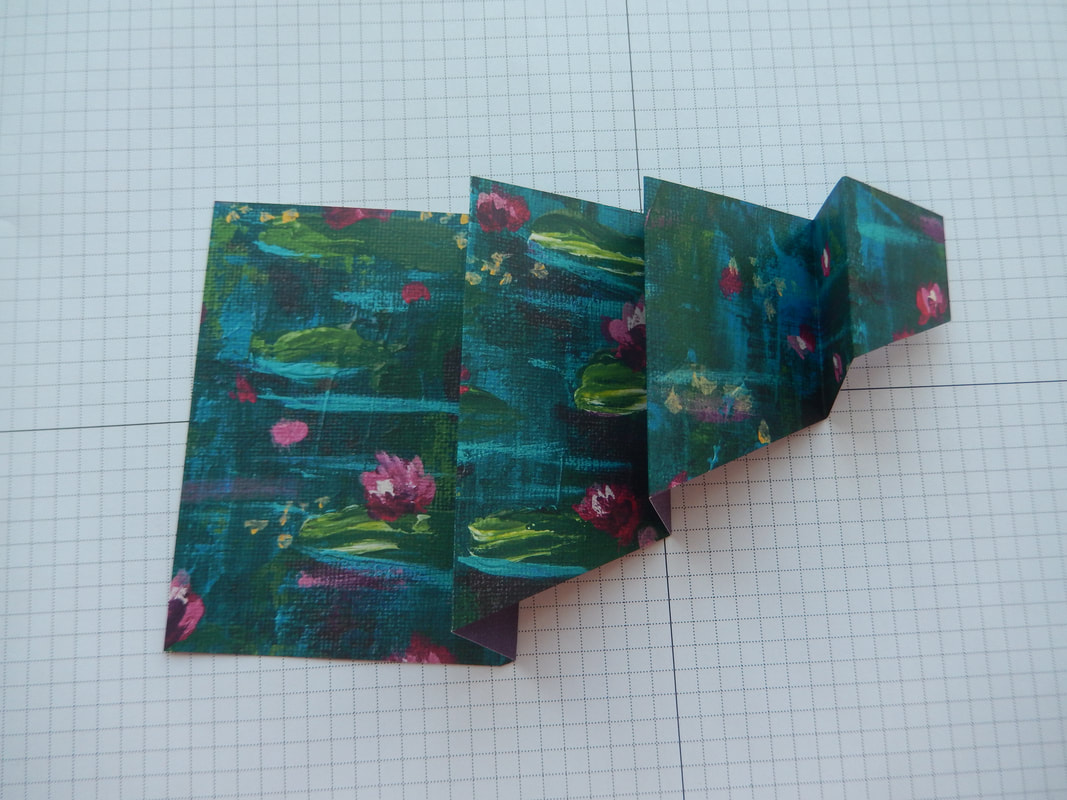
Now adhere each 1" section down and it will look like this.
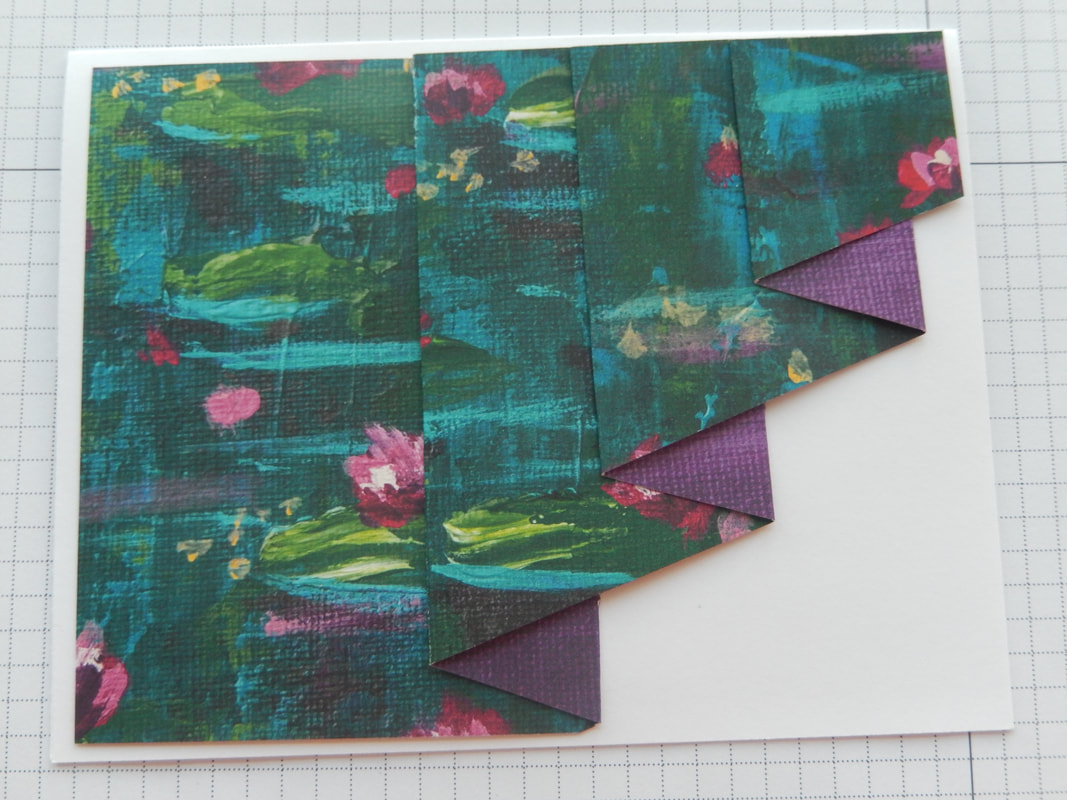
Adhere this piece to your base card (I ended up ending a tiny bit off the far right section to leave a nicer border edge). Now finish it off as you desire. Embellishments, images, greetings, etc. Hope you have fun, It's a quick one to do.
Tutorial # 9
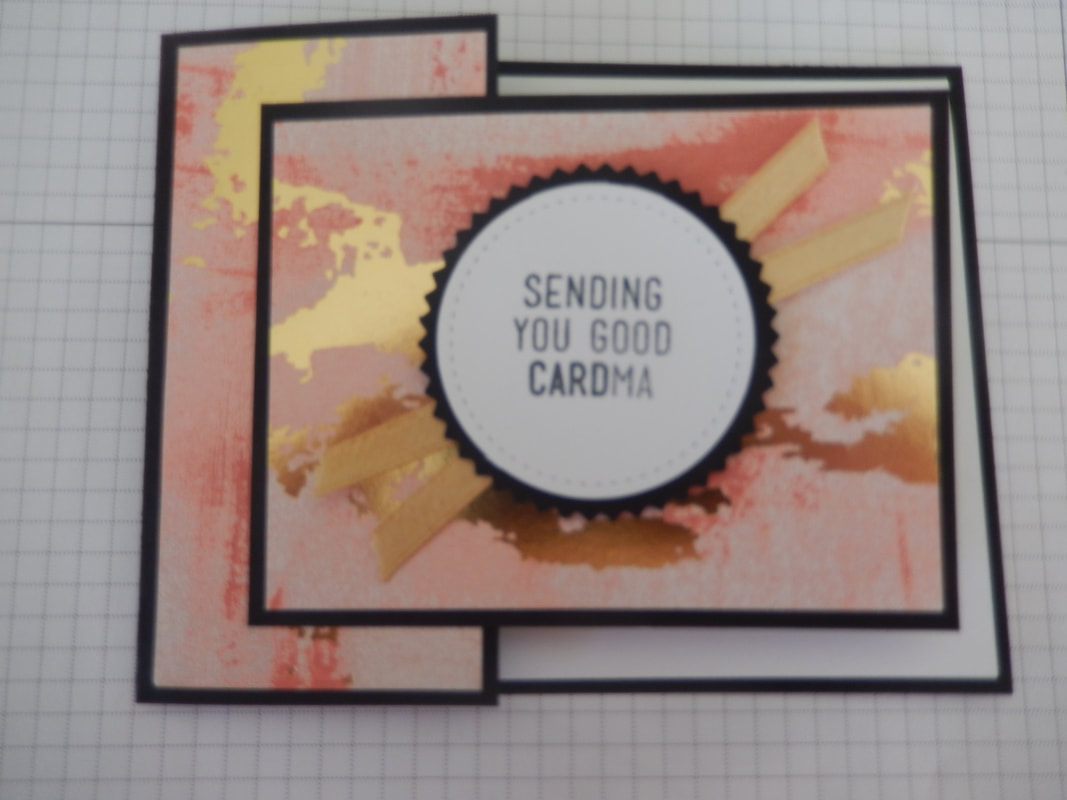
Pick a favorite DSP of yours and then choose a base cardstock color to go with it.
Cut
Cut your cardstock 11" X 4 1/2" and score at 5 1/2". Then cut 3 1/4" off from the right front and keep.
Cut your DSP, one piece 4" X 2" and the other 4" X 3".
Attach these 2 pieces of DSP to the front flap and the cut piece.
Attach the extra piece to your card front, attaching it centered and only about 1/3 on the left side. Attach a white mat, 5 1/4" X 4" to the inside of your card.
Now, add any images, sayings you wish to finish it off. Bet you love it because it's a paper you really like. Keep cardmaking!
Tutorial # 8
Do you have a sheet of 12" X 12" that you love both sides? If so this one is for you. Take a deep breath and cut it at 5 1/2" X 12" and score at 4 1/4", 7 1/4" and 10 1/4". How easy is that!
You can fold it either way. The three sections on the right will be the same design and the narrow one on the left will be the opposite side.
Put adhesive on the backs of both middle sections and close the card.
Now all you have to do is play (decorate your card). I'll be back when I'm finished decorating mine (I got up really late this morning.)
I found some doilies from way back that I hadn't used and lined them up, one on each side of the middle section.
Then I cut 2 white cardstock pieces at 3 3/4" X 2 3/4", which covers up the doilies. I put one on the front narrow panel, then closed the center panel and lined up the second white mat with the first. Put adhesive all over that and closed the card. Now everything lines up so it doesn't show when the card is closed. What's left---just to decorate.
Tutorial #7

First, choose your DSP paper. If you use it from the same pkg,it will match. Next choose your cardstock to go with it. Using an 8 1/2" X 11"' sheet, score at 4 1/4" down the short side and at 5 1/2" on the long side. Now put this is your cutter and cut diagonally. This will make 2 cards, if you wish.

This is what it will look like after you cut the base and then fold it.
Cut your choice DSP to 3 1/2" X 4 3/4". Then cut diagonally from upper left to lower right. I chose a coordinating paper and did the same---this will also be enough for 2 cards, if you wish. Choose a color from your DSP and get a matching cardstock. Cut that to 3 1/2" X 4 3/4" and then cut that on the diagonal as well.
Adhere these pieces together.
Adhere these to the two front flaps on your base card.
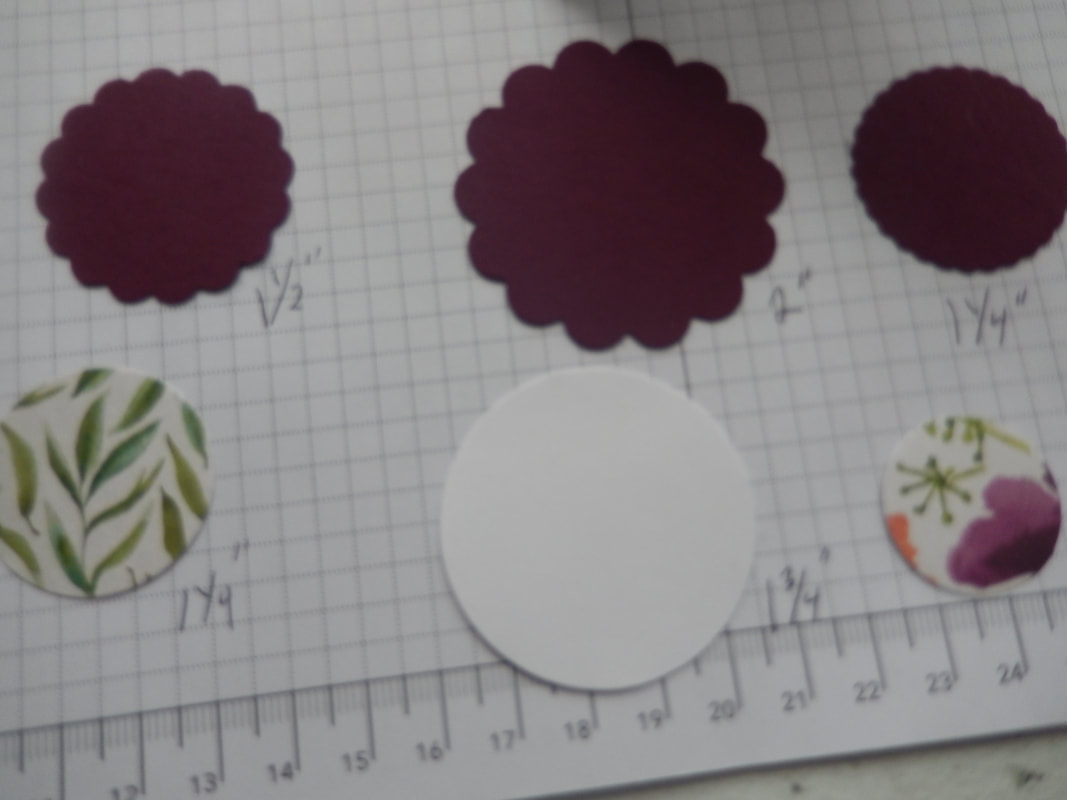
Punch out or die cut scalloped circles from your base color cardstock. ! 1/4", 1 1/2", 2". The punch out circles from the two DSP papers 1", 1 1/4" and the white one is 1 3/4" for your greeting.
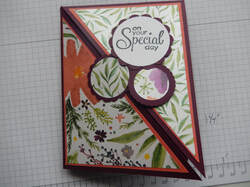
Sorry, I didn't have the right size 1 1/4" scallop punch. Stamp your greeting onto your white circle and attach to the matching mat. Attach each of the other DSP circles to your corresponding mats. Using 3D dots, attach the greeting to the upper right section of your card front. Using 1 3D dot, attach the smallest circle just slightly overlapping the greeting and the center of your opening. Use red tape or tear and tape (something strong) to adhere the last circle. Tape it so it overlaps the center and tucks under both other circles. This is how your card stays closed.
The inside of your card will have a white mat, 5 /14" X 4". Enjoy!
Tutorial #6
Large card base 4 1/1 X 11 score at 5 1/2 and 2 3/4. Small card base 5 1/2 X 2 1/8 score at 2 3/4 and 4 1/6 Base color mat 5 1/2 X 4 1/4 DSP mats 4 X 5 1/4 small DSP mats 2 X 2 5/8 base color mat 2 1/8 X 2 3/4.

Attach the DSP to the inside of your base card/s. Attach your DSP to your mat/s. This are just chosen from my stash. I used old papers for this card. I took the DSP papers from the same pkg. so they would match.
Just put glue or adhesive to the pictured section (bottom of front) on your base card/s.
Then close your base card/s and attach your card front/s. It will only be stuck to the bottom half of your card. Now you have an easel card or 2.
This is what it should look like from the side.
This is what it should look like from the side.
Now Look at the designs you used and use an idea from the DSP to add a 3D'd stopper to your inside panel, the large one near the front if you only make one or near the front on the little one if you went for both. I'll be posting a picture of my final one soon.
My finished card. Hope you give it a try, either single or a double.
Tutorial # 5
I had to make up a card using current Stampin' Up products for a demonstrators' team meeting. It's to be a shoe box exchange.
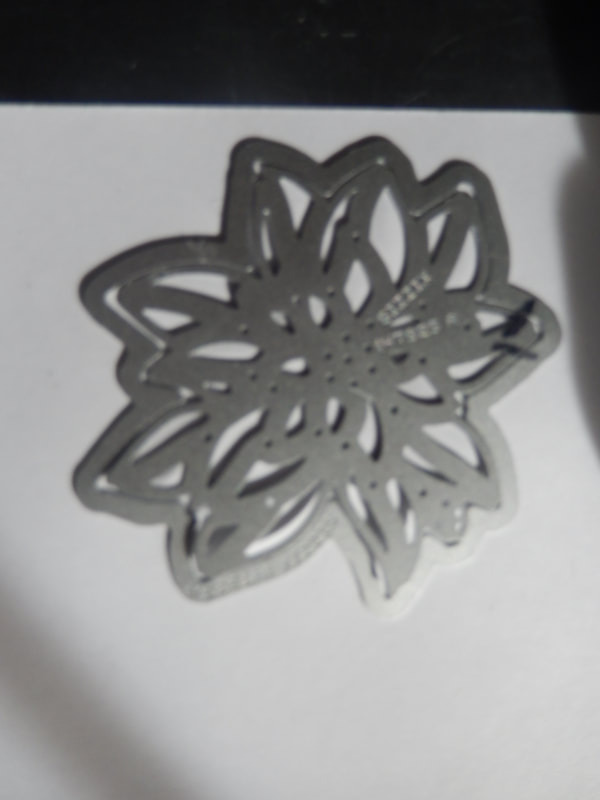
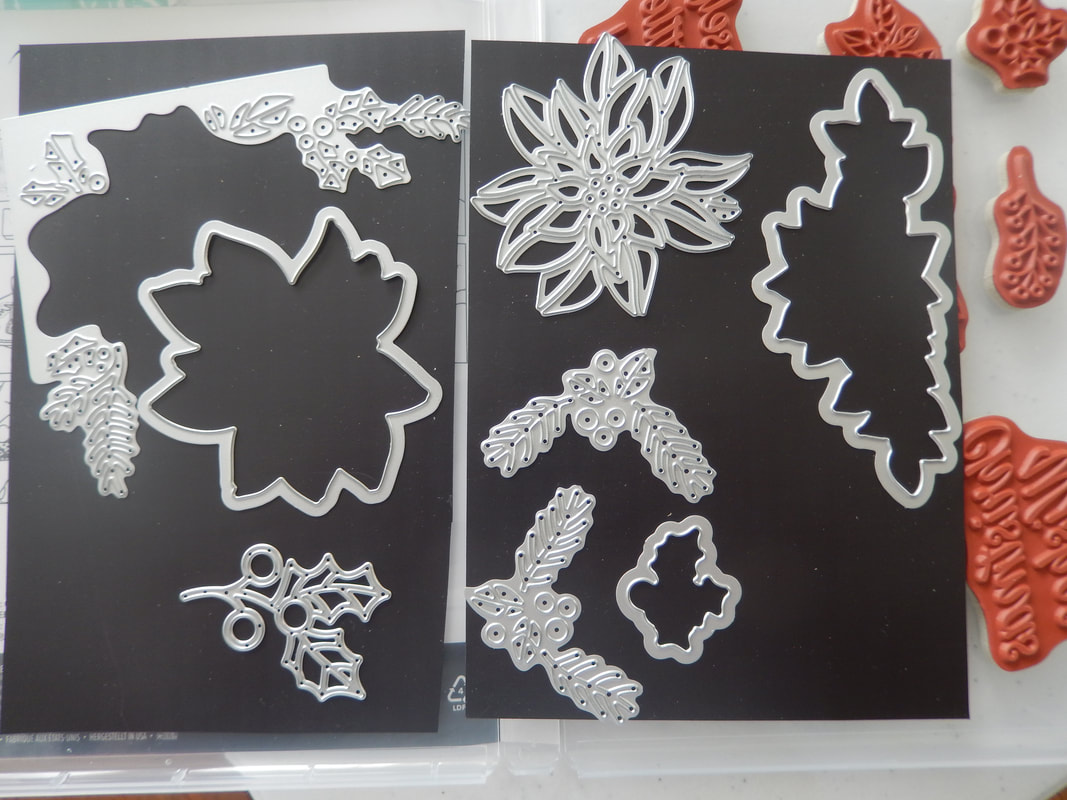
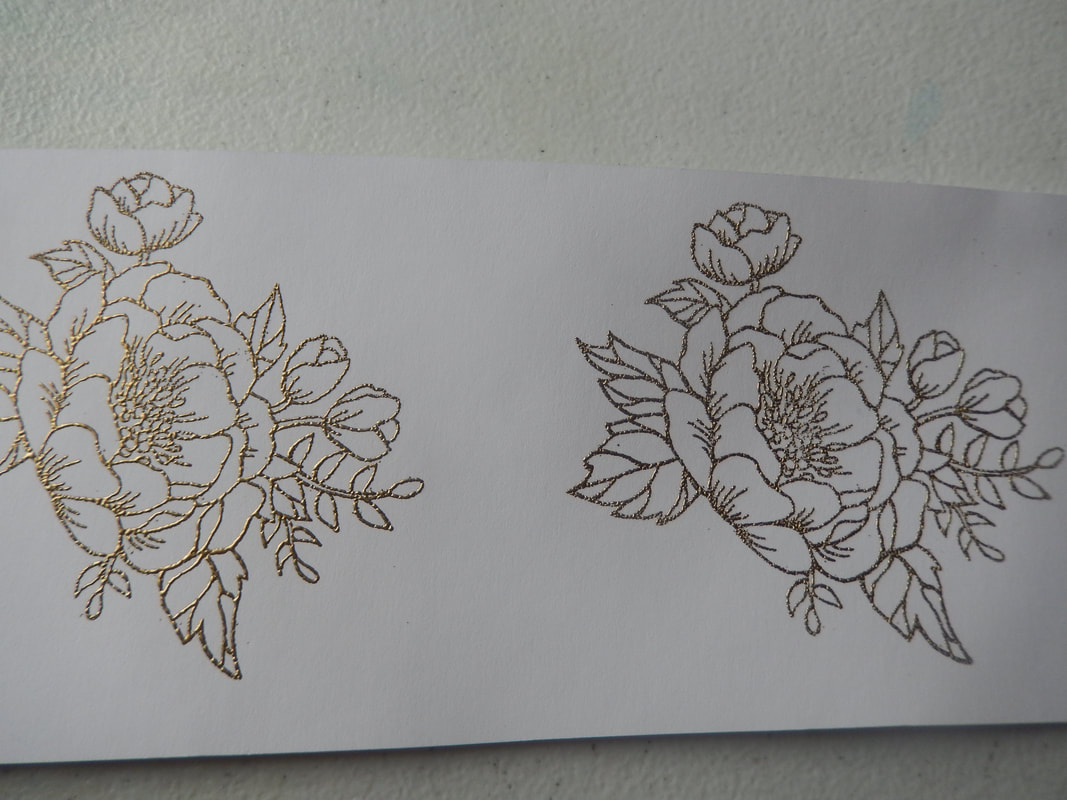
The first pictures shows the poinsettia dies, the outline and the fancy one. I made marks on each to make them faster to line up when using together.
The first pictures shows the poinsettia dies, the outline and the fancy one. I made marks on each to make them faster to line up when using together.
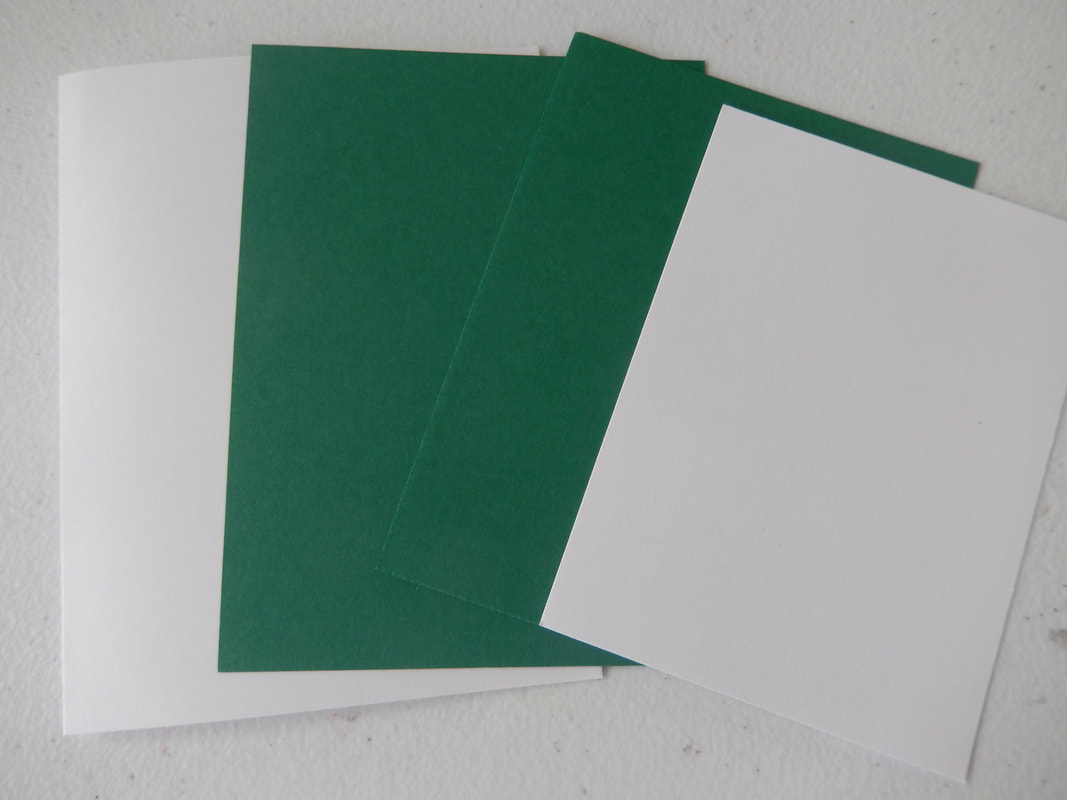

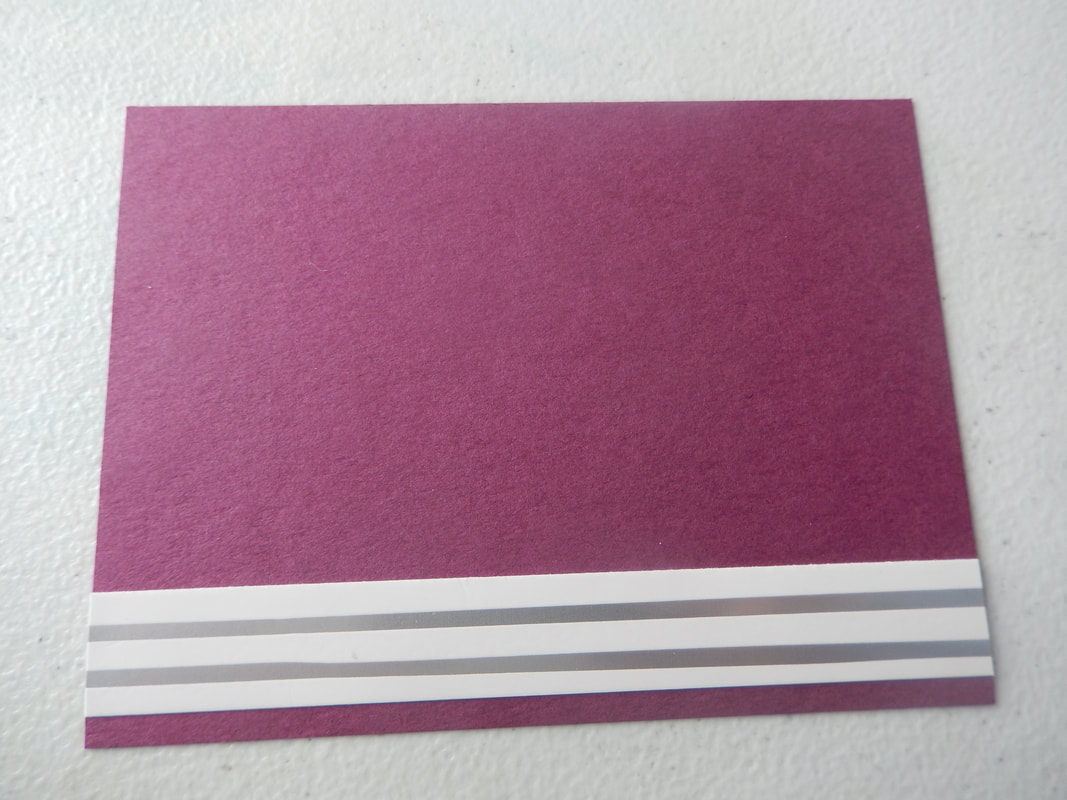
Base card is white, 8 1/2" X 5 1/2", scored at 4 1/4". The front mat is Shaded Spruce, 5 1/4" X 4". Inside Shaded Spruce mat is 5 1/4" X 4" and the white mat is 5 " X 3 3/4".
The second picture shows the inside mats put together and stamped.
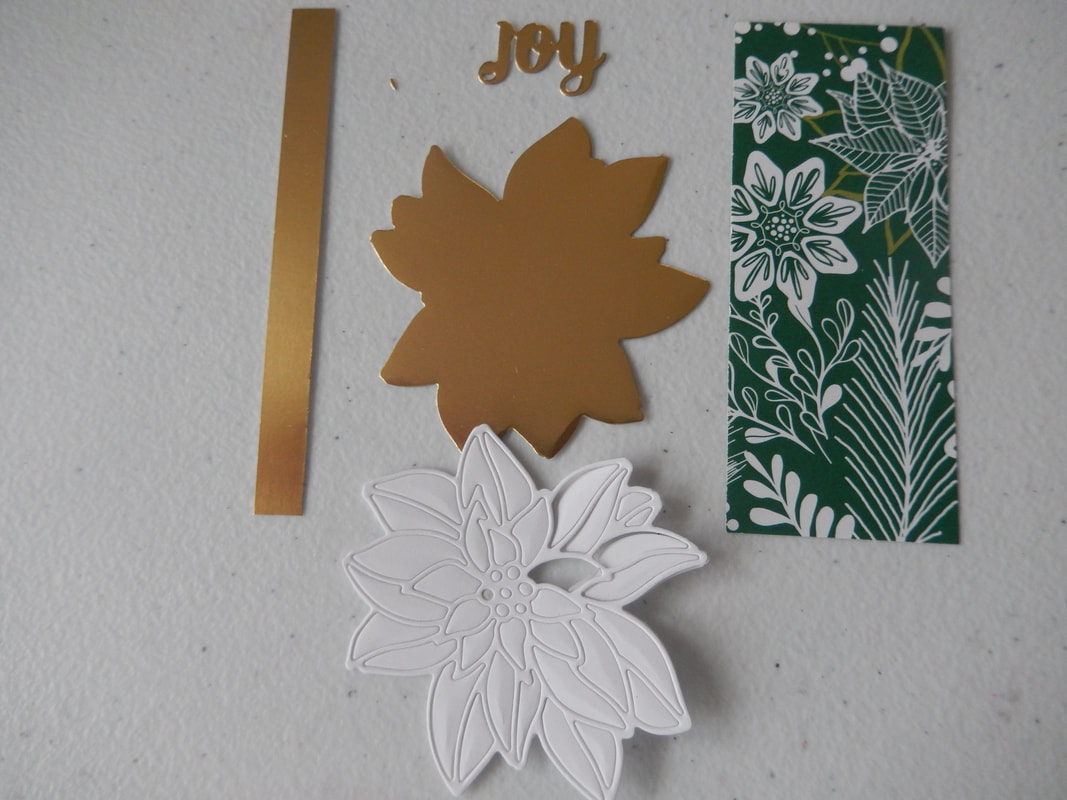
The third picture shows the added pieces needed....gold strip-4" X 1/4", gold solid poinsettia, Adhered backed white fancy poinsettia, gold JOY die cut, and DSP from Under the Mistletoe-4" X 1 1/2".
The second picture shows the inside mats put together and stamped.
The third picture shows the added pieces needed....gold strip-4" X 1/4", gold solid poinsettia, Adhered backed white fancy poinsettia, gold JOY die cut, and DSP from Under the Mistletoe-4" X 1 1/2".
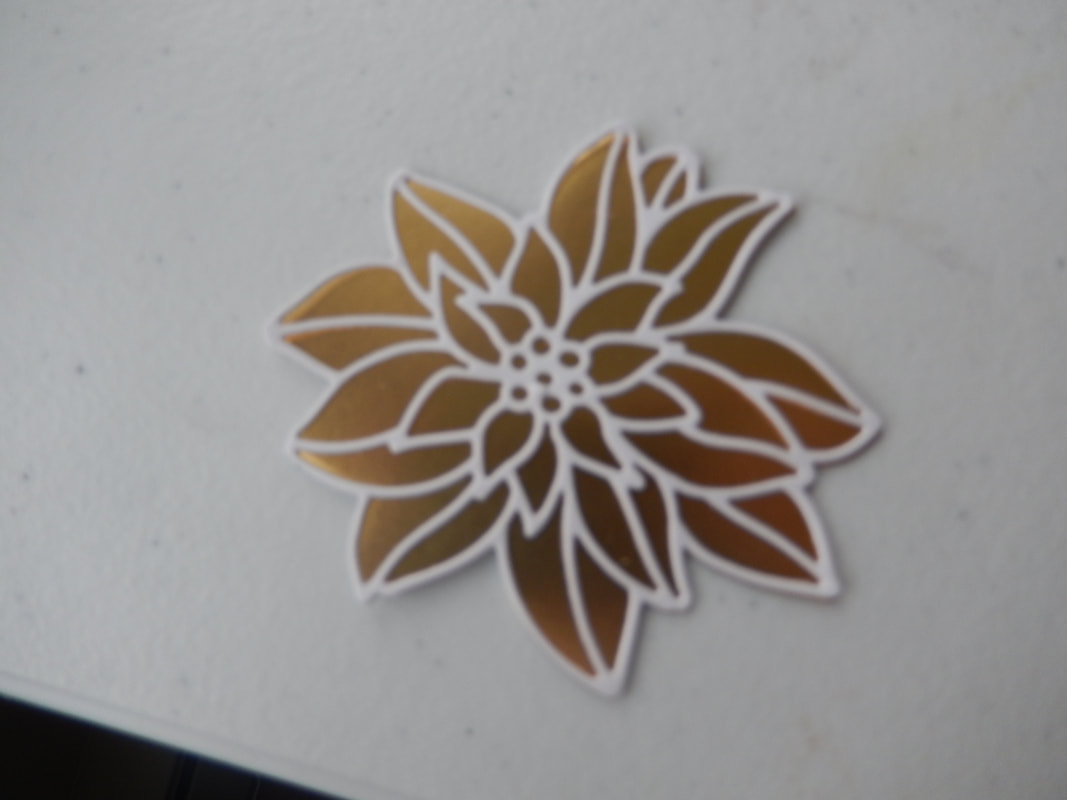

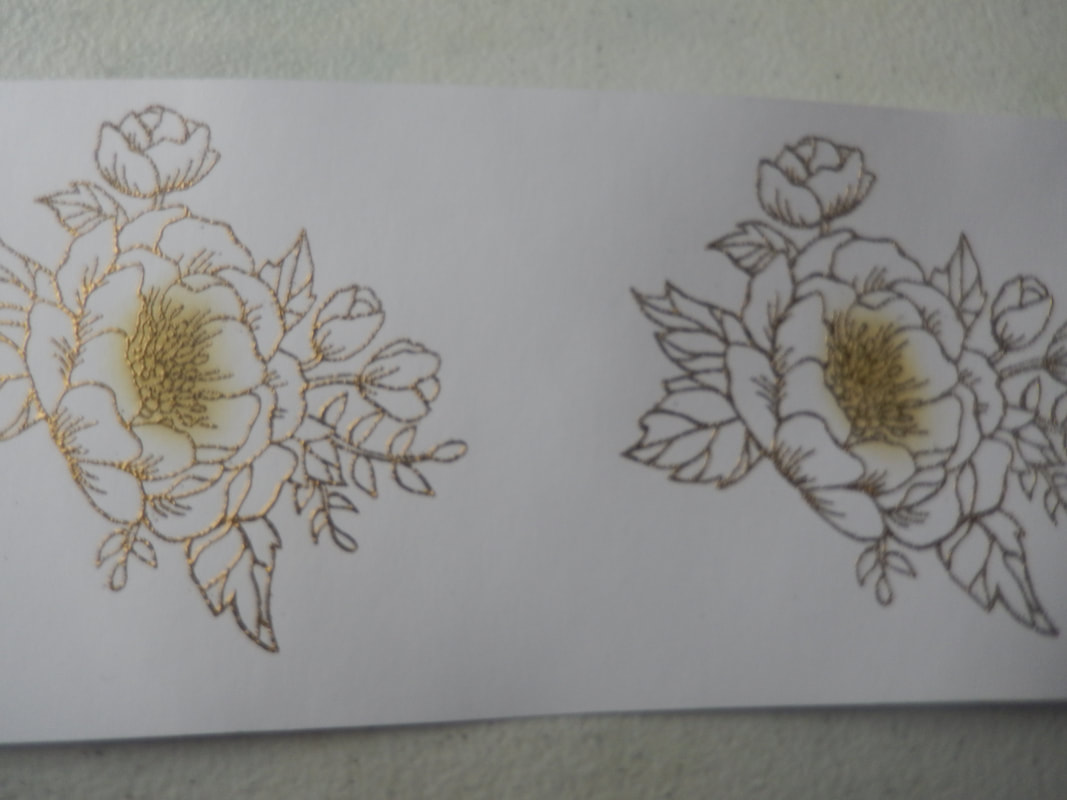
The first picture shows how it looks with the white overlay on the gold base for the poinsettia.
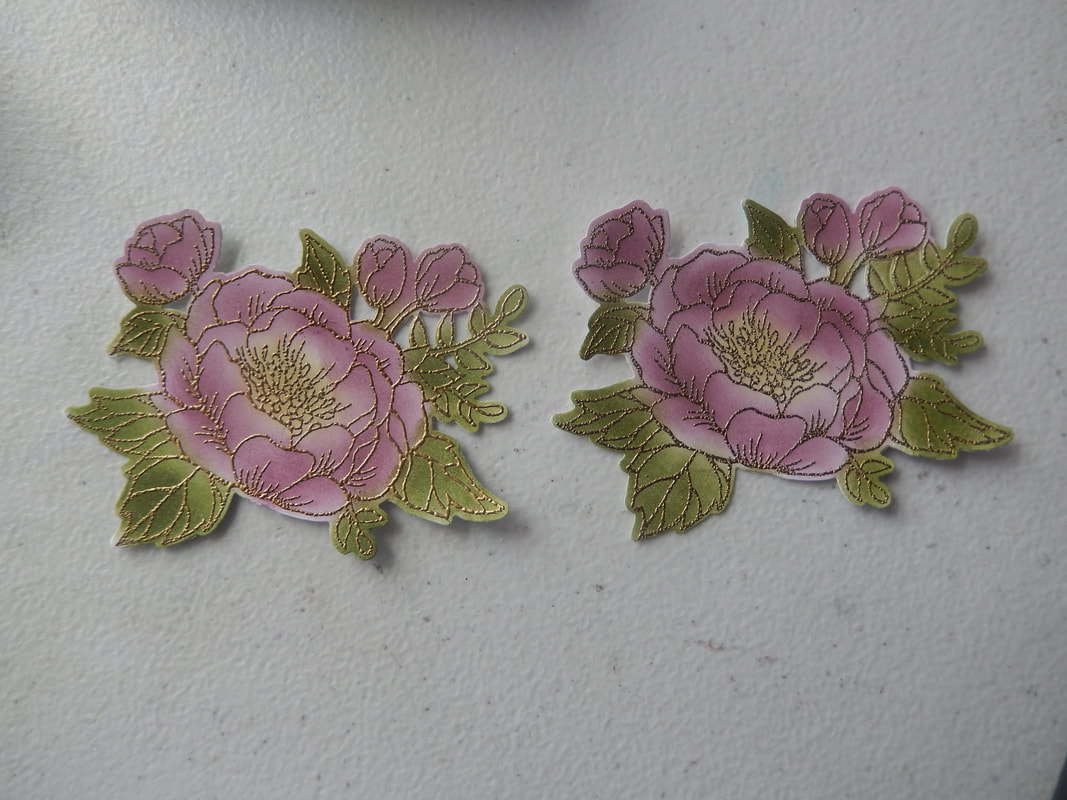
The last card shows the finished outside card. I 3D'd the poinsettia.
The last card shows the finished outside card. I 3D'd the poinsettia.
Tutorial # 4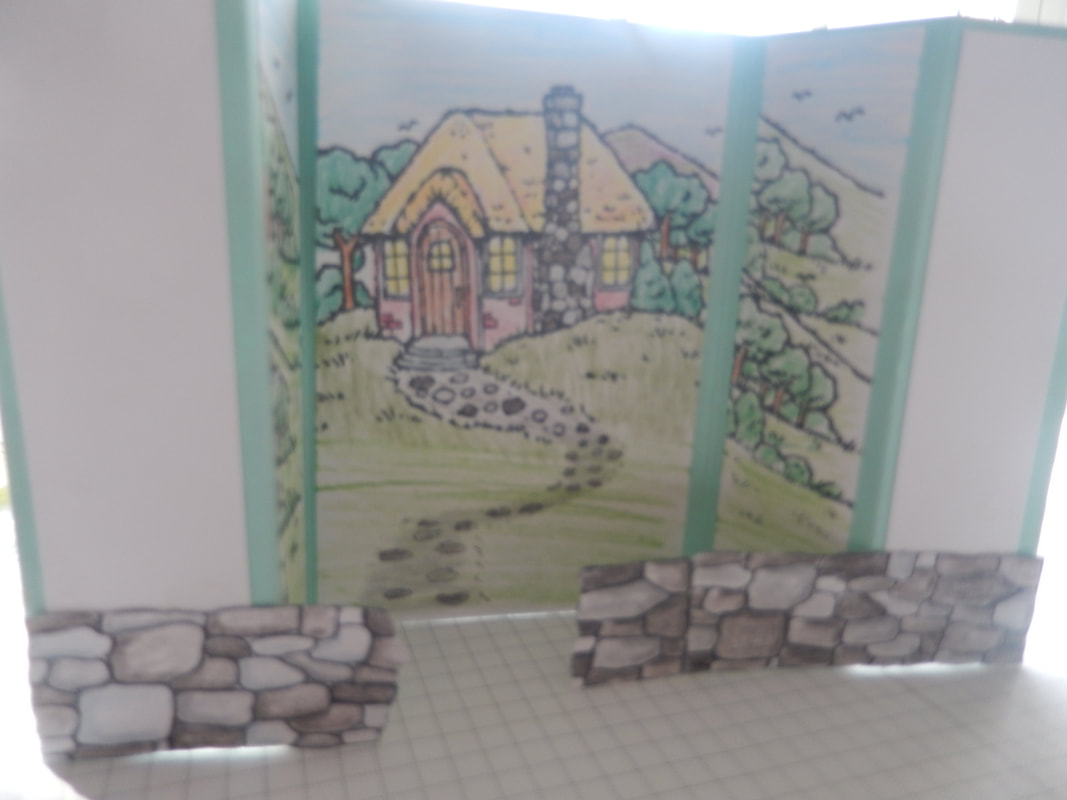
|
|
|
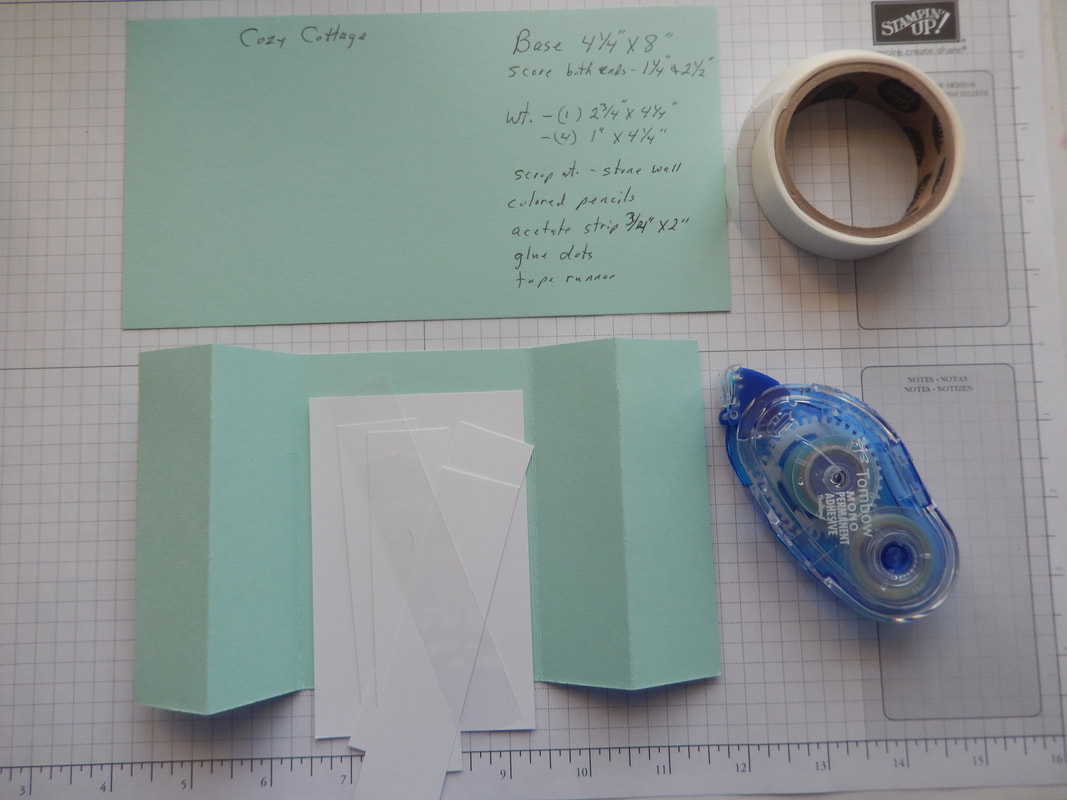
This is the Cozy Cottage Host Stamp from 2017-2018 Stampin' Up.
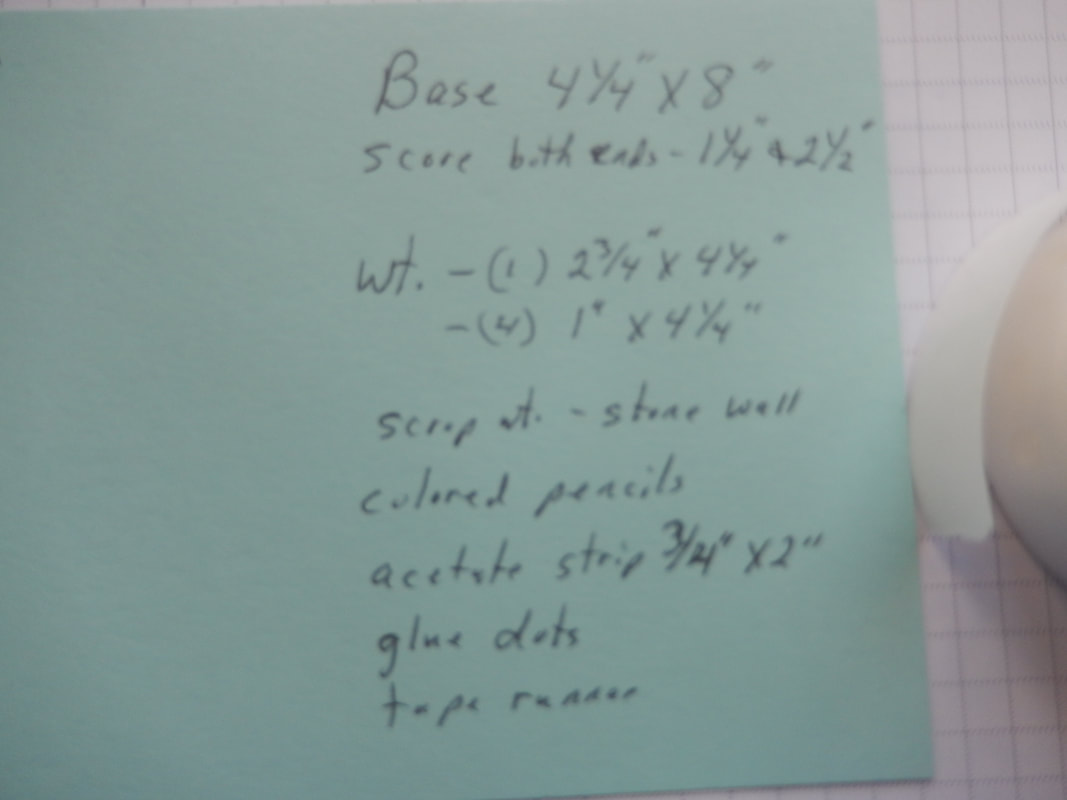
The base card is 4 1/4" X 8"
white: (1) 2 3/4" X 4 1/4"
(4) 1" X 4 1/4"
Scrap of white for wall
colored pencils
Acetage strip 3/4"X 2"
Glue dots
Tape runner
Score the base card at 1 1/4" and 2 1/2" on both ends.
The base card is 4 1/4" X 8"
white: (1) 2 3/4" X 4 1/4"
(4) 1" X 4 1/4"
Scrap of white for wall
colored pencils
Acetage strip 3/4"X 2"
Glue dots
Tape runner
Score the base card at 1 1/4" and 2 1/2" on both ends.
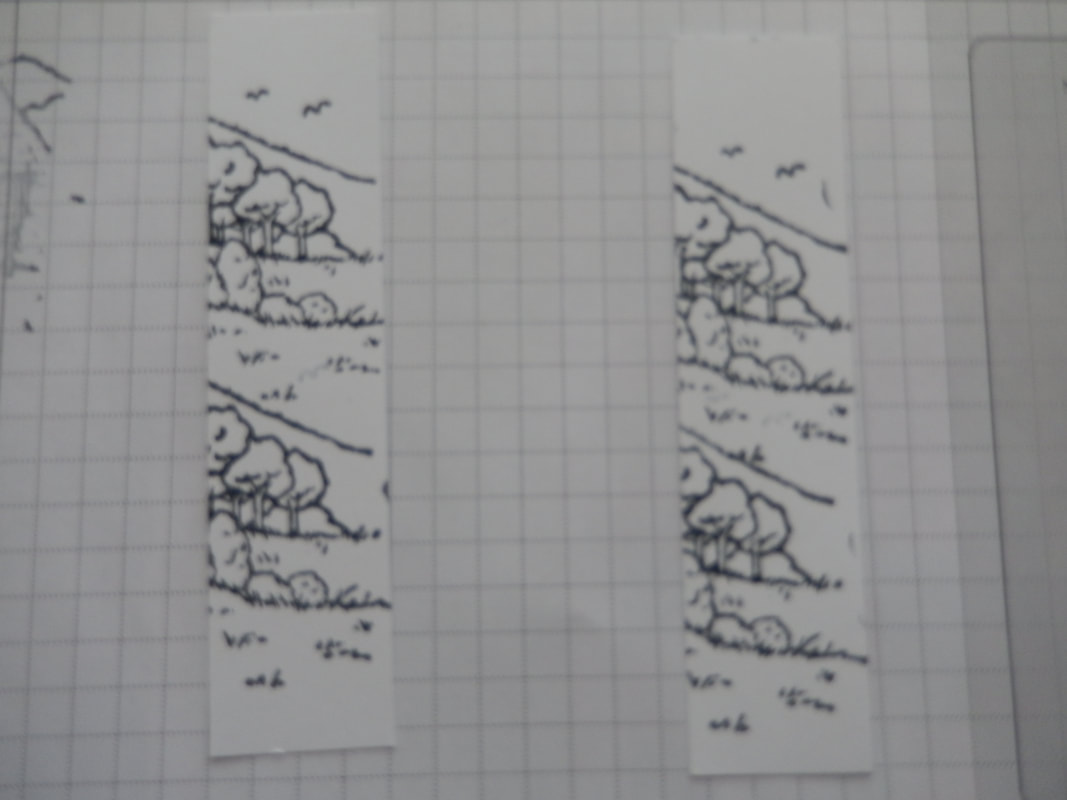
Stamp a partial image onto 2 of your white strips.
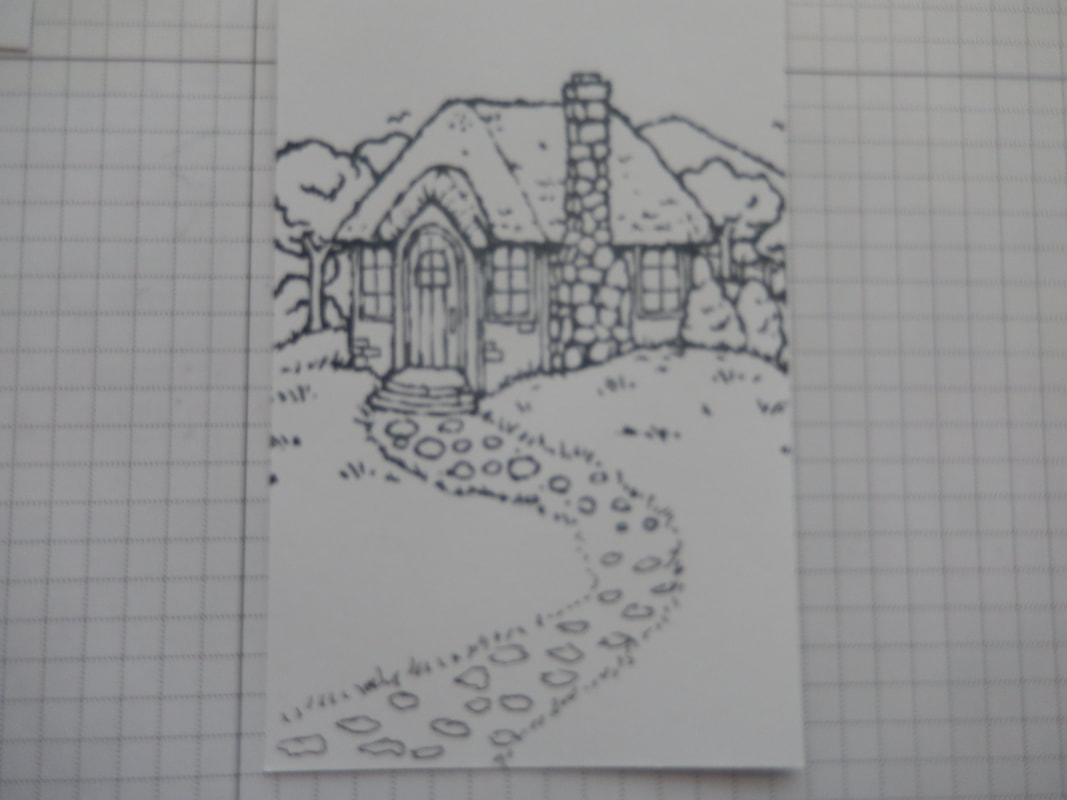
Stamp the basic image onto the 2 3/4" X 4 1/4" mat, closer to the top and then continue the path down to the bottom.
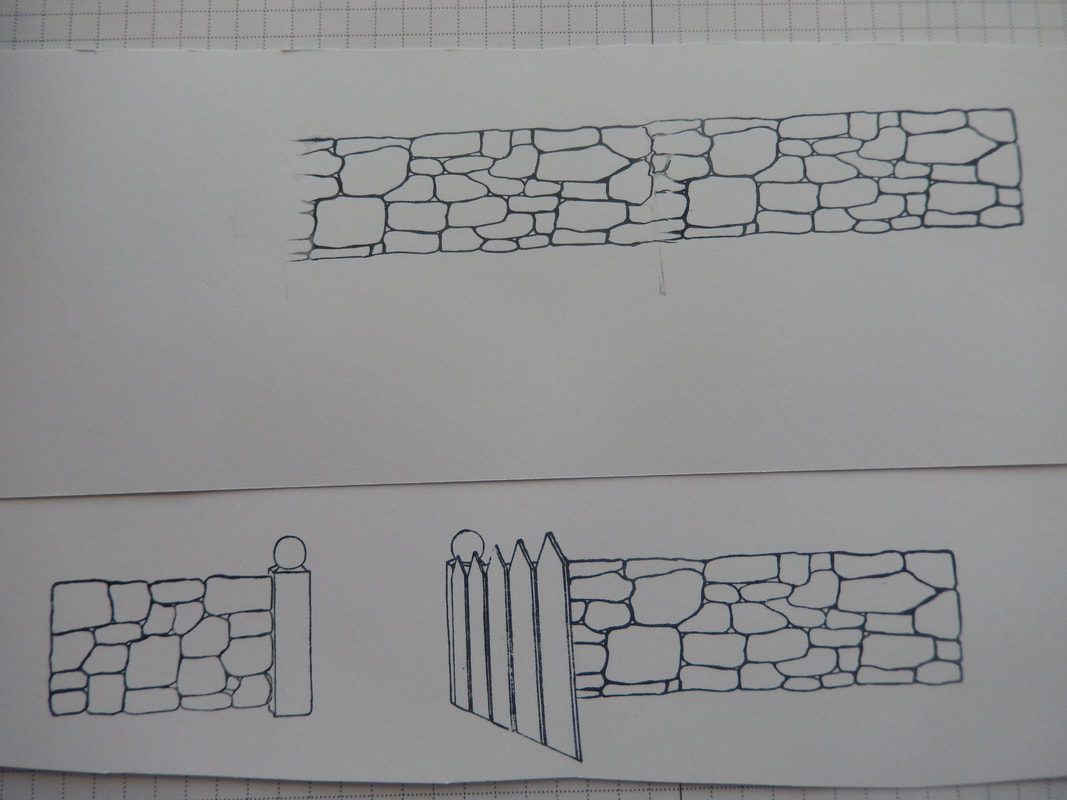
I stamped the stone wall as is (from another company to have a larger image) and then doubled up on part of the wall.
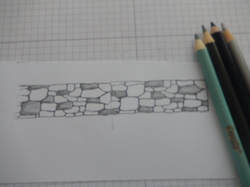
I used several grays and a black to color in the stone walls. This one shows how I did the first color.
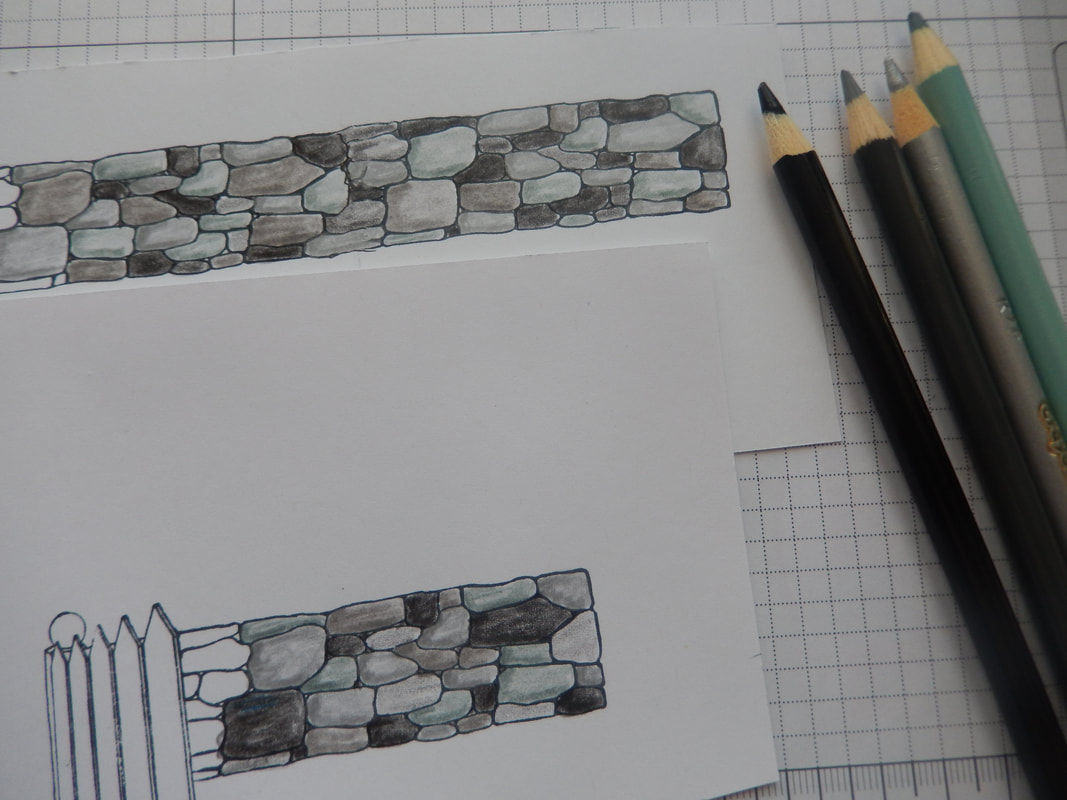
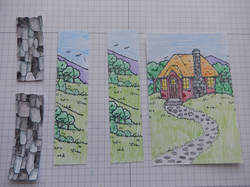
This shows all the coloring done and the wall pieces cut out.
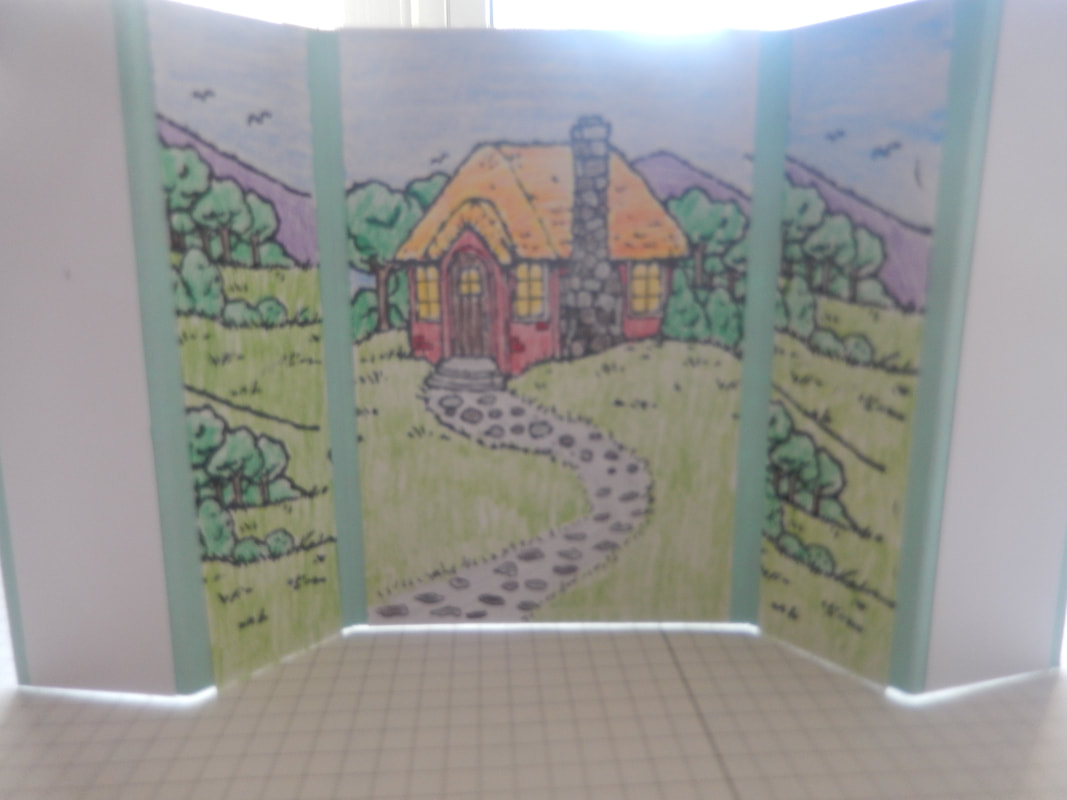
I've attached the scene pieces with a tape runner.
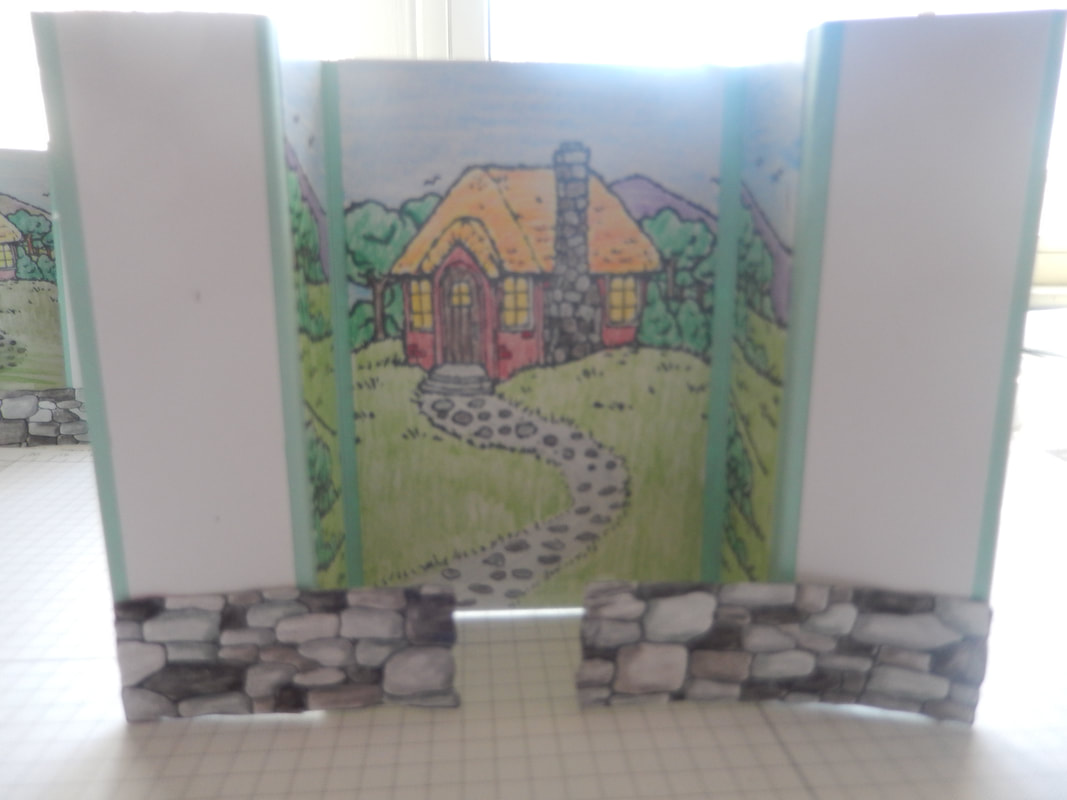
I used glue dots behind the wall to attach the strip of acetate to the stone wall, then more glue dots to attach the stone wall to either side panel. You have places to stamp your greeting and write a message.
Hope you liked this tutorial and found it helpful. Hoping you'll drop by again. Thank you for visiting. Happy Stamping!
Hope you liked this tutorial and found it helpful. Hoping you'll drop by again. Thank you for visiting. Happy Stamping!
Tutorial # 3

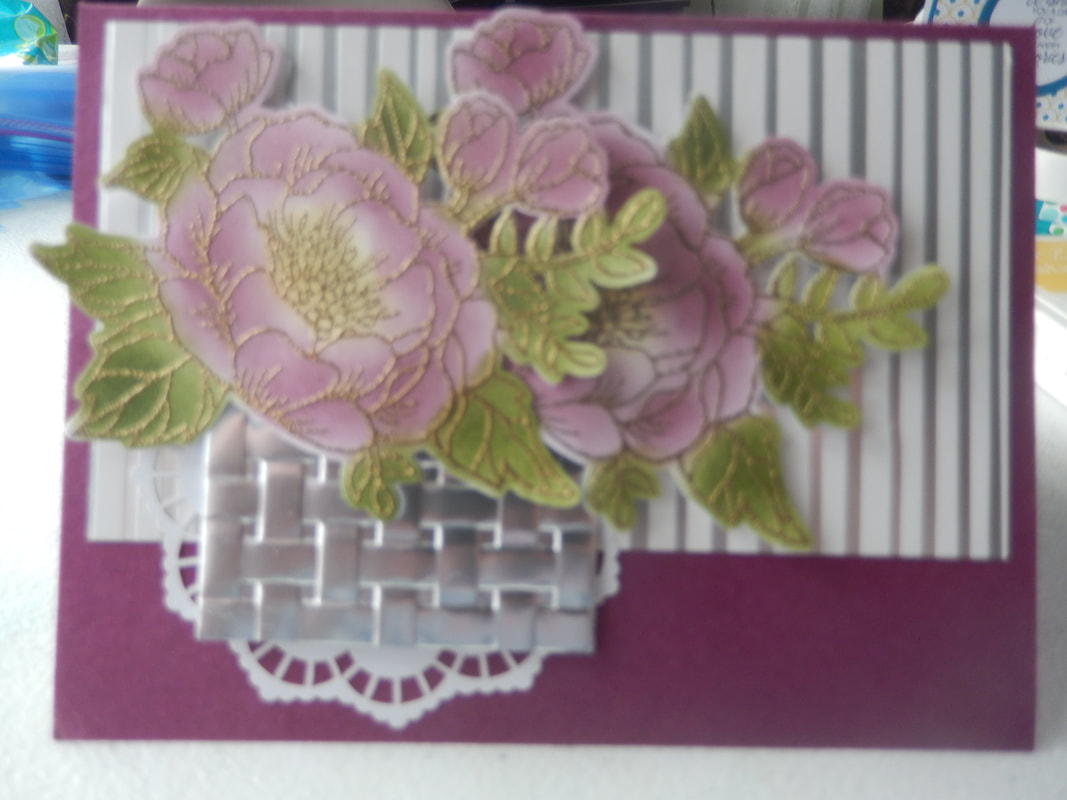
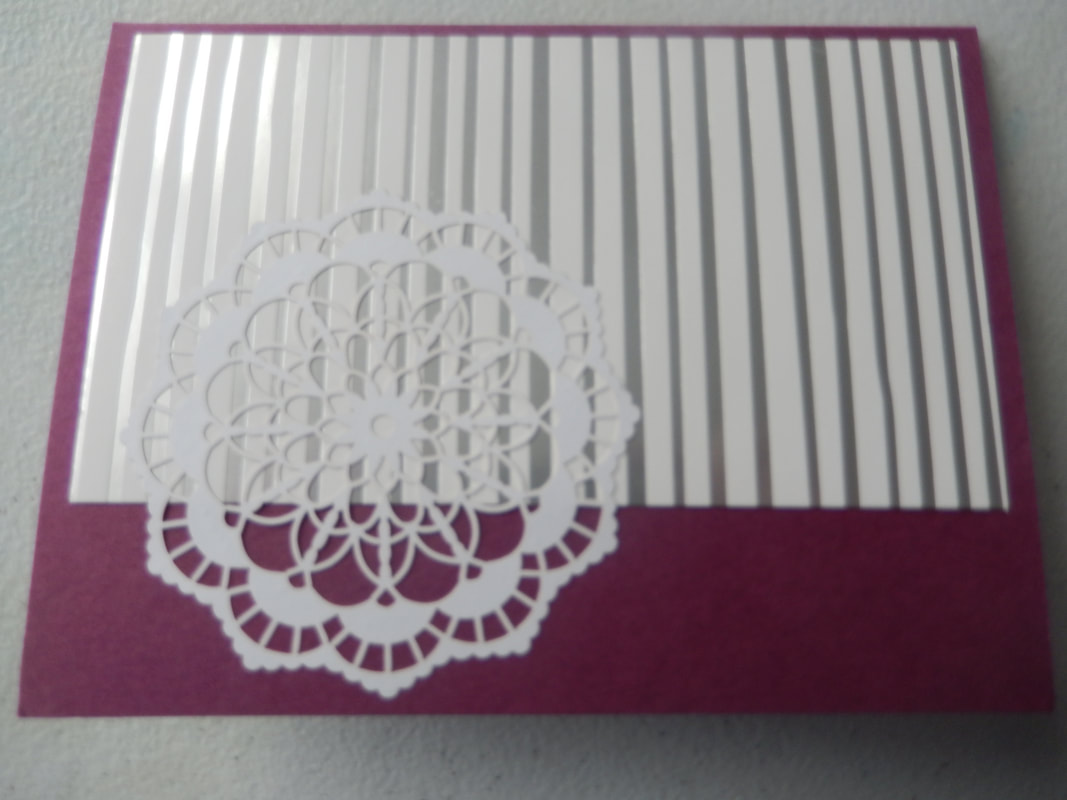
This is the card for this tutorial.

|
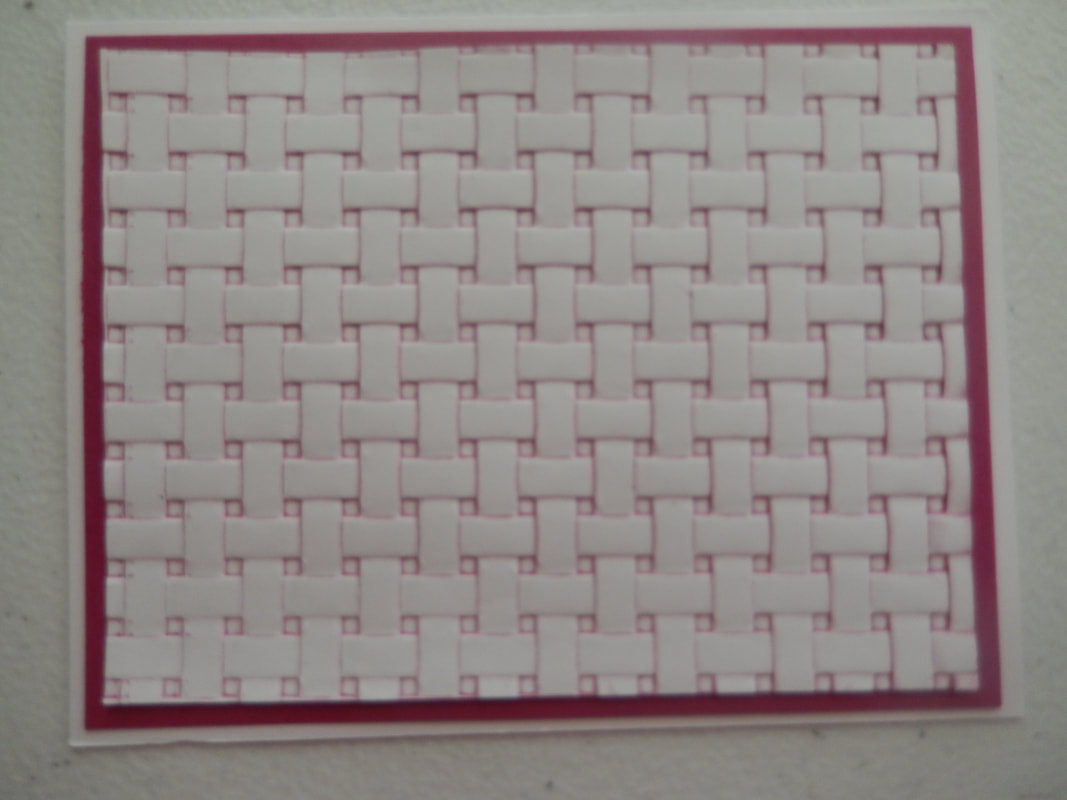
This is the foil piece after I ran it through the BS with the basket weave embossing folder.
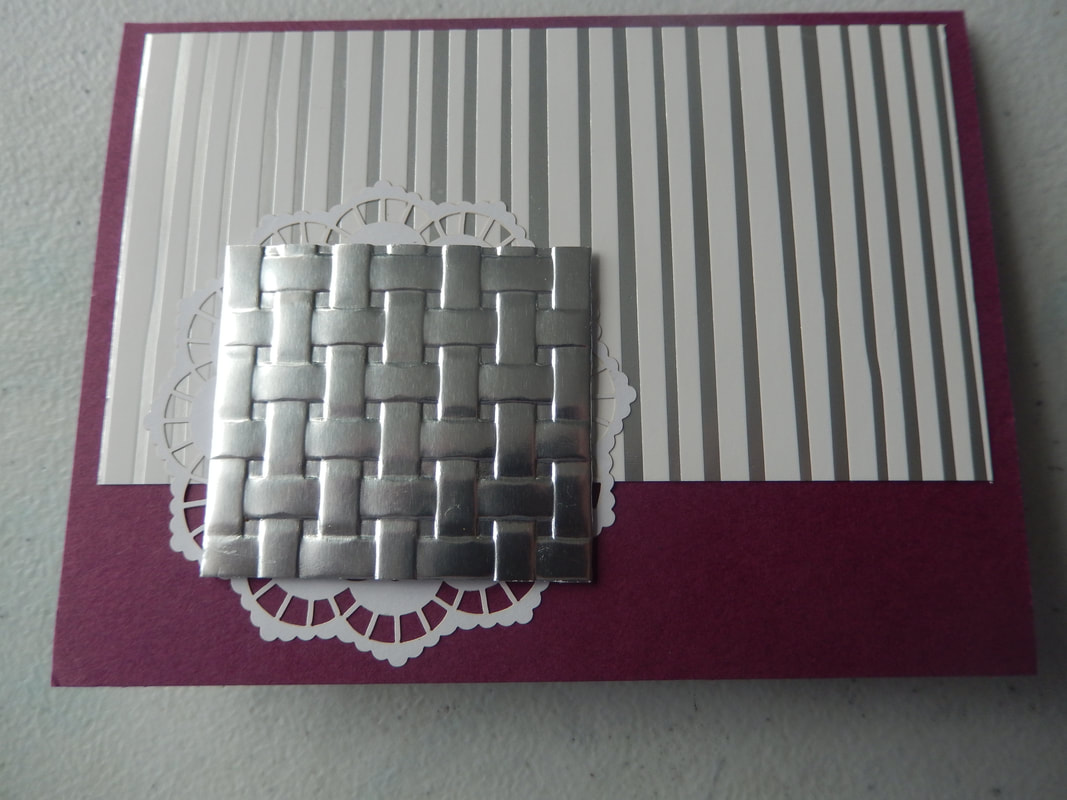
Here I added the foil basket by putting a couple 3D dots in the middle and adhesive on the right and left folded under edges.
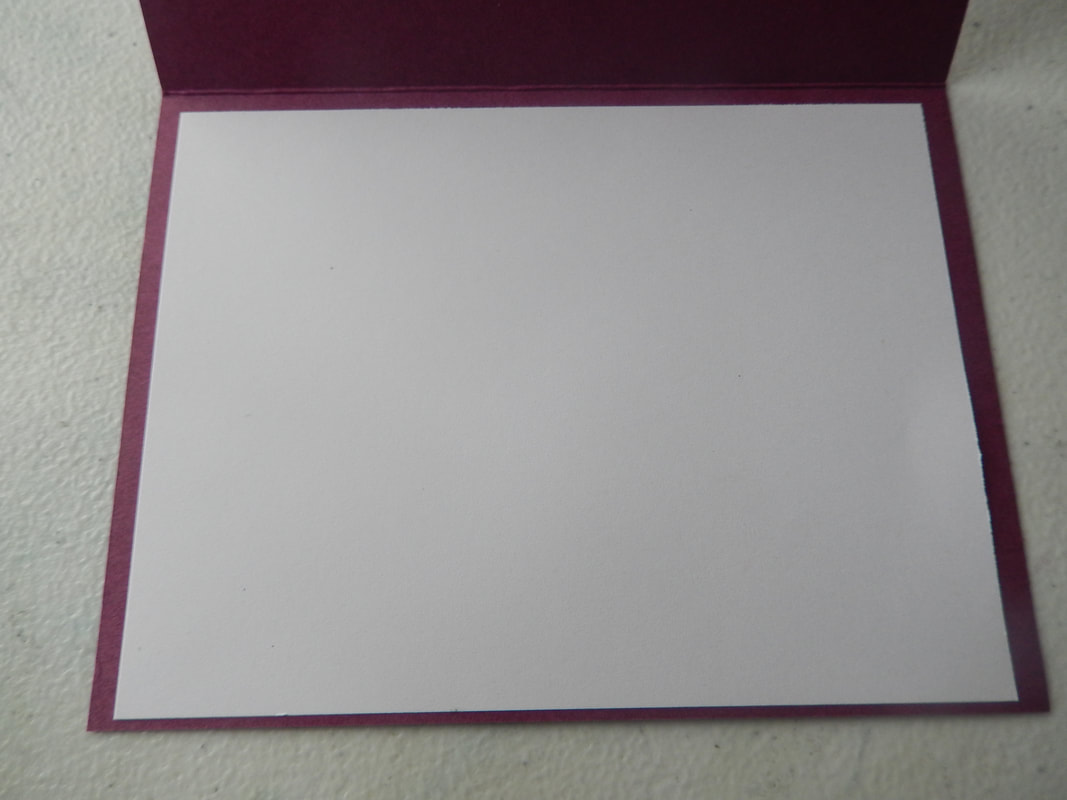
I added a narrow strip of the foil paper to the Rich Razzleberry mat for the inside.
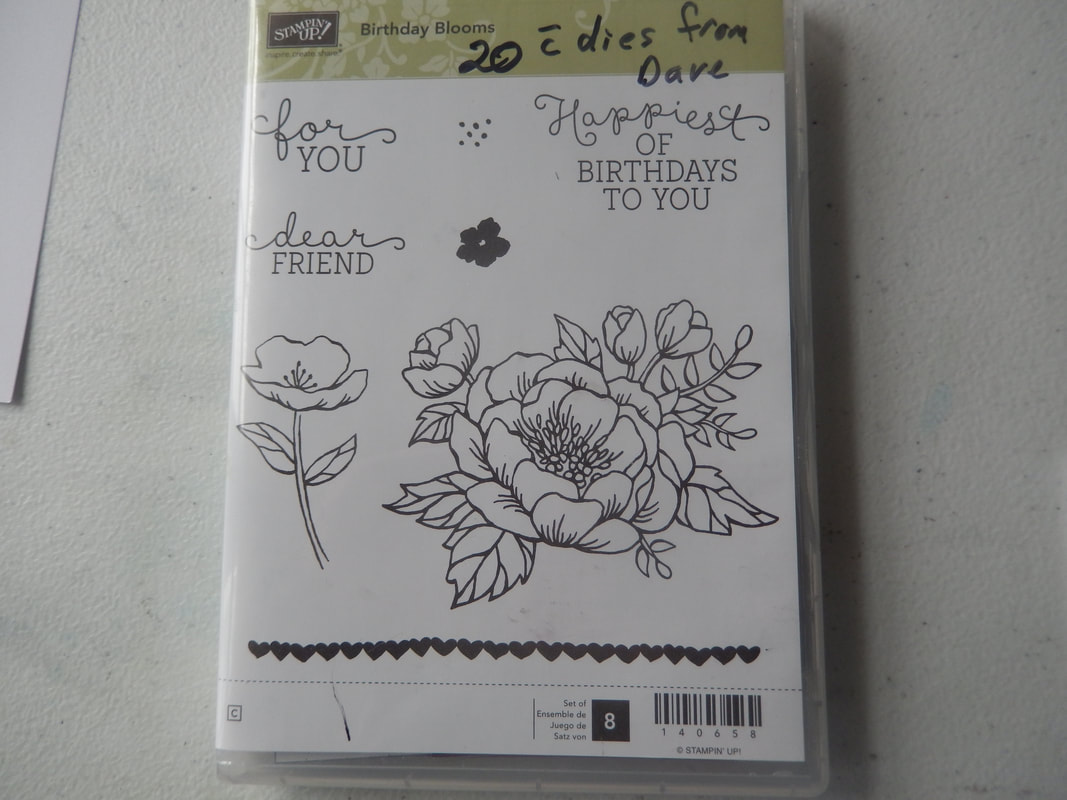
I used the Birthday Blooms stamp set on this card.
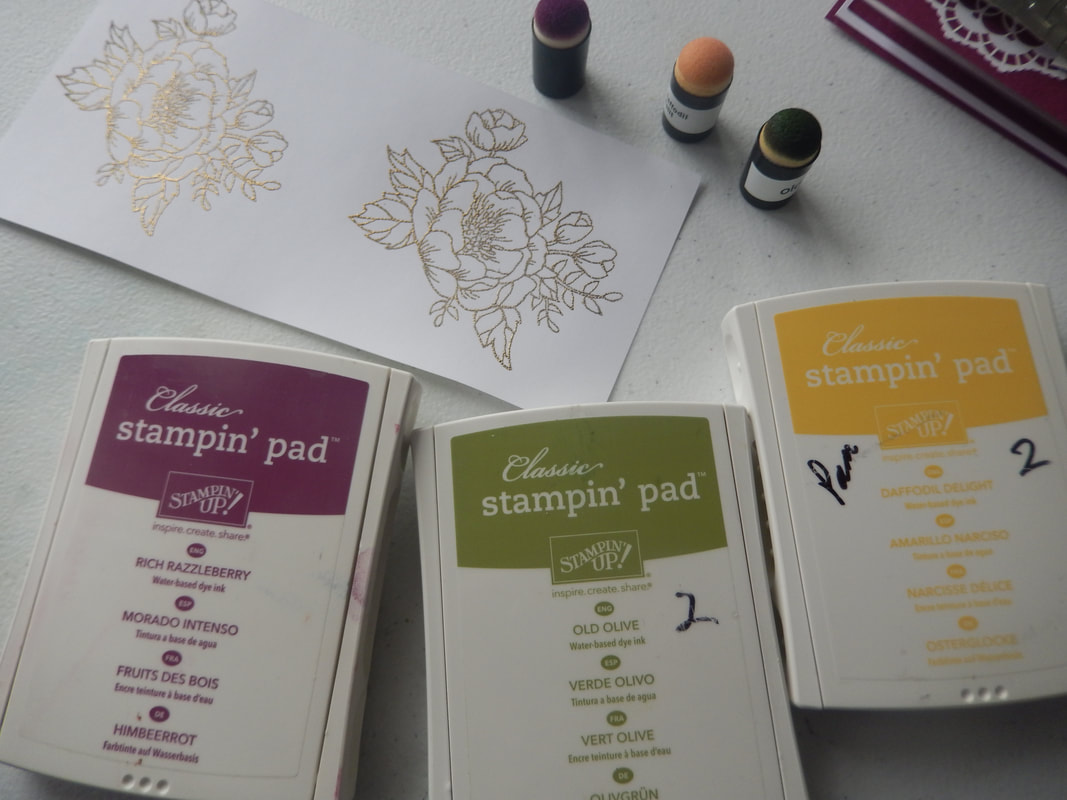
I used Rich Razzleberry, Old Olive, and Daffodil Delight inks with sponge daubers to add color.
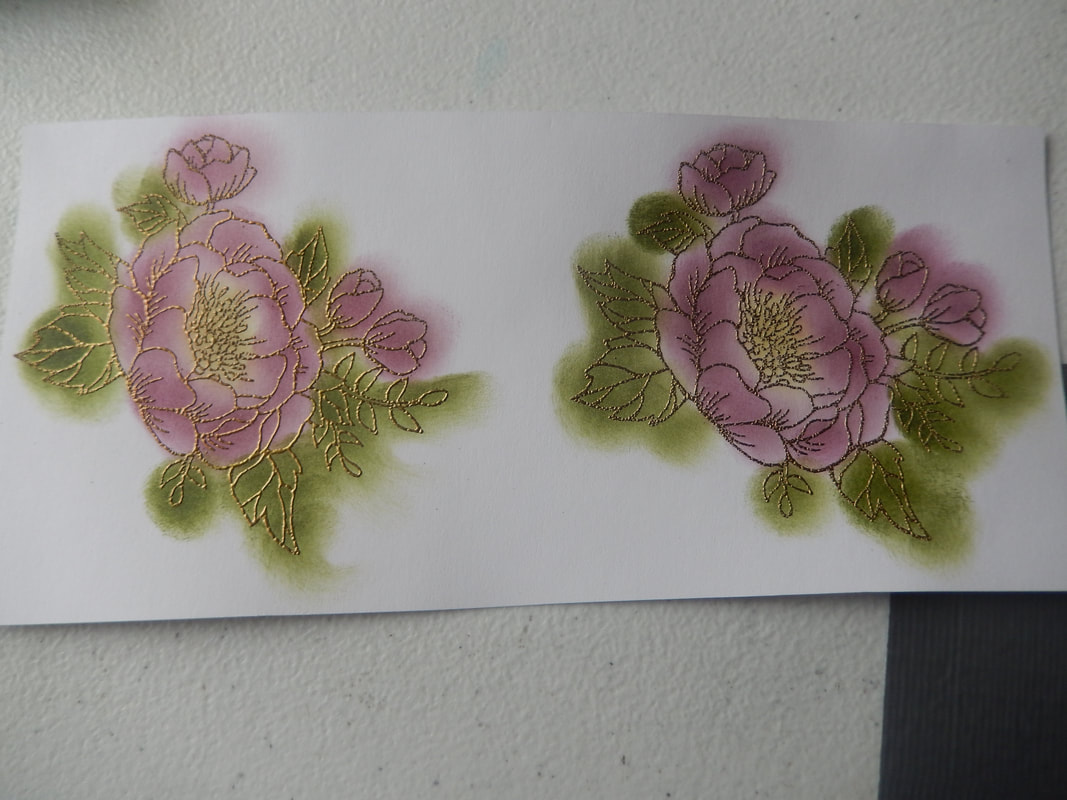
This is how it looks before cutting them out. Looks messy but just watch!
Here is the finished card. Hope you will try this.
Thank you for visiting. Hope you will stop by again. |

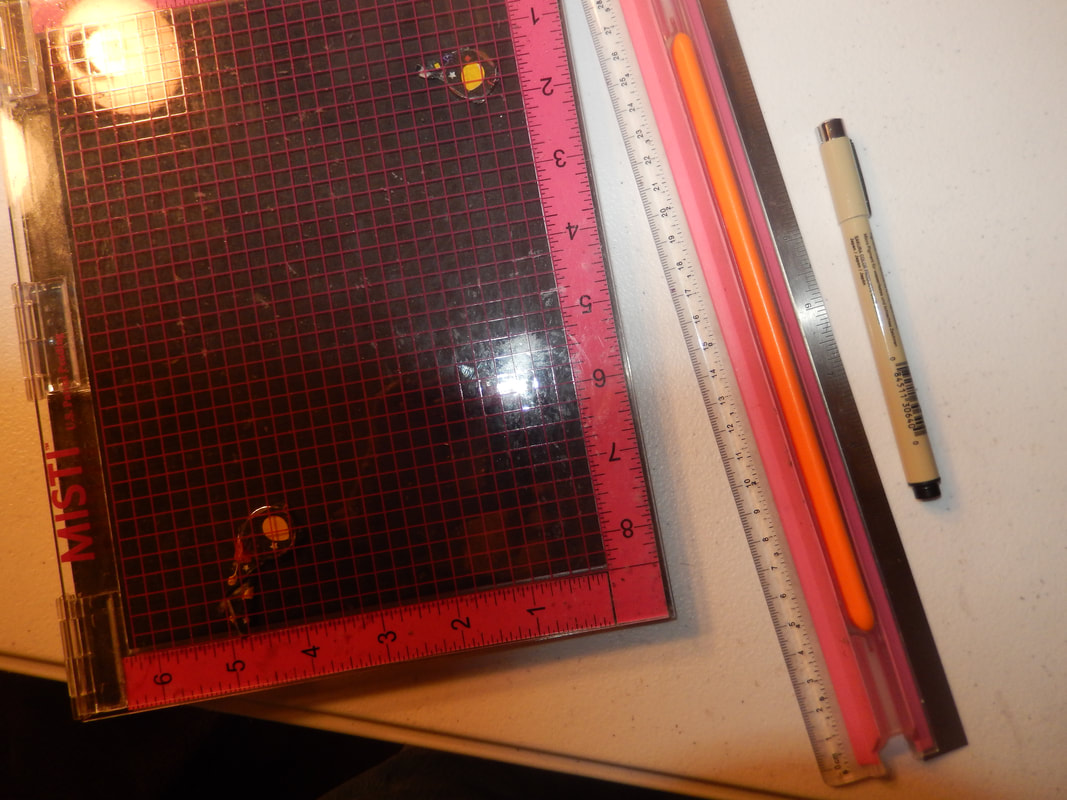
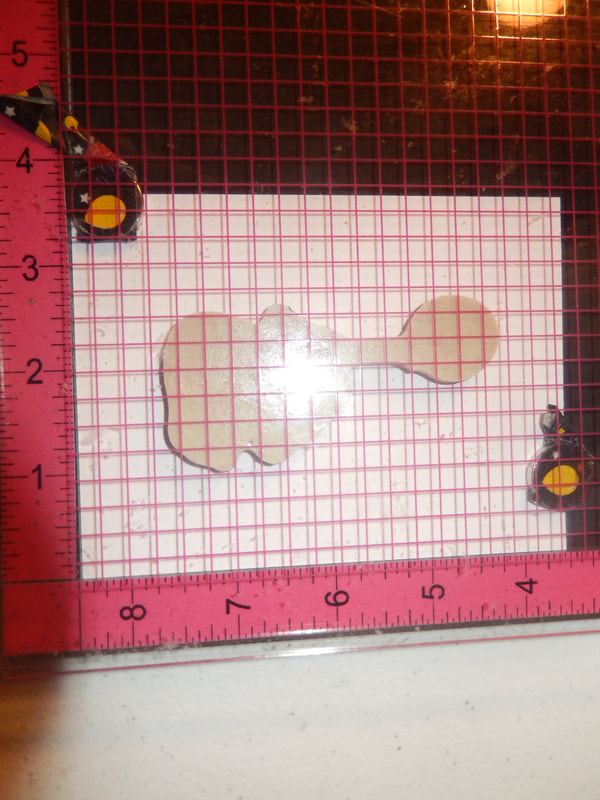
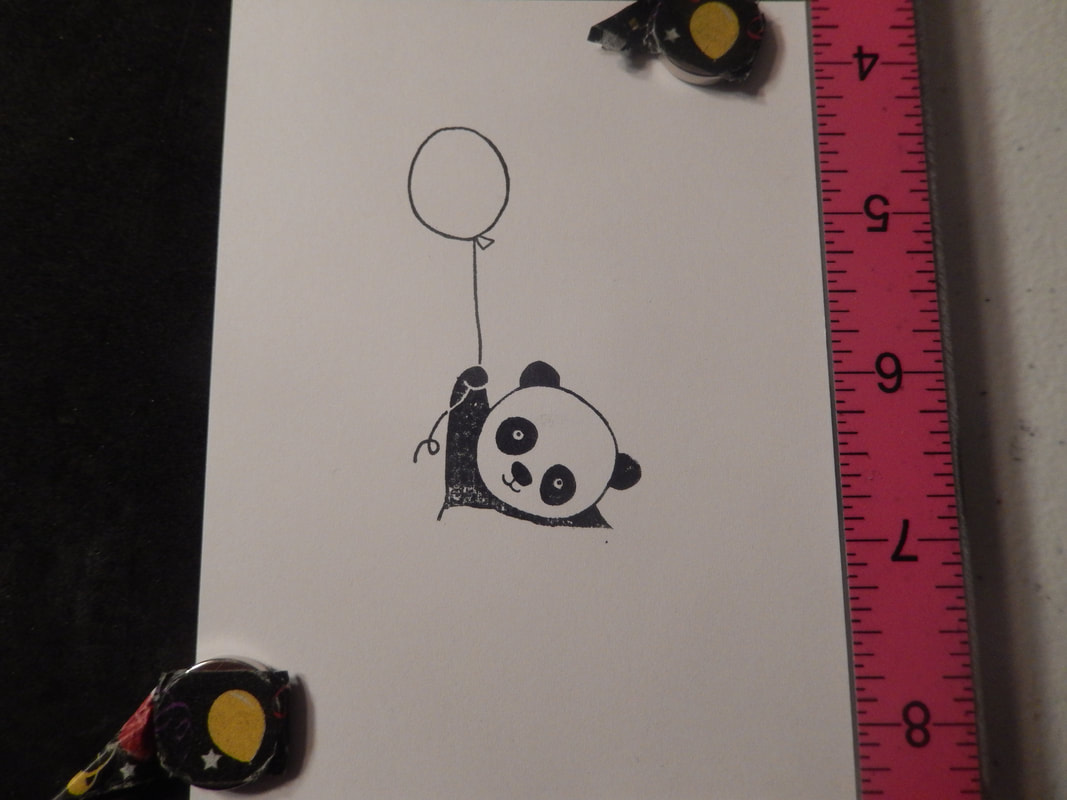
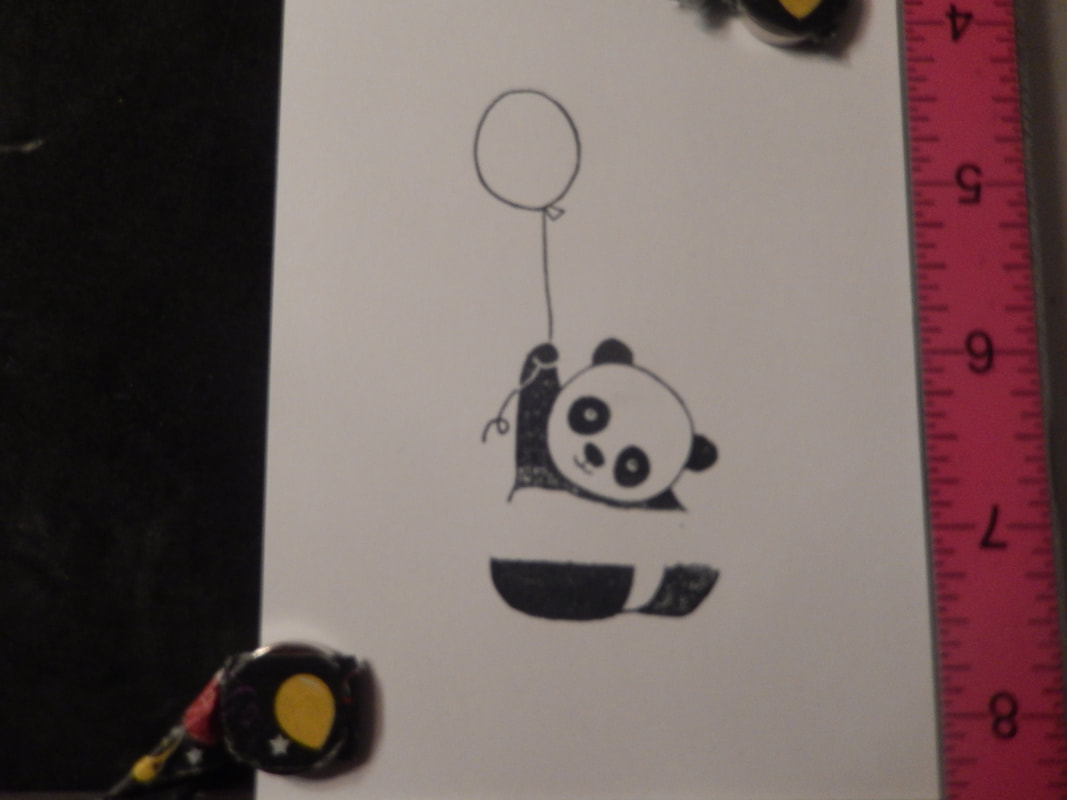
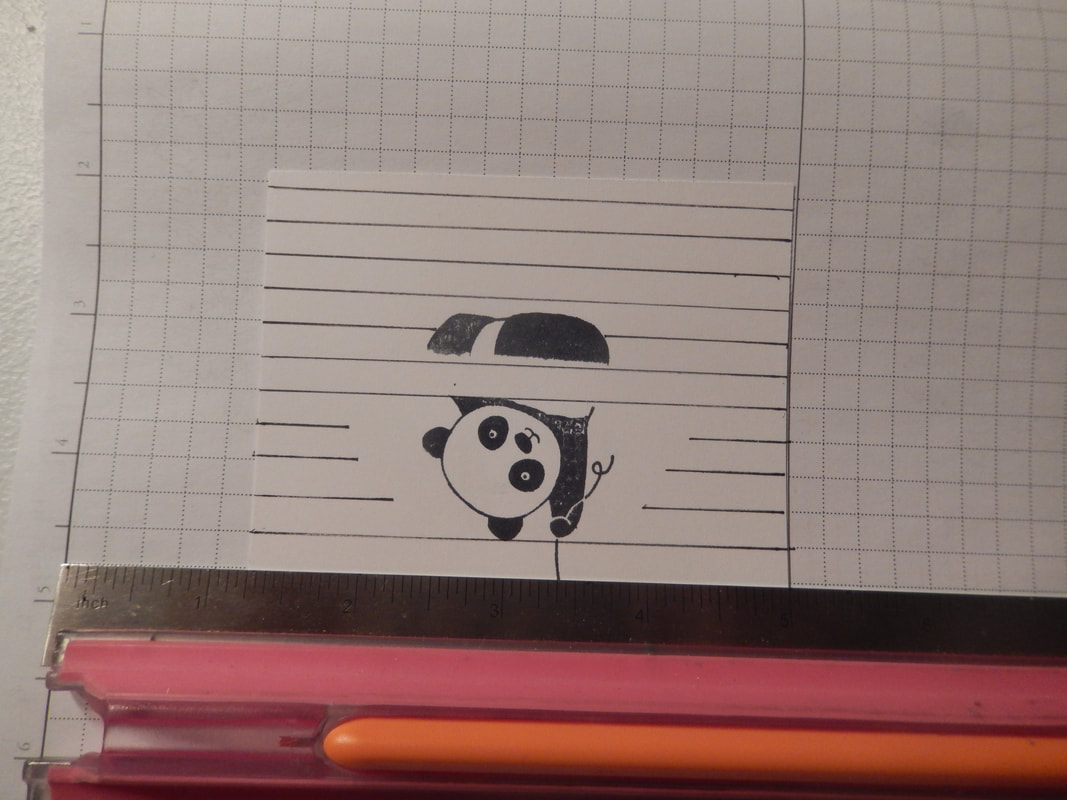
I used my Misti, a ruler and a black pen. I put my panda image on my paper, about in the middle. |
|
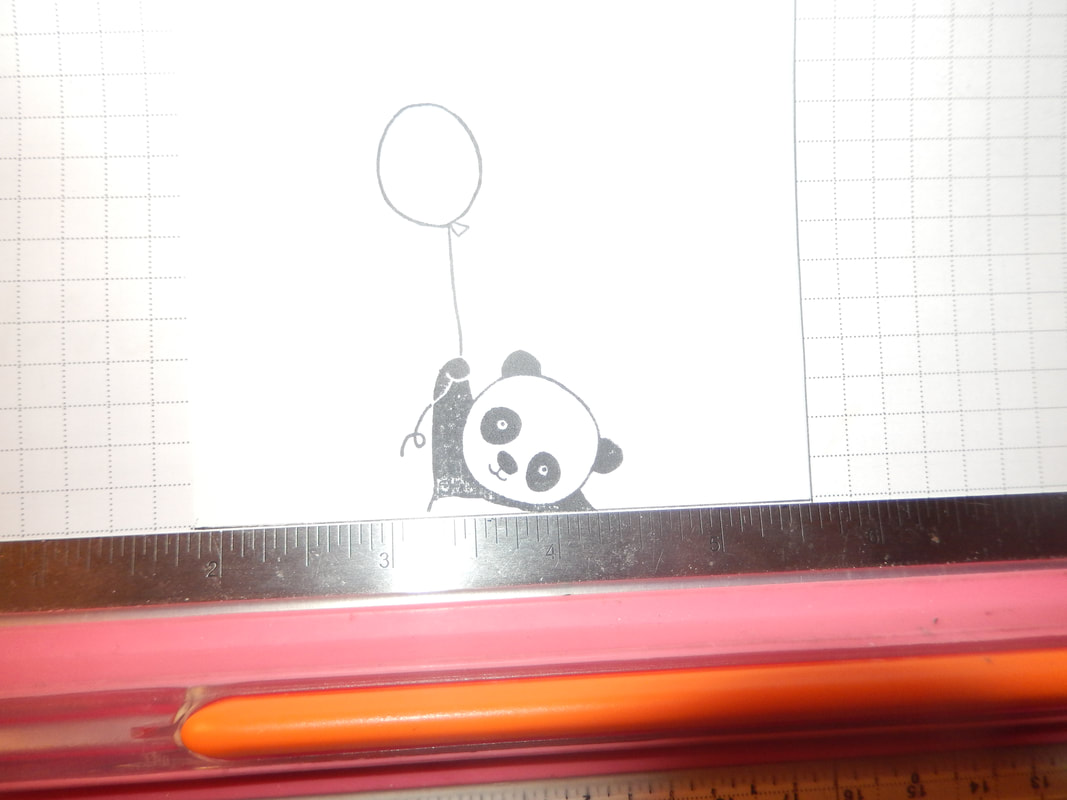
I inked up just the top part and tried to make it
as straight across as possible. Then I stamped it onto my work area. You can fill in the lighter parts later. |
|
|
|
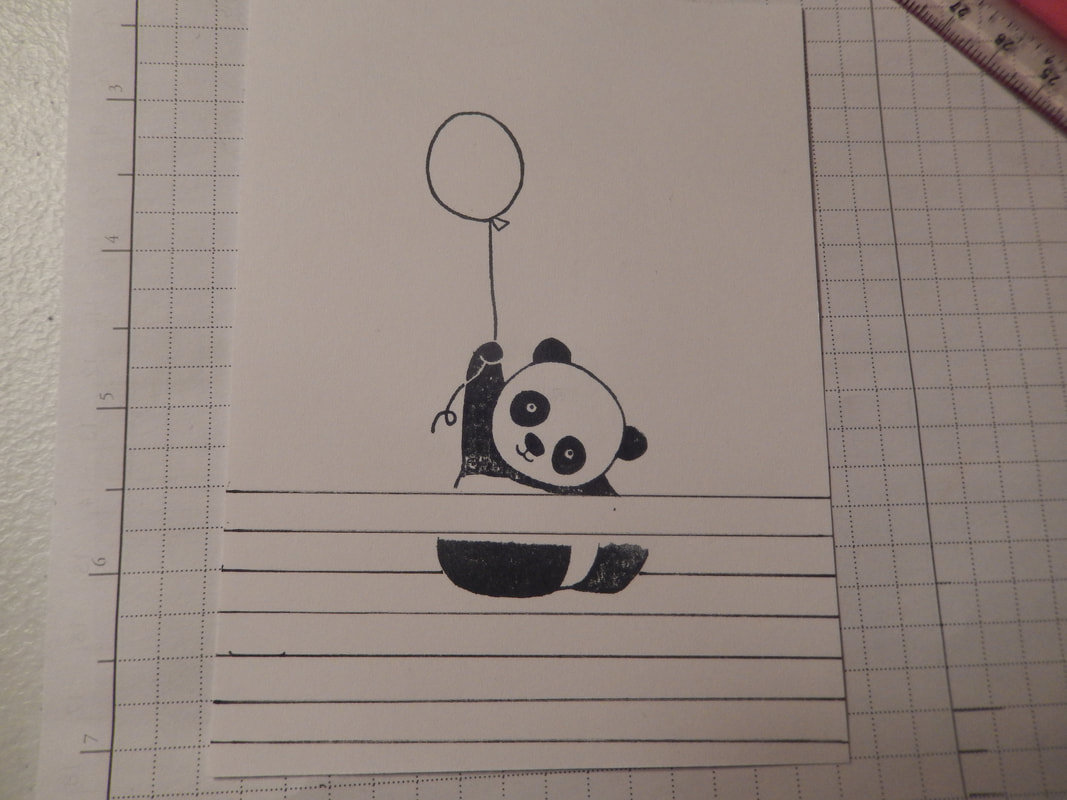
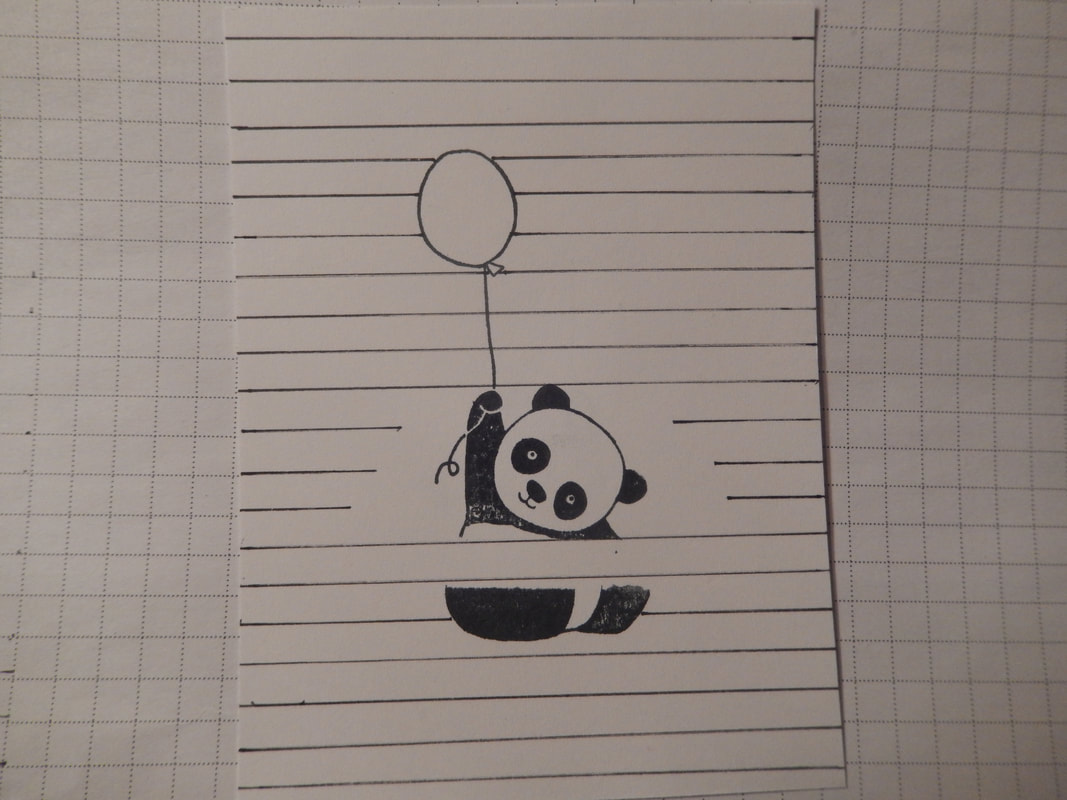
I did the same with the bottom portion of the stamp,
leaving the middle blank.
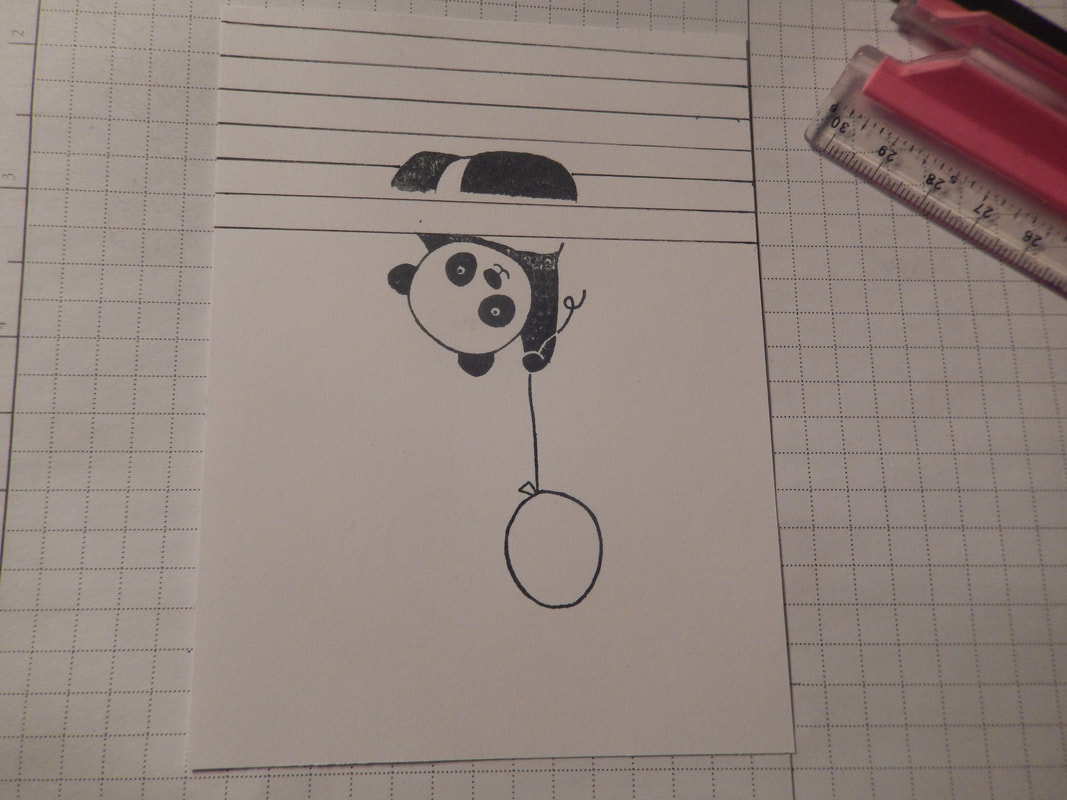
Put your mat onto graph paper so you can draw straight lines.
Start drawing where the top part of your image ends.
leaving the middle blank.
Put your mat onto graph paper so you can draw straight lines.
Start drawing where the top part of your image ends.
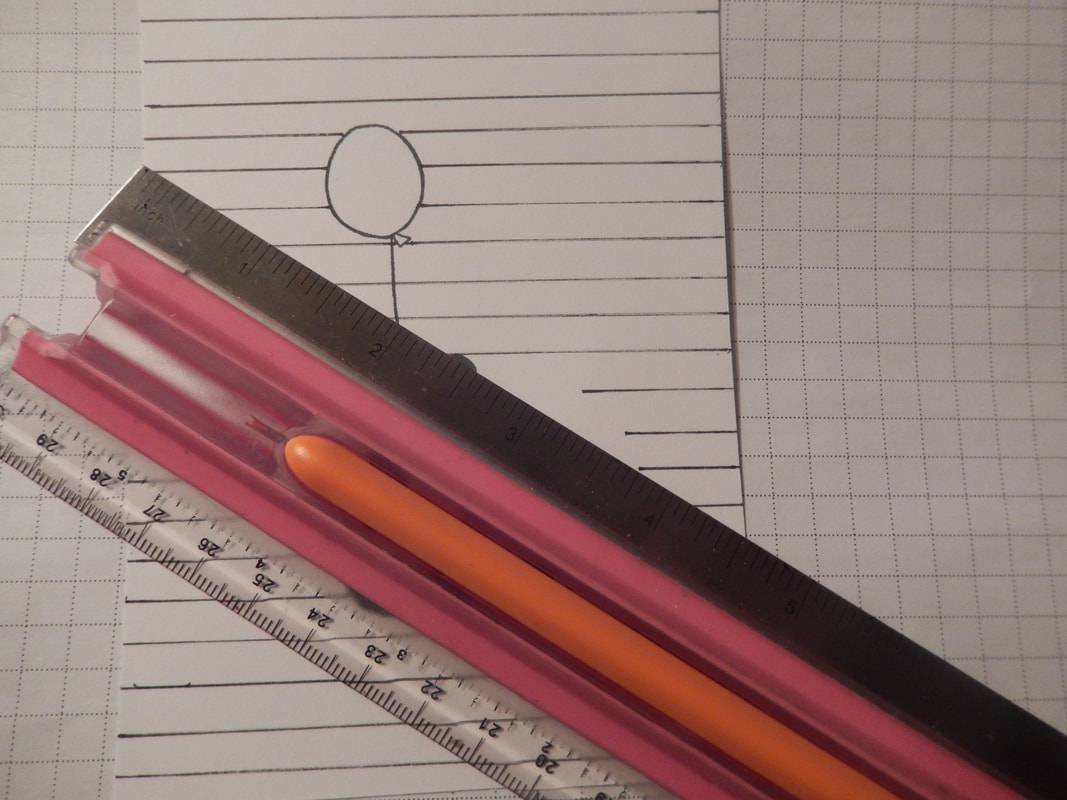
Using your ruler and the grid paper, make straight lines all the way down
to the bottom of the mat, skipping over your image. Turn your paper upside down to to do top lines. This is where you will start to make it look like the image in peeking out. |
|
Start by making small lines on either side of your image.
Each line will be a little longer until you get to the top of your image. Then you will go back to making the full lines. |
|
|
|
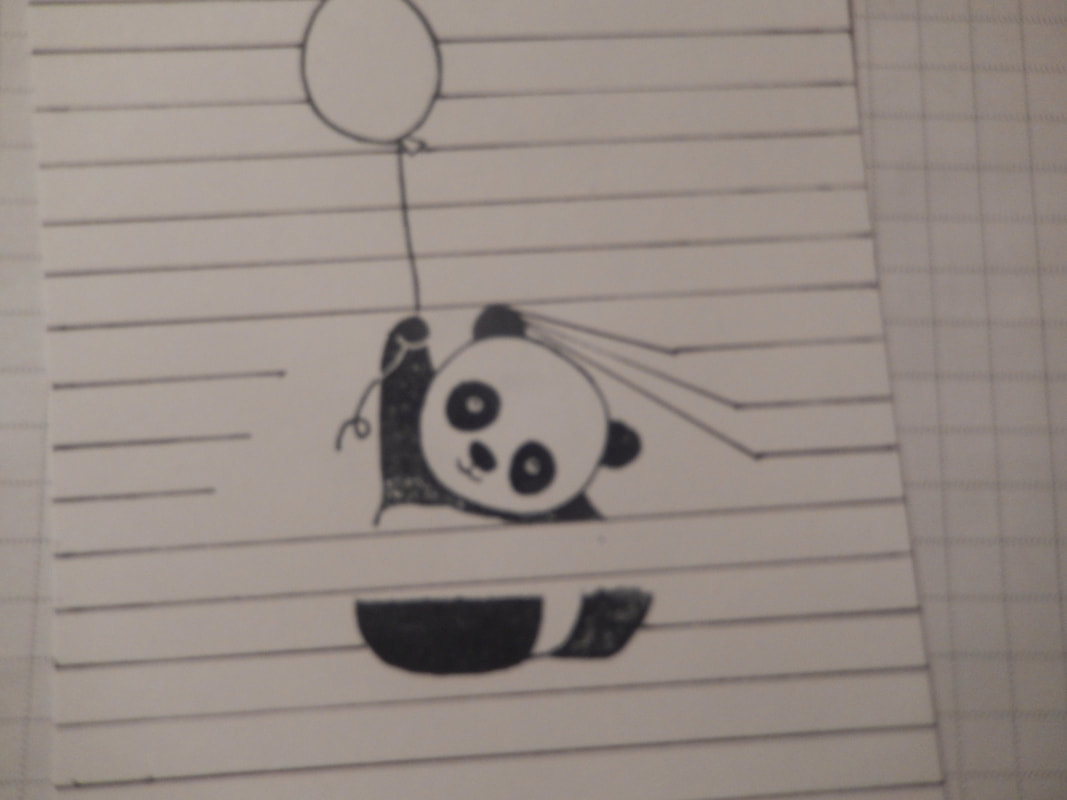
Using your ruler, connect each of the short lines to a center point
and draw a line. I chose the ear.
Picture of the right shows how it looks on the right side.
and draw a line. I chose the ear.
Picture of the right shows how it looks on the right side.
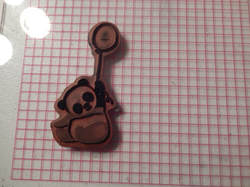
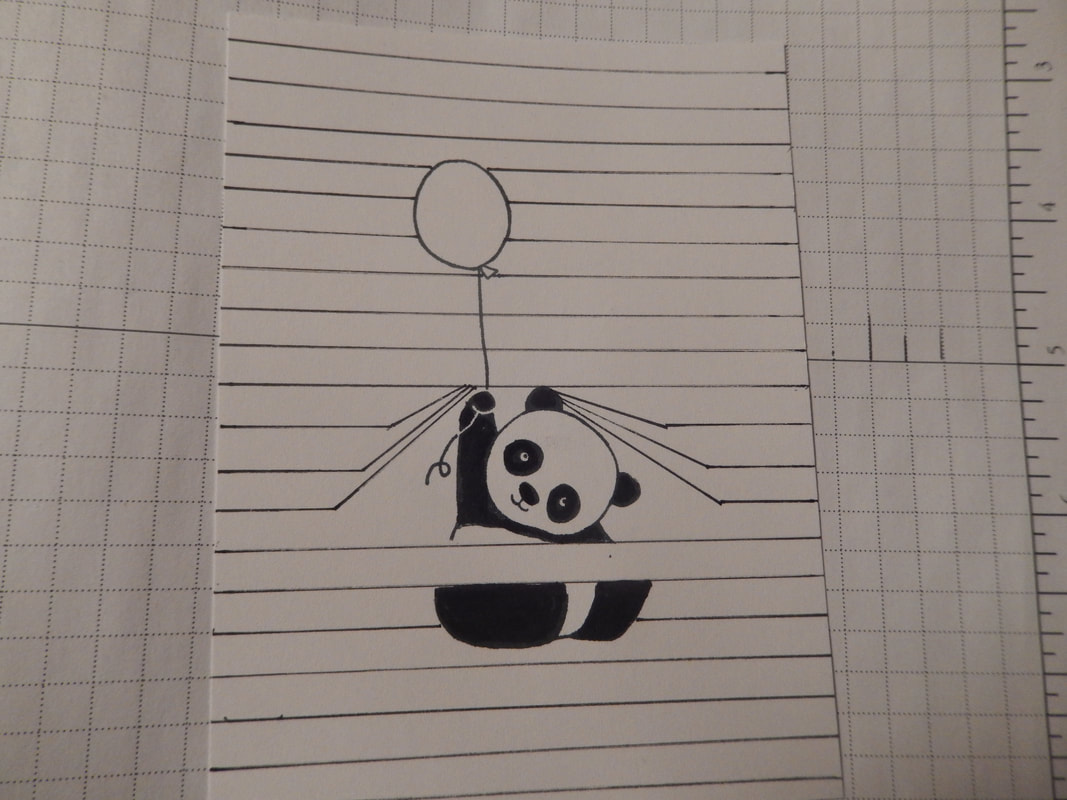
This shows how it looks with both sides done.
The picture on the right shows that I went over the black parts of the panda with a black marker and filled in to the lines. |
|
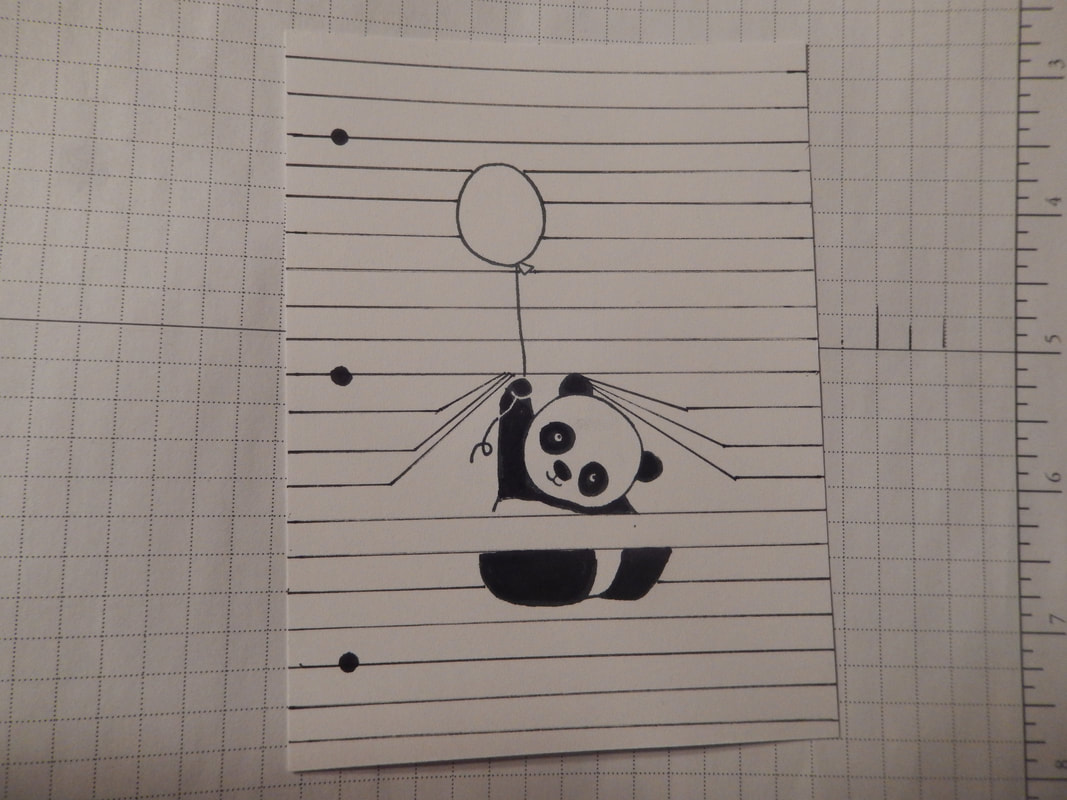
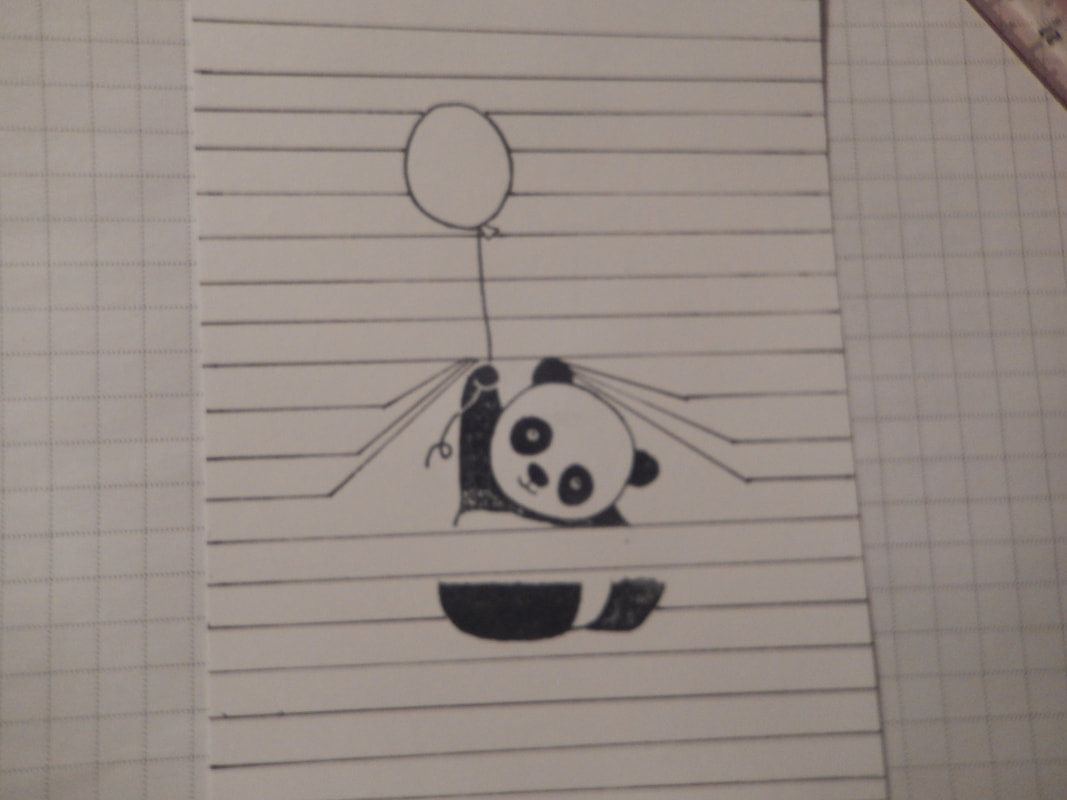
With the same black marker I made faux notebook holes.
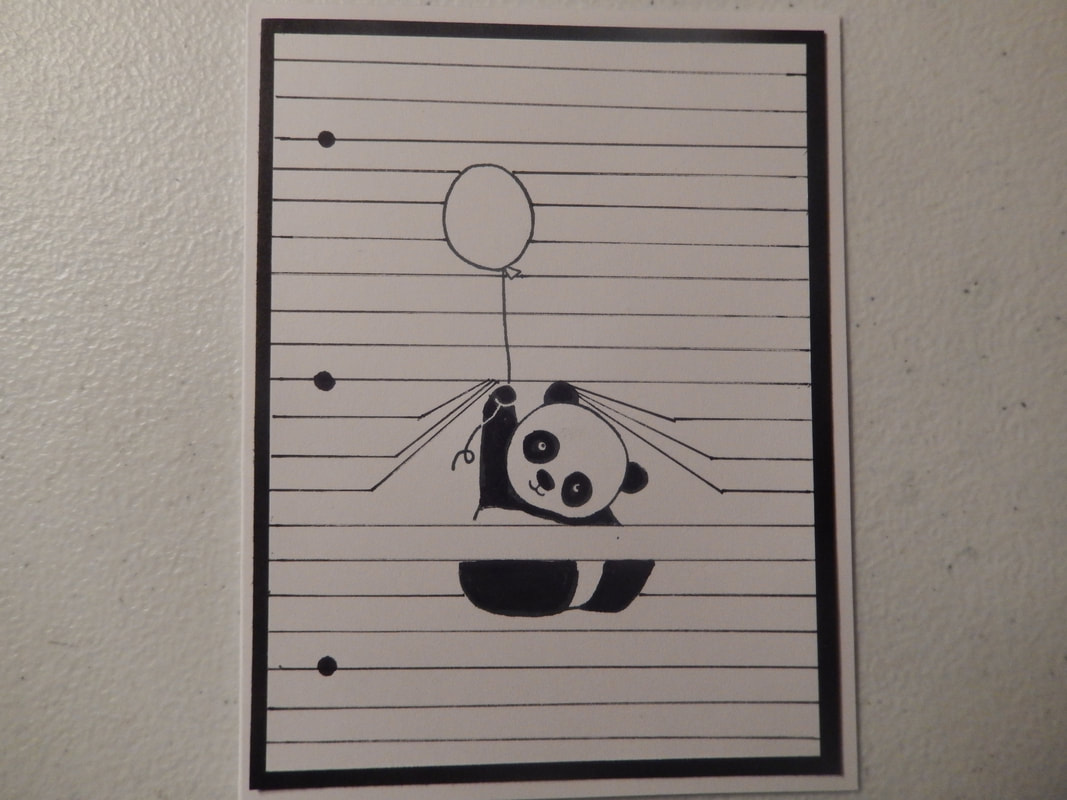
I added the image mat to the black mat and then to the base card. |
|
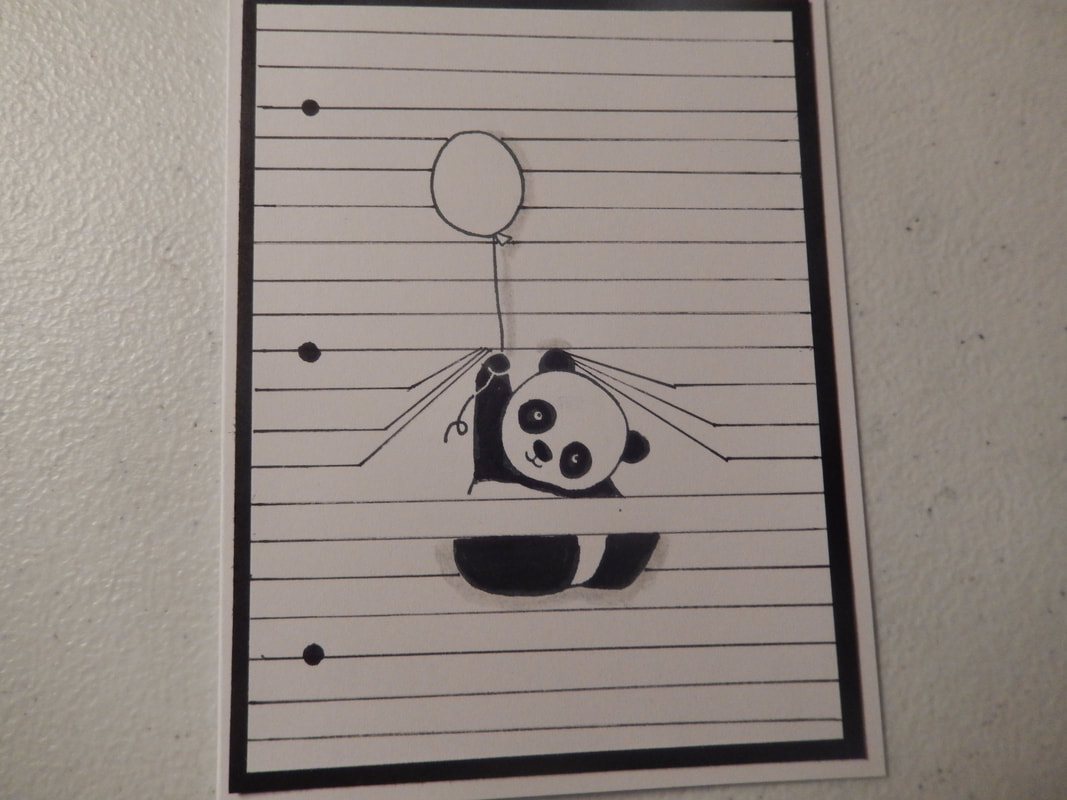
The last step I did was to add some shading where I thought it would be on the "page". Hope you give this a try and have fun with it.
Thank you for visiting and hope you'll visit again. Happy Stamping!
Thank you for visiting and hope you'll visit again. Happy Stamping!
Tutorial # 1

Front of birthday card. |

Inside of birthday card. |
I made a tutorial for this card and hope you will try one of your own. Thank you for visiting.
|
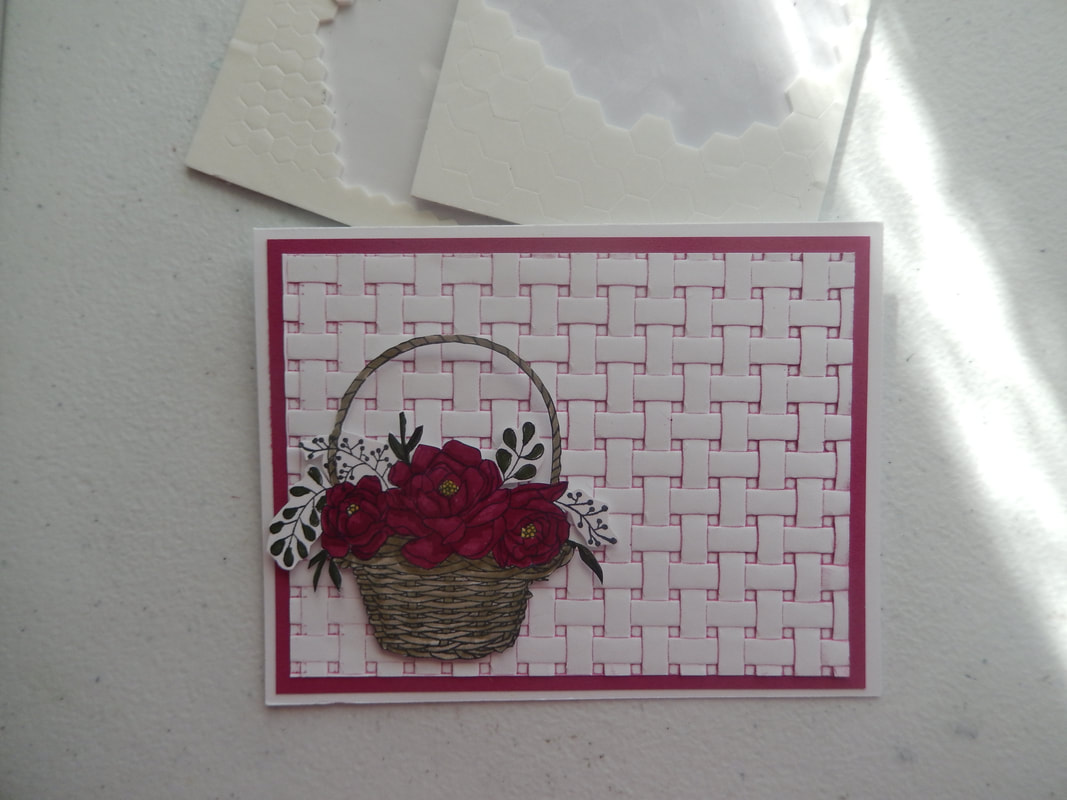
Base card, white 8 1/2" X 51/2", scored at 41/4"
Berry Burst mat 5 1/4" X 4" white mat 5" X 3 3/4" |
|
Using Berry Burst ink pad, drag ink across top inside embossing folder, add your white mat and run through the Big Shot.
|
|
Attach your Berry Burst mat to your base card and then add the embossing mat over this.
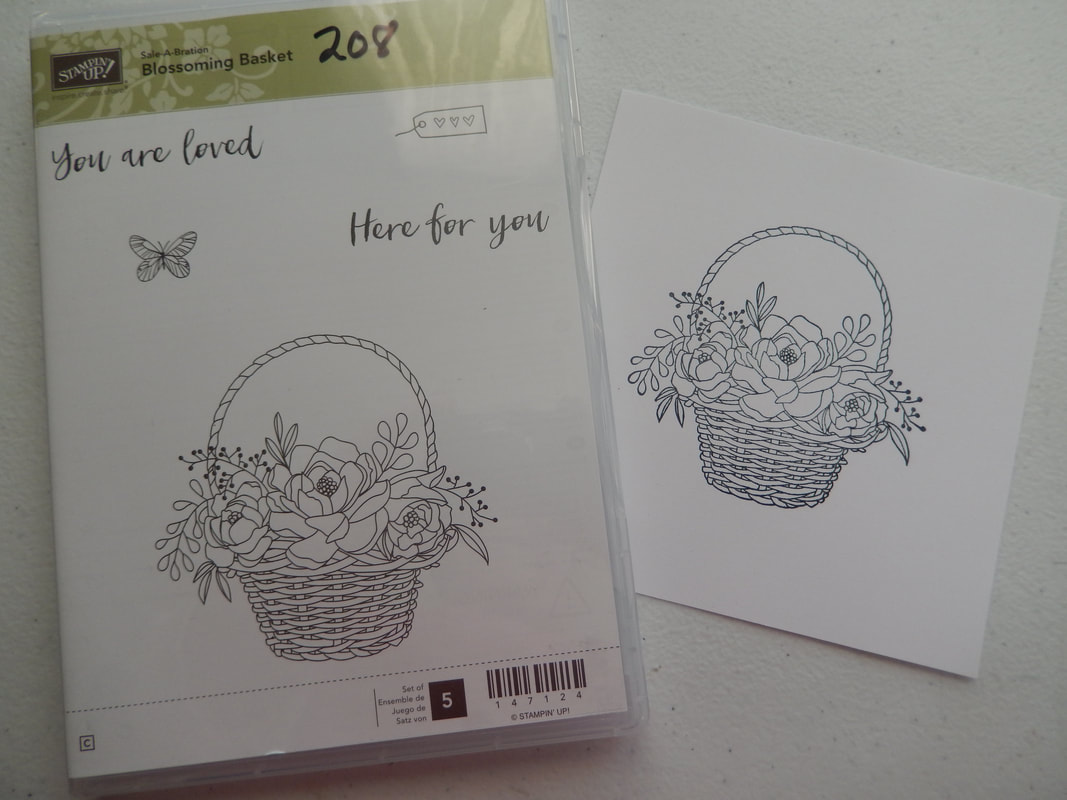
I used Blooming Basket stamp set to stamp the basket. I stamped it twice so I could cut one up for the inside.
I used Blooming Basket stamp set to stamp the basket. I stamped it twice so I could cut one up for the inside.
|
|
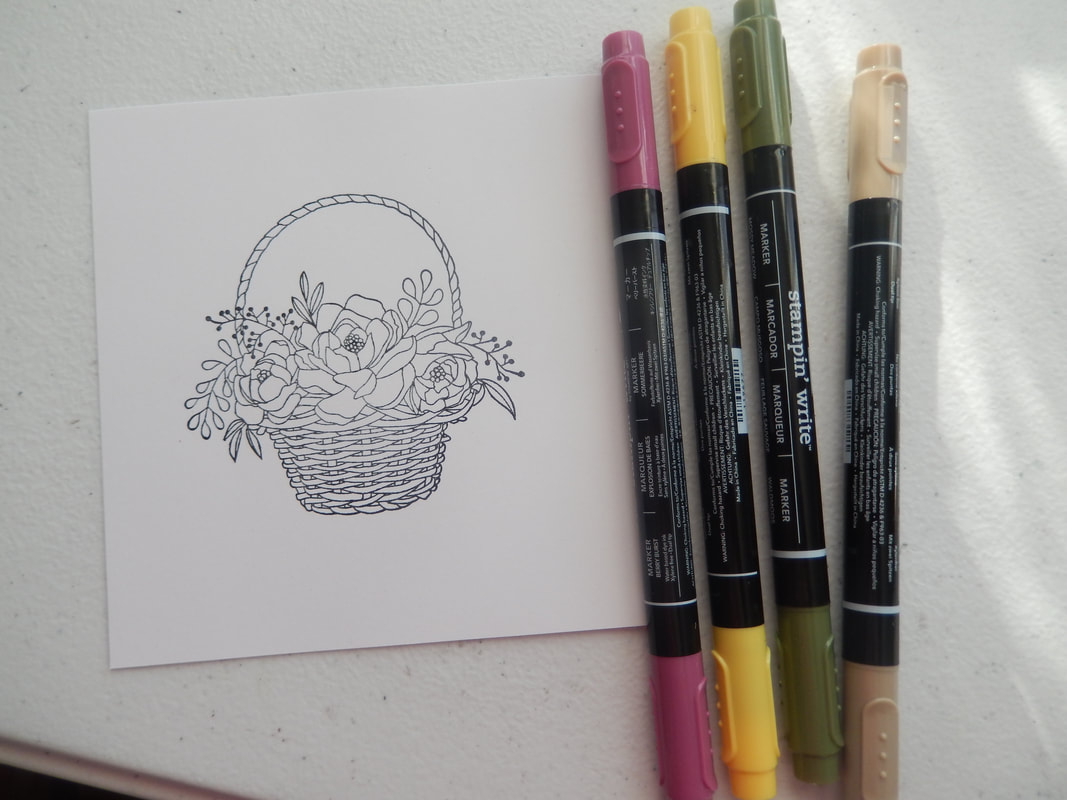
I used the following markers to color in the baskets: Berry Burst, Daffodil Delight, Mossy Meadow and Crumb Cake.
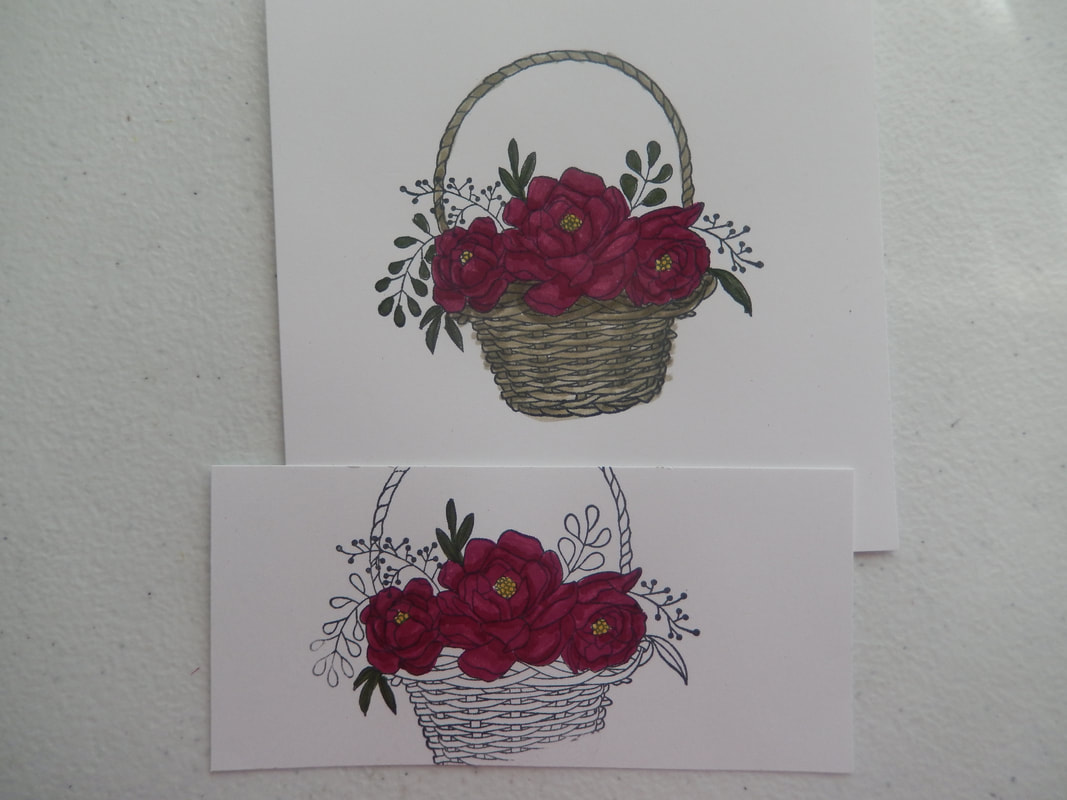
The right pictures shows how I colored them.
The right pictures shows how I colored them.
|
|
This is how I cut them out.
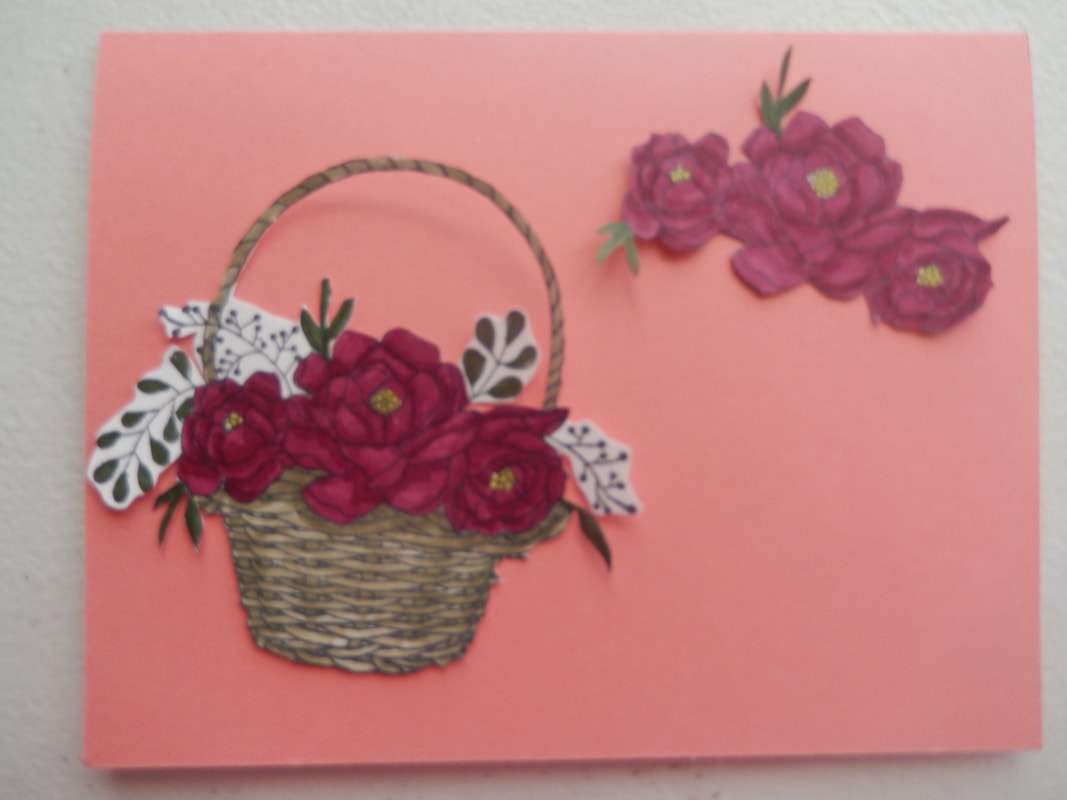
I used 3D dots, both regular and mini to attach the basket to the front of the card.
I used 3D dots, both regular and mini to attach the basket to the front of the card.
|
|
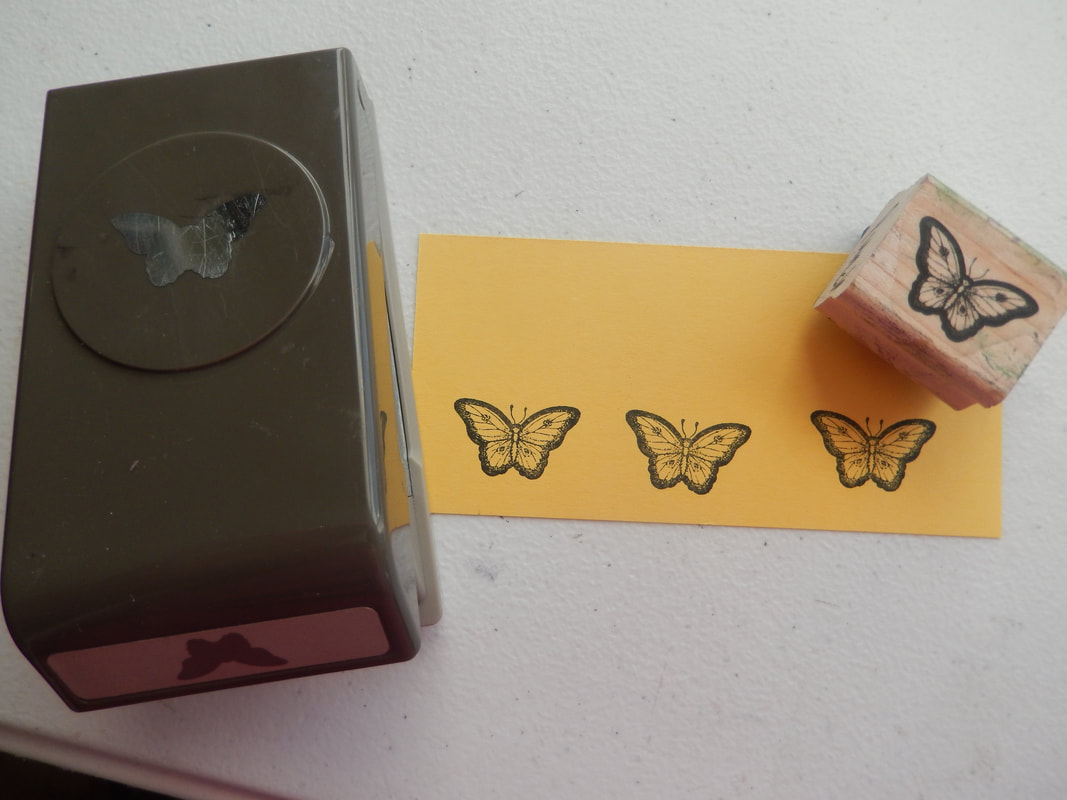
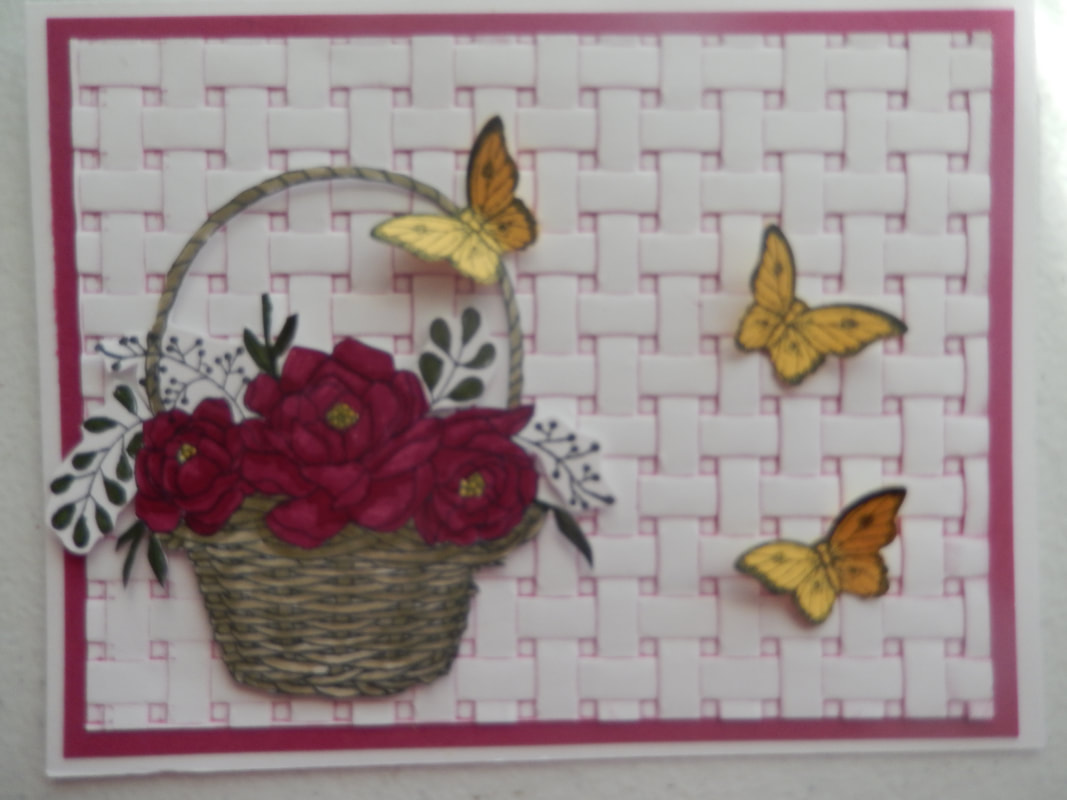
I used an older Stampin' Up stamp and butterfly punch to make three butterflies for the card front.
I used glue dots to add the butterflies.
I used glue dots to add the butterflies.
|
|
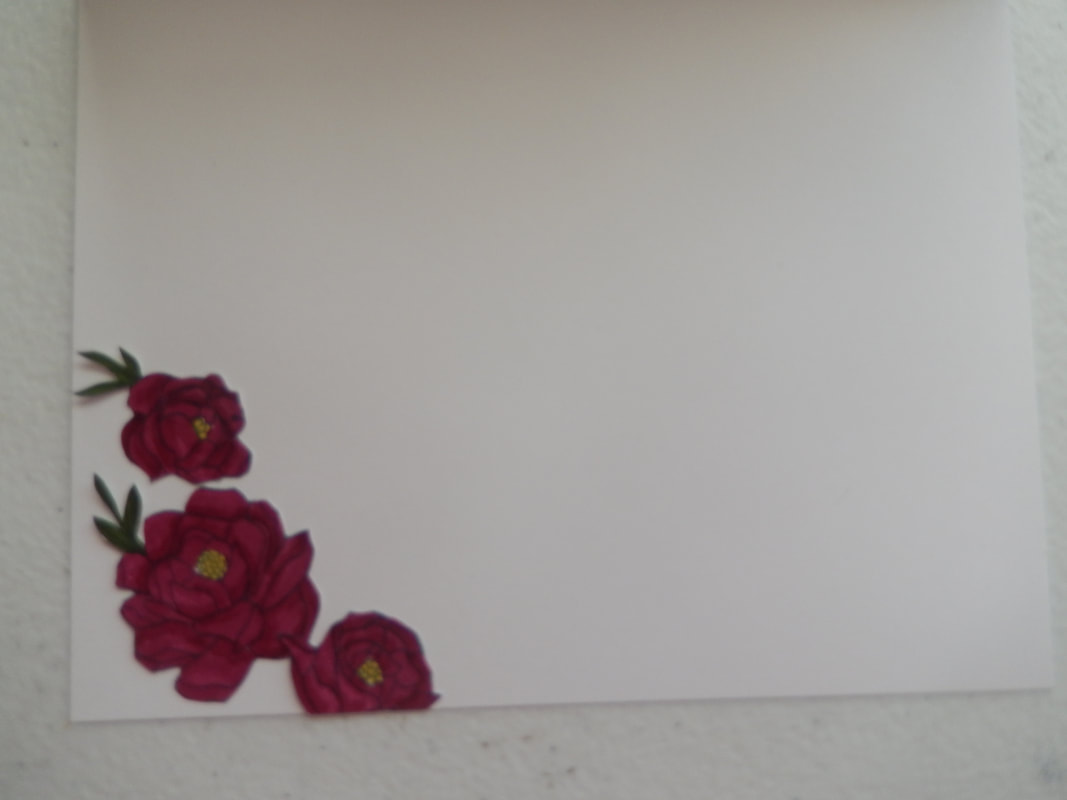
(Sorry picture is blurry). I cut apart the extra flowers and attached them to the lower left corner on the inside of the card.
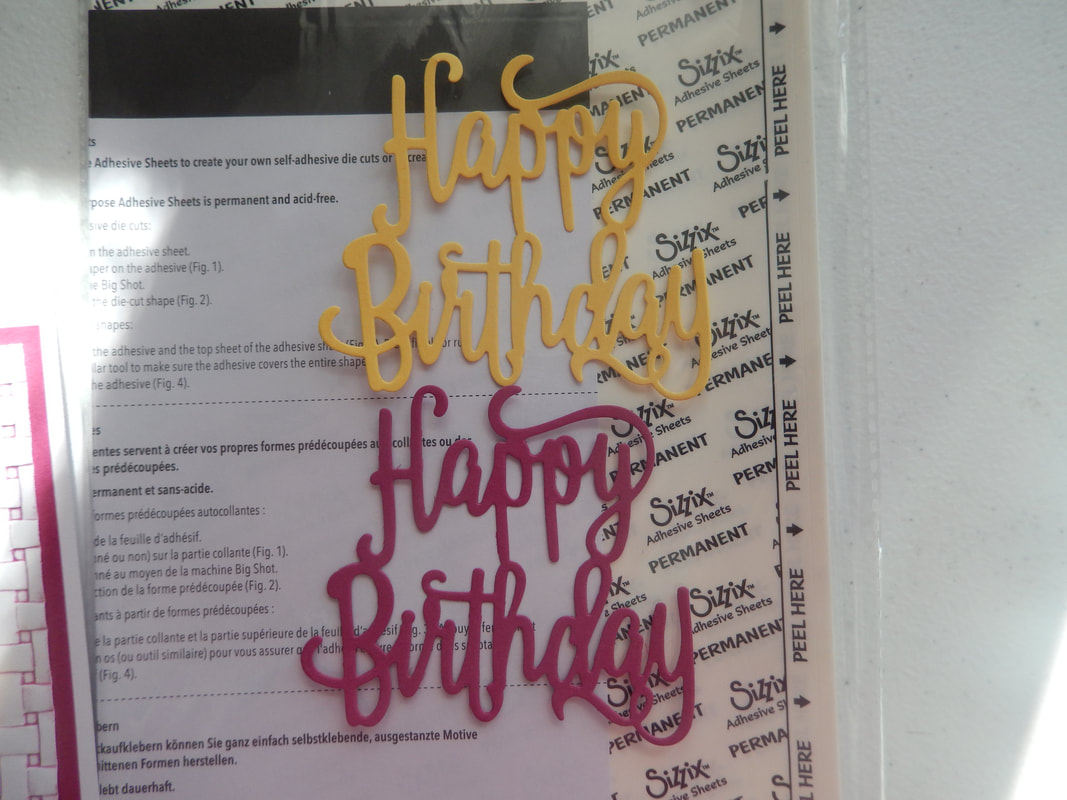
I used Adhesive sheets under Berry Burst and Daffodil Delight and then die cut the sentiment out of each color.
I used Adhesive sheets under Berry Burst and Daffodil Delight and then die cut the sentiment out of each color.
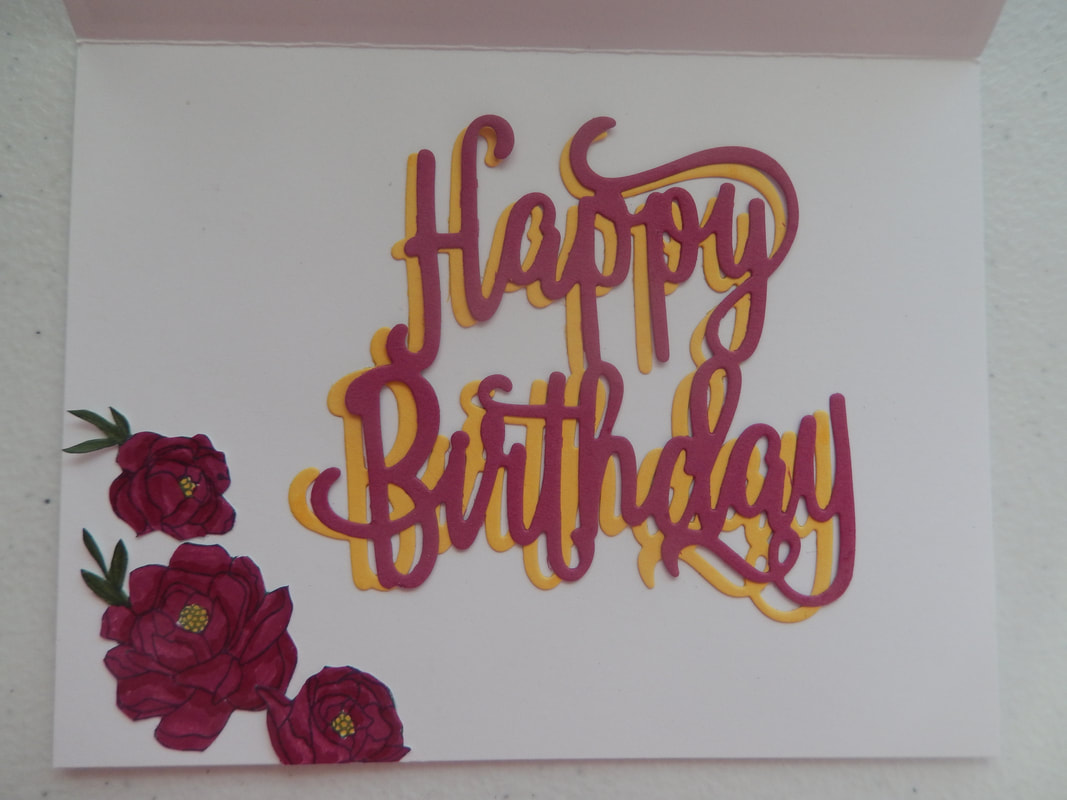
I overlapped the two sentiments to give a shadow effect.
I hope you enjoyed this tutorial and will come back for more tutorials.
I hope you enjoyed this tutorial and will come back for more tutorials.
